book_filename: "Course_Name"
chapter_name: "Chapter "
repo: https://github.com/ottrproject/OTTR_Template/ ##Make sure you update this to your GitHub Repo!!
rmd_files: ["index.Rmd",
            "01-intro.Rmd",
            "02-chapter_of_course.Rmd",
            "03-new_chapter_of_course.Rmd",  ## This is the only new line!
            "about.Rmd"]
new_session: yes
delete_merged_file: true
language:
  ui:
    chapter_name: "Chapter "
output_dir: "docs"Publishing OTTR Courses
Below are some examples of courses created using the OTTR Template and published on three platforms: Bookdown, Leanpub, and Coursera.
Introduction to Reproducibility in Cancer Informatics:
Computing for Cancer Informatics:
Publishing with Bookdown
To publish your content using Bookdown, utilize GitHub Pages by following the repository setup instructions. Note that Bookdown is a prerequisite for Coursera and Leanpub publishing. You must publish with Bookdown before using those platforms.
As you add or rename chapters, update _bookdown.yml accordingly. For example, after adding 03-new_chapter_of_course.Rmd:
Only a single line changes. Be careful with quotation marks ("") and commas (,).
Preview the book by running bookdown::serve_book() in the RStudio Console. This generates an .rds file you can ignore. The live preview will appear in your RStudio Viewer.
When a pull request is merged to main, GitHub Actions will re-run bookdown::render_book() and add the results to main.
Publishing with Leanpub
OTTR includes everything needed to publish to Leanpub. The ottrpal package handles converting content into a Leanpub-ready format, storing output in the manuscript folder.
Warning
Do not manually edit files in the manuscript folder. It is auto-generated by ottrpal and will be overwritten.
If you want quizzes and answers hidden, you will need a separate private OTTR_Quizzes repository. Start with these instructions before proceeding.
Leanpub Rendering
The ottrpal package handles most formatting for links and other elements, as long as you have followed the image formatting instructions.
GitHub Actions will attempt to convert Bookdown to Leanpub by running ottrpal::bookdown_to_leanpub() at the top of the repository.
Hosting your course on Leanpub
Finalizing a course on Leanpub can be tricky. The Using Leanpub guide provides detailed help.
Create a Leanpub account if you do not have one.
Start a course:
- Click the three-line button at the far right of the top bar.
- Click the Author tab, then Courses.
- Verify your email address if prompted.
- Click
create a new course, then A Course. - Provide a title (the Course URL fills automatically).
- Select Using Git and GitHub.
- JHU developers: follow this additional setup document.
- Press
add to plan.
Preview a new version:
- Click the three-line menu, then the Author tab, then Courses.
- Click your course name or icon.
- Click Preview New Version, then
Create Preview.
If the render fails, it is typically due to a quiz formatting error. Occasional failures may also occur due to sync lag between GitHub and Leanpub — try again if it fails once.
Setting up quizzes
Store quizzes in the quizzes/ directory. Use the template quiz as a starting point. All quizzes must be written in Markua format.
After adding each quiz, add its filename to the Book.txt file at the top of the repository (not the one in manuscript) in the correct position. For example, with two quizzes interleaved between three chapters:
01-intro.md
02-chapter_of_course.md
quiz_1.md
03-chapter_of_course.md
quiz_2.md
about.md
Files listed with a # prefix in Book.txt are ignored by Leanpub.
You cannot have two quizzes with the same quiz_id. See an example quiz here.
Leanpub quiz question types
Standard multiple choice — answer choices are not randomized:
? A question is here
a) A wrong answer
B) A correct answer has a capital letter
c) A wrong answer
d) A wrong answer
Choose answers — randomizes choices using C) for correct, m) for mandatory incorrect, and o) for optional incorrect. The number of answers must be at least equal to the count of correct and mandatory incorrect answers.
{choose-answers: 4}
? A question is here
C) The correct answer is signified with a capital C
m) A mandatory incorrect answer
m) A mandatory incorrect answer
o) An optional incorrect answer
o) An optional incorrect answer
Upon merging to main, the check-quizzes.yml GitHub Action validates quiz formatting and reports errors on the pull request.
Leanpub quiz format rules
- Quizzes start and end with
{quiz}and{\quiz}tags. - No exclamation points or colons in answers.
- At least one correct answer per question.
- All question and quiz attributes must be recognized by Leanpub.
- All quizzes must be listed in
Book.txt. - The
choose-answerscount must be at least as large as the number of mandatory and correct answers.
Converting quizzes from Leanpub to Coursera format
Convert quizzes to a Coursera-uploadable YAML file by running:
ottrpal::convert_quizzes()Note that images and links are not currently supported by the conversion script and must be added manually. Colons (:) are not allowed in prompts or answers.
_Quizzes repository checklist
Publishing with Coursera
Once your content is extensively developed, consider publishing on Coursera.
Note
This guide was prepared for ITN project developers at Johns Hopkins University or other Coursera partner institutions. Coursera’s Educator Resource Center is the authoritative source for platform documentation.
Setting up your Coursera course
If you are from Johns Hopkins: Follow this document and contact Ira Gooding (iragooding@jhu.edu) to create a course shell.
If you are not from Johns Hopkins: Set up your educator profile and course shell through your own institution.
Converting your files for Coursera
GitHub Actions (in render-all.yml) renders your course in a Coursera-compatible format — identical to the standard version but without the left-side table of contents. These files are available in the docs/no_toc folder. A preview link is posted as a GitHub comment by render-preview.yml.
If quizzes were written in Leanpub format, pull-request.yml converts them automatically for Coursera upload. Alternatively, you can write quizzes directly on Coursera’s website and download them as YAML for storage in your repository.
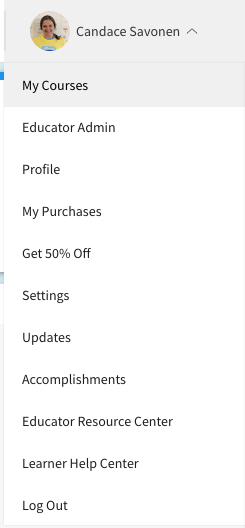
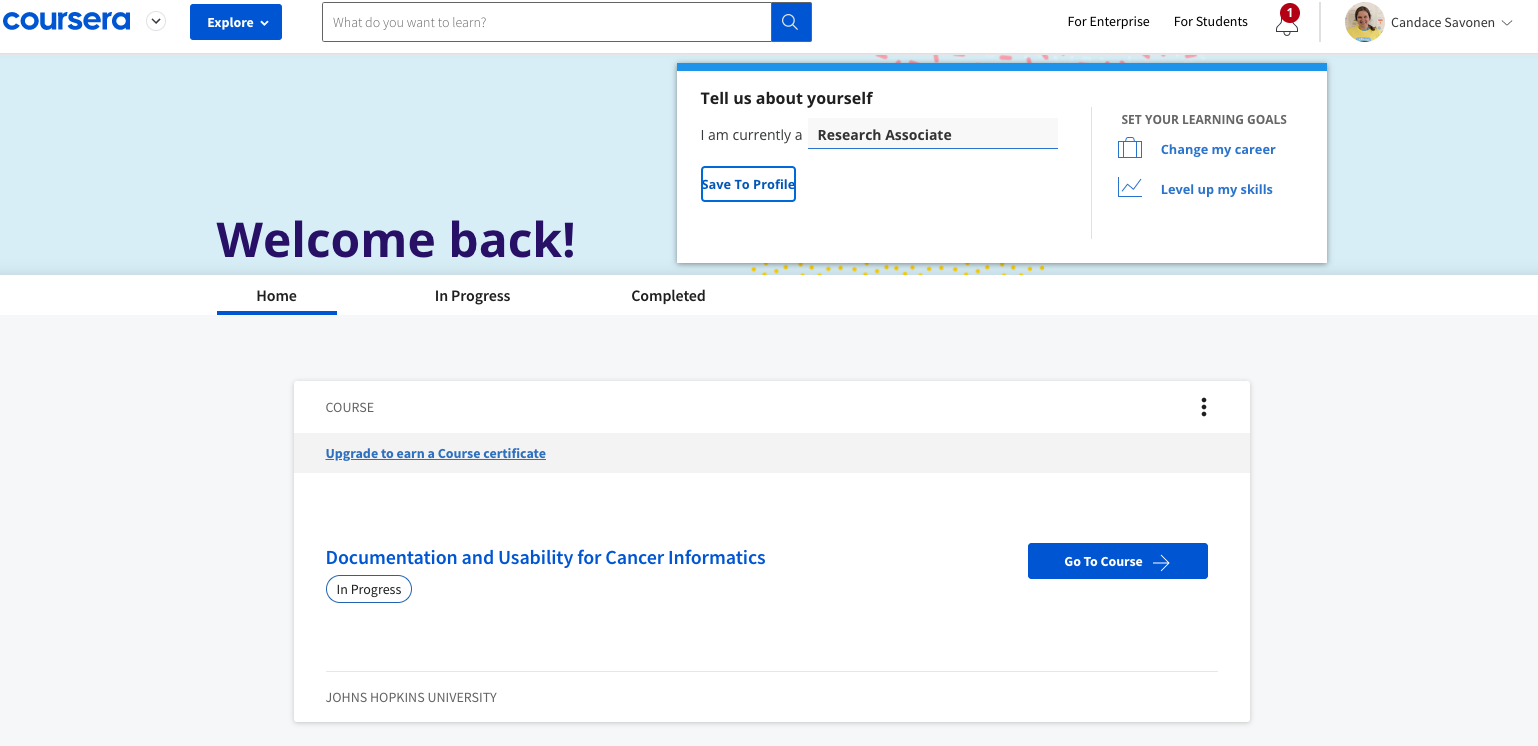
Navigating to your course on Coursera
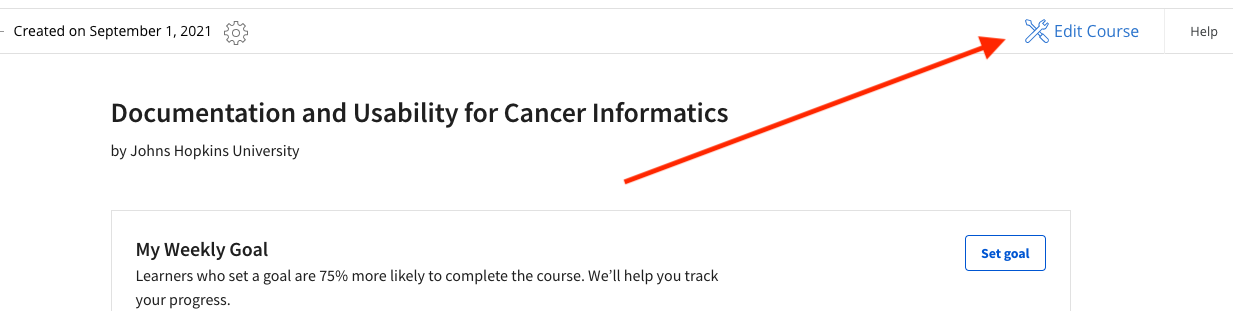
Go to My Courses in your Coursera profile. Your course will appear in the list. Click Go to Course, then Edit Course in the upper right corner.
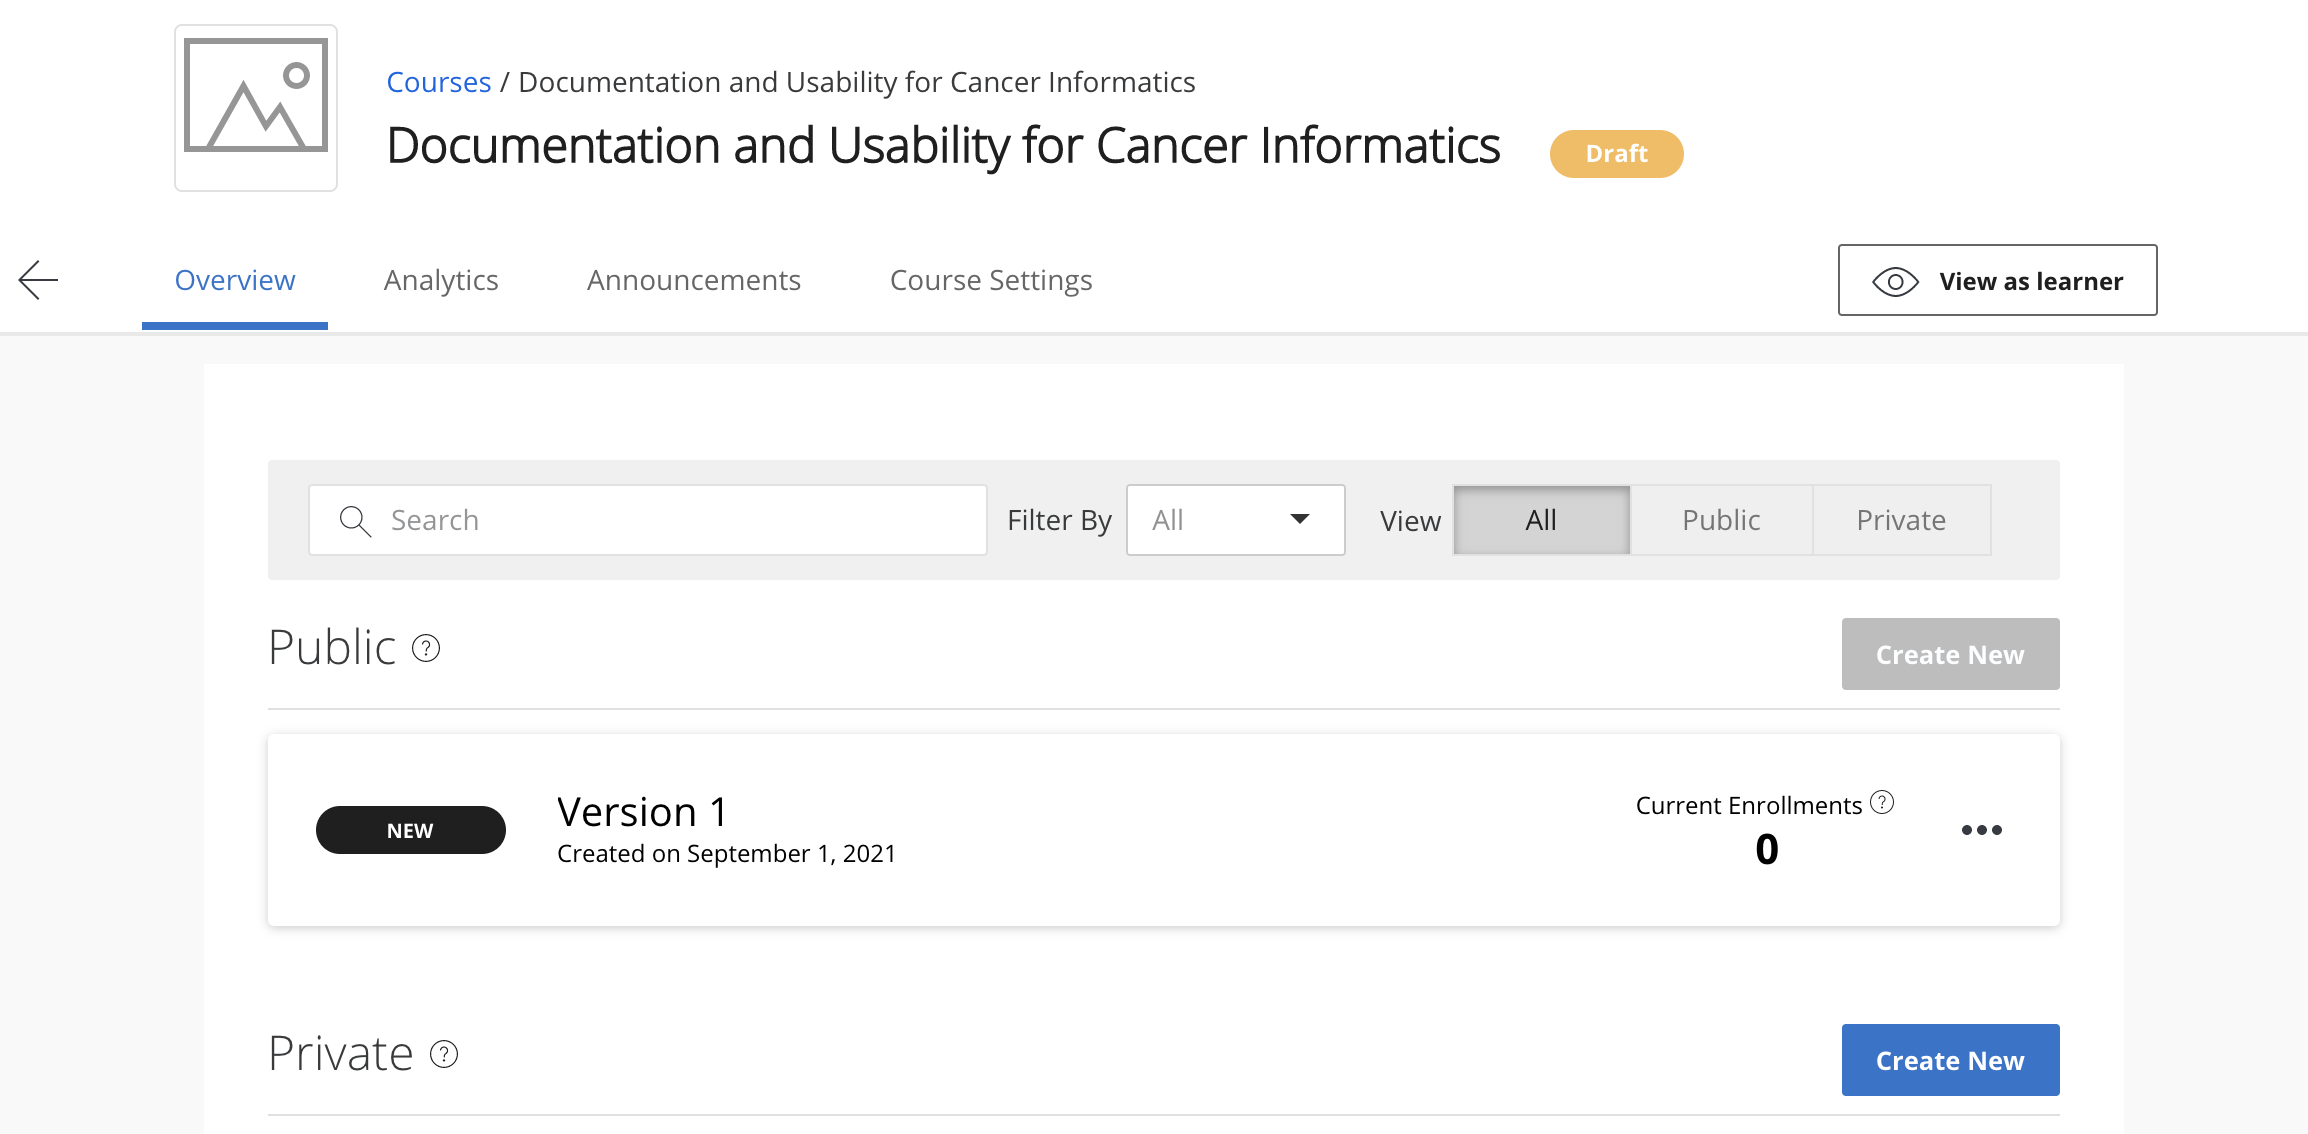
Select your version (initially Version 1):
You are now on the Edit content page:
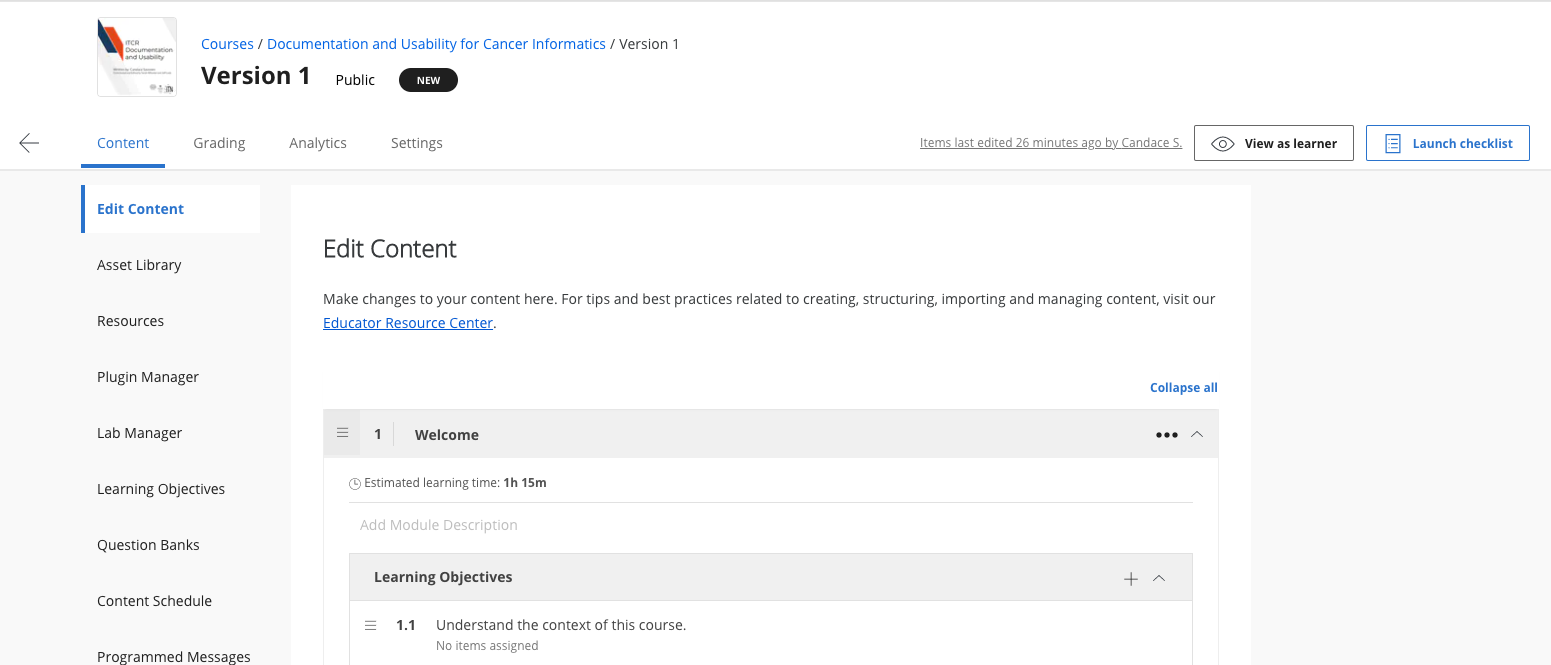
Each lesson should contain at least one chapter and one quiz. Each module represents approximately one week of learner work — plan one or two lessons per module accordingly.
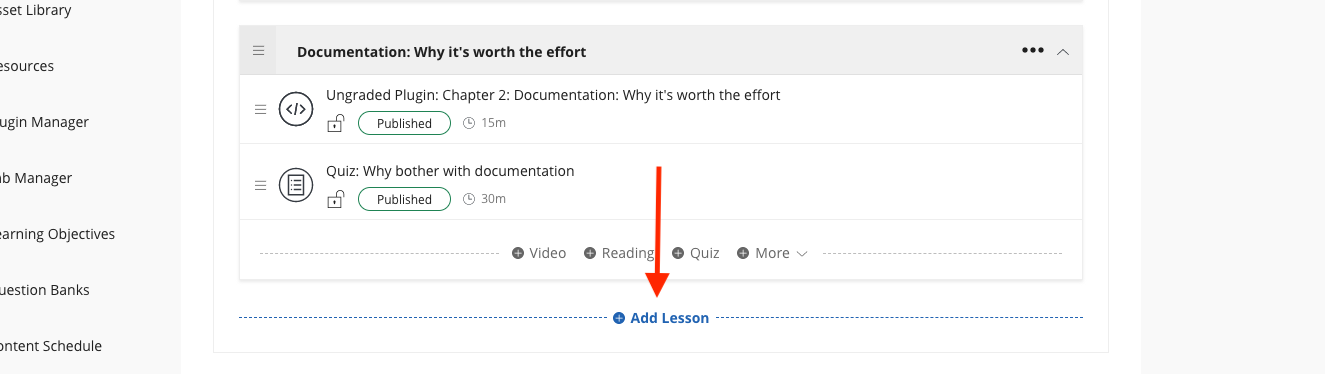
Click + Add Lesson to add a new lesson:
Adding chapters to Coursera
Chapter URLs follow this pattern, using your GitHub Pages URL with /no_toc/ inserted before the filename:
<main-github-pages-url>/no_toc/<html_filename>Find your GitHub Pages URL under Settings > Pages. For example:
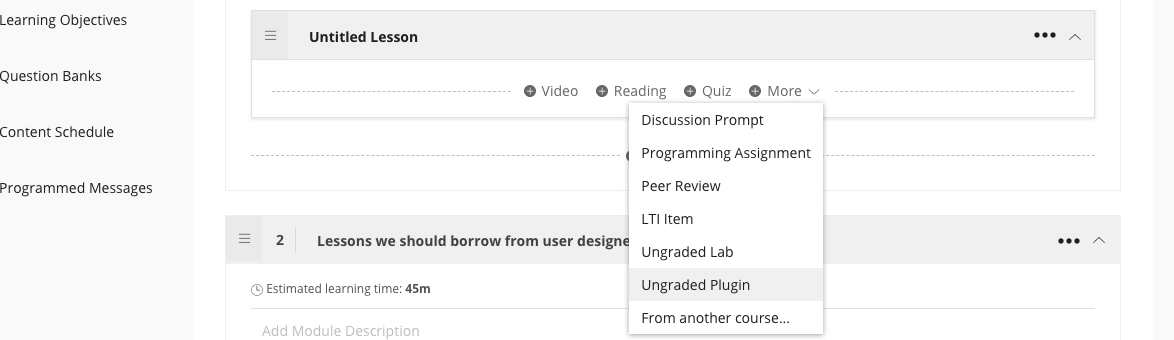
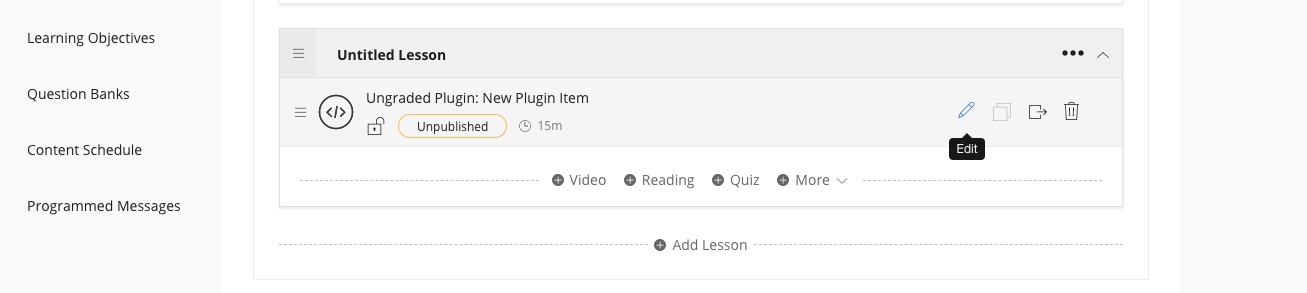
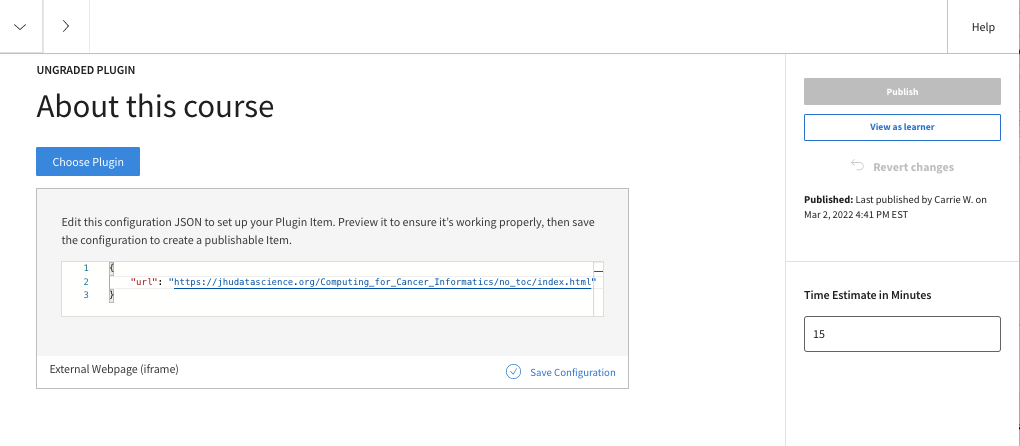
https://ottrproject.org/OTTR_Template/no_toc/introduction.htmlTo add a chapter: in a lesson, click + More and choose Ungraded Plugin.
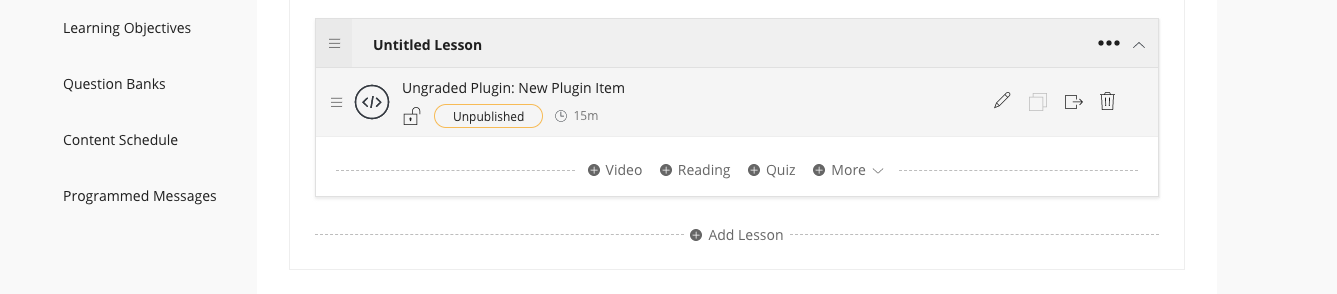
Click the edit button on the new Ungraded Plugin:
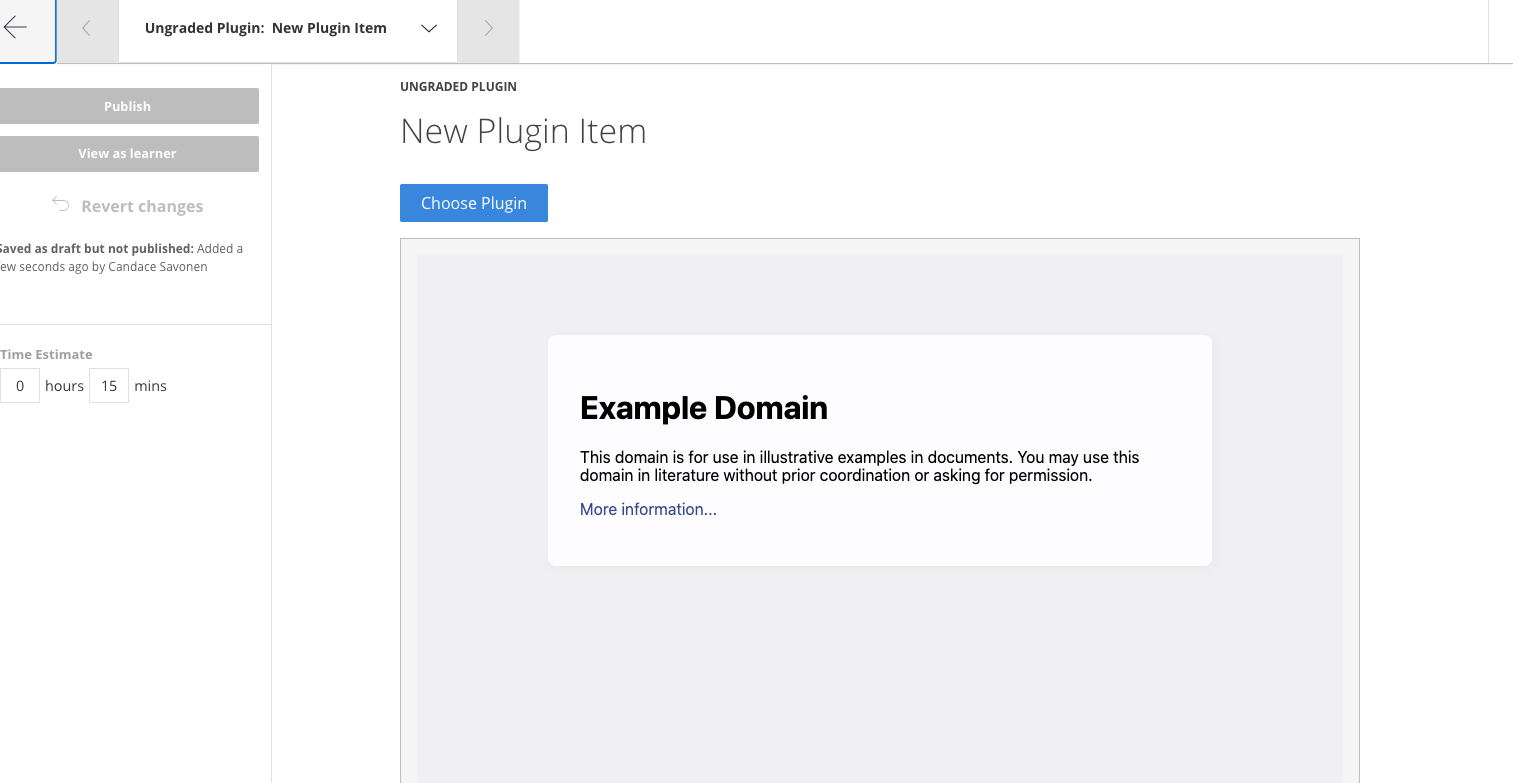
Scroll down and click Edit Configuration:
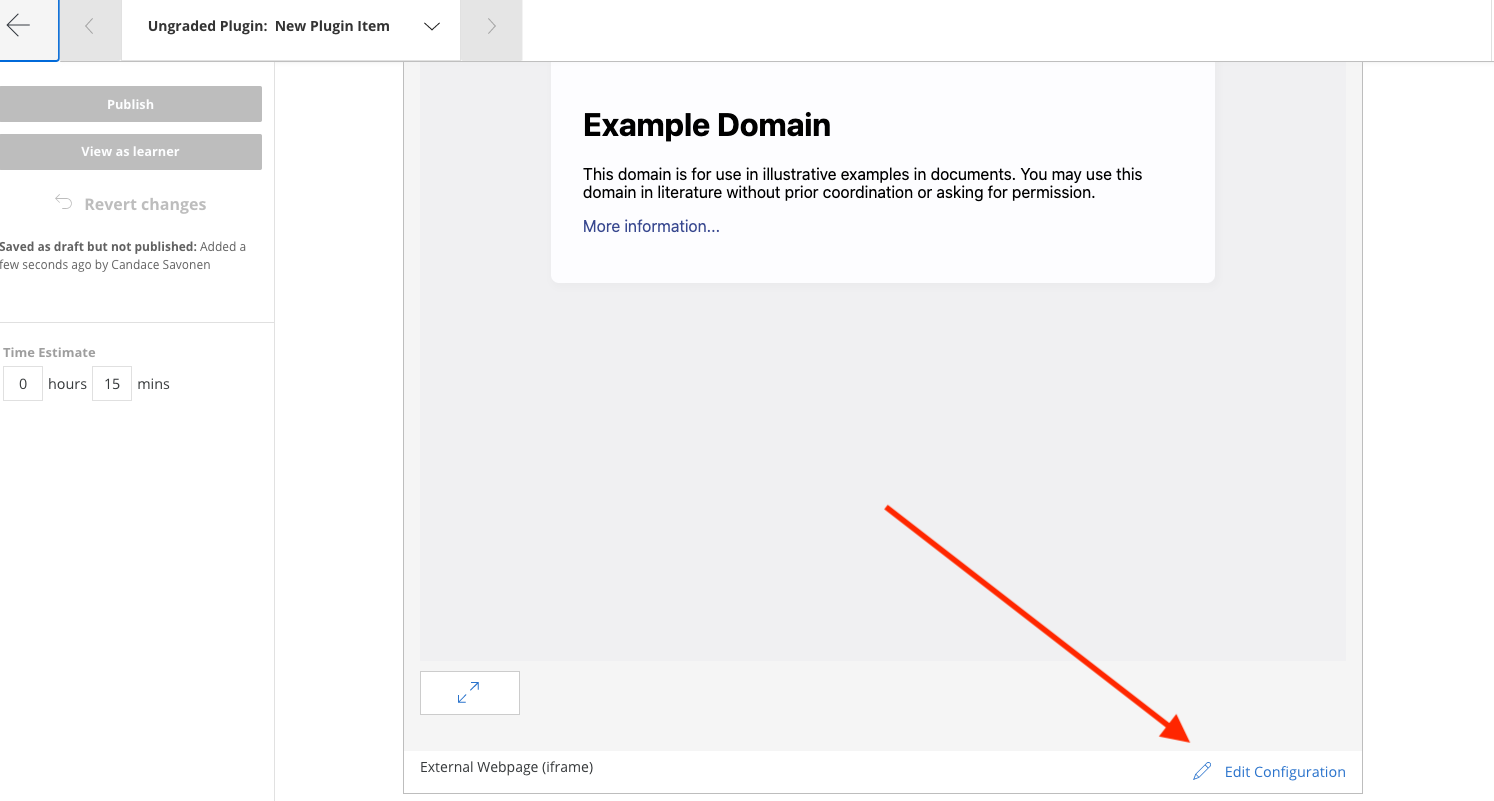
Replace the example URL with your chapter URL:
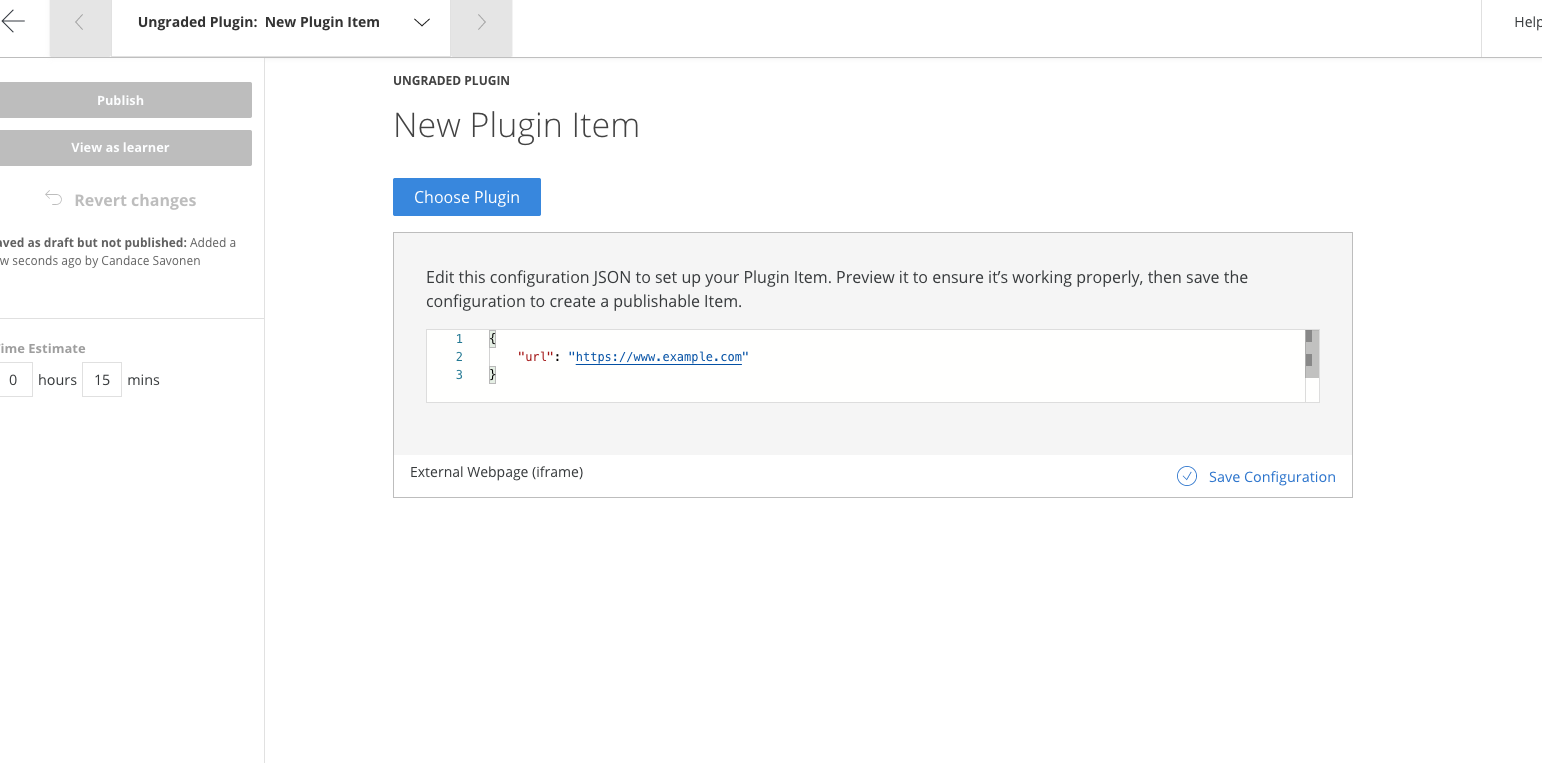
Click Save Configuration:
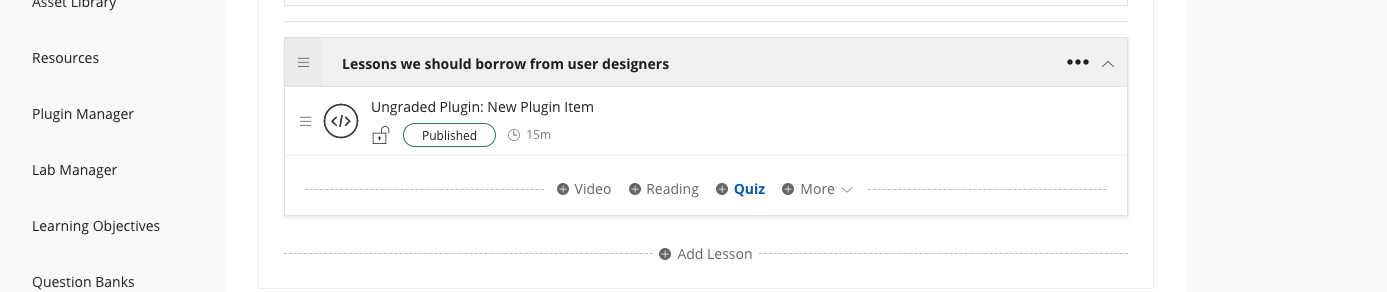
Adjust the time estimate for your content. If the URL is correct, a preview of your chapter appears:
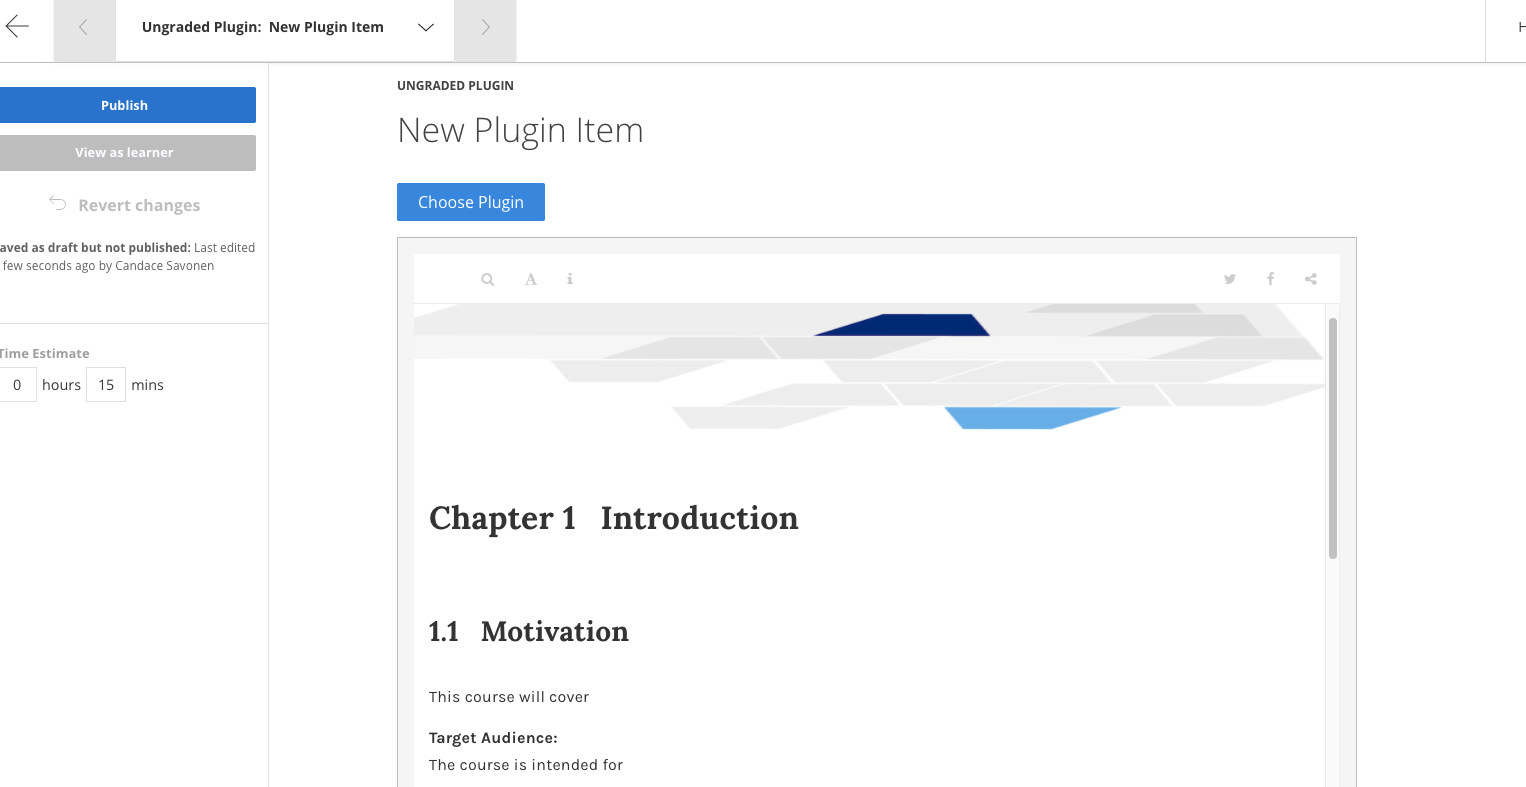
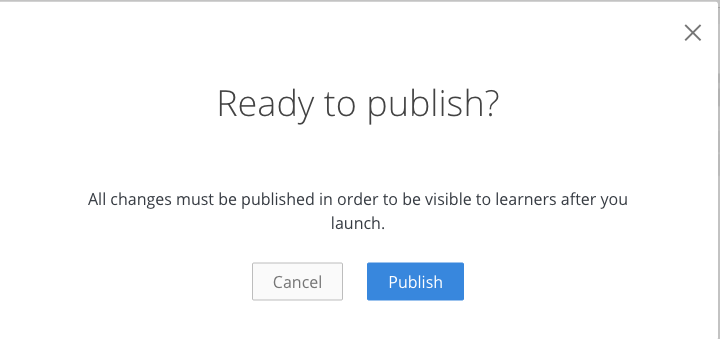
Edit the title if needed, then click Publish to save. Coursera will ask you to confirm — click Publish again.
Adding quizzes to Coursera
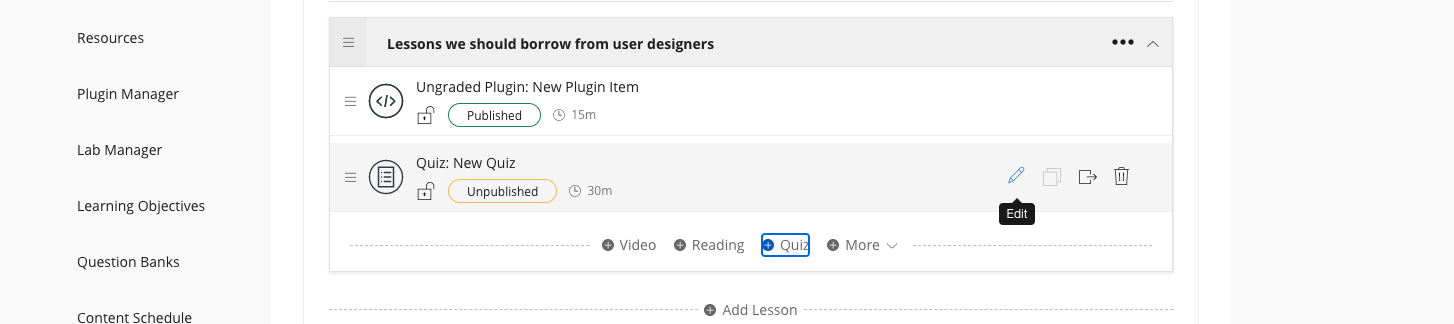
From the Edit content page, click + Quiz on the lesson where you want to add it:
Click Edit on the new quiz:
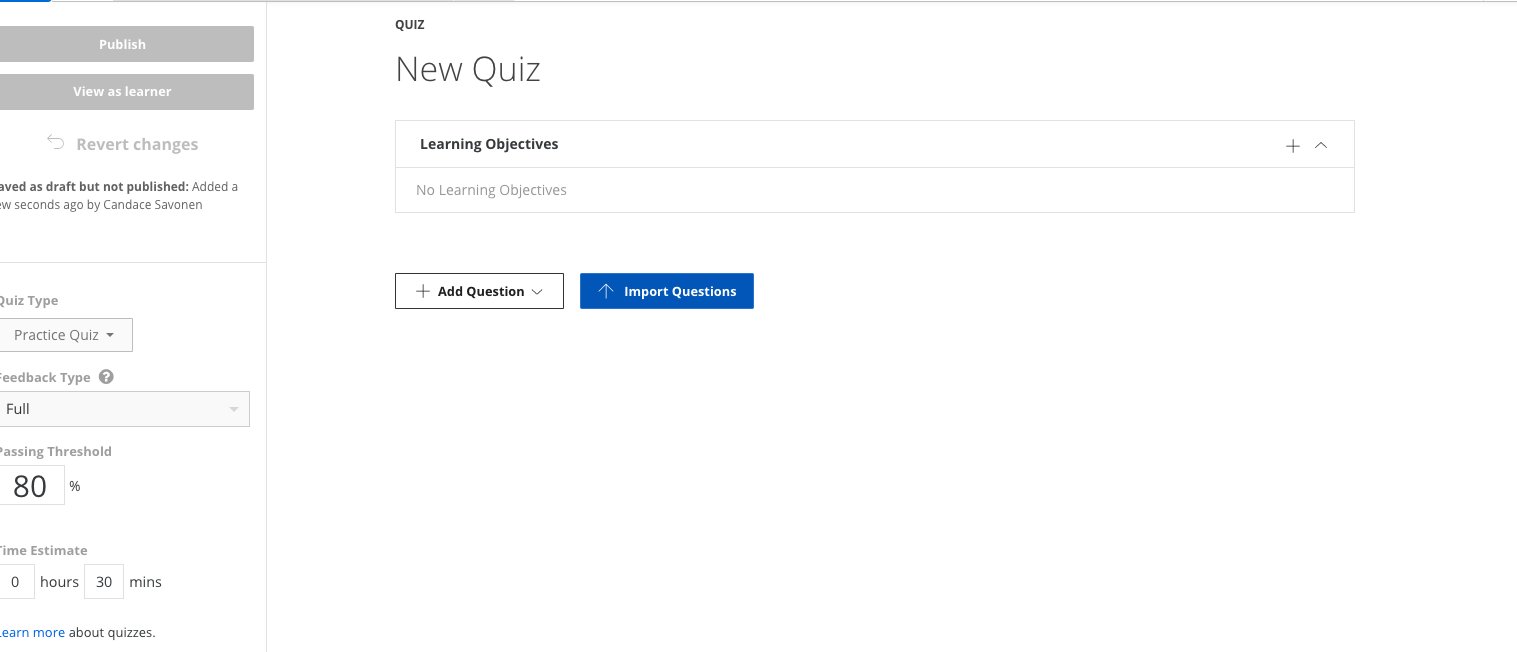
To import a converted Leanpub quiz, click Import Questions and choose your converted YAML file. (If not yet converted, see the conversion section.)
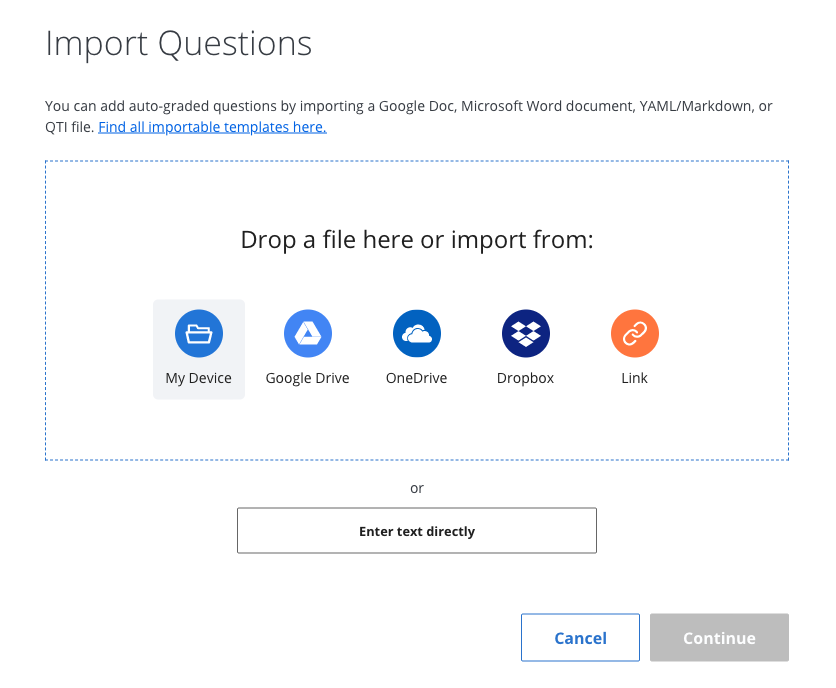
Click Upload:
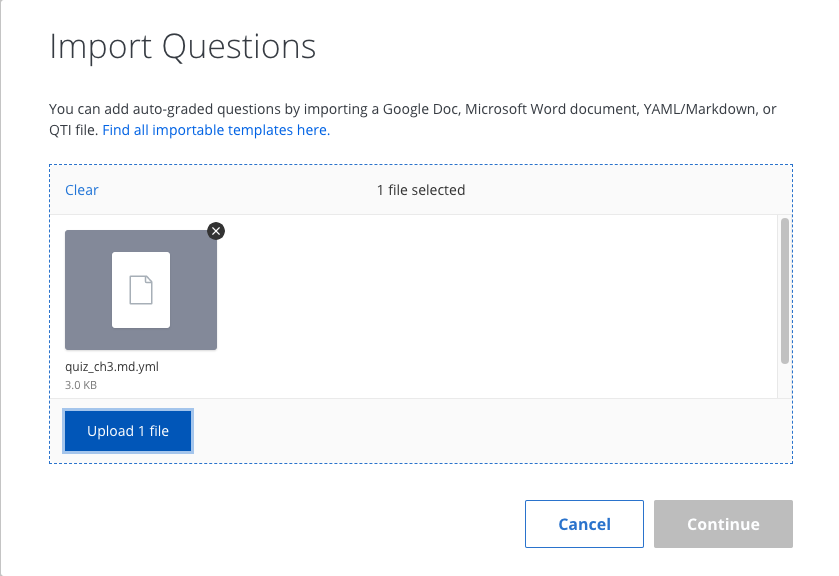
If the upload fails, file an issue with the file and a description of the failure. Note that images, links, and colons in prompts or answers are not supported.
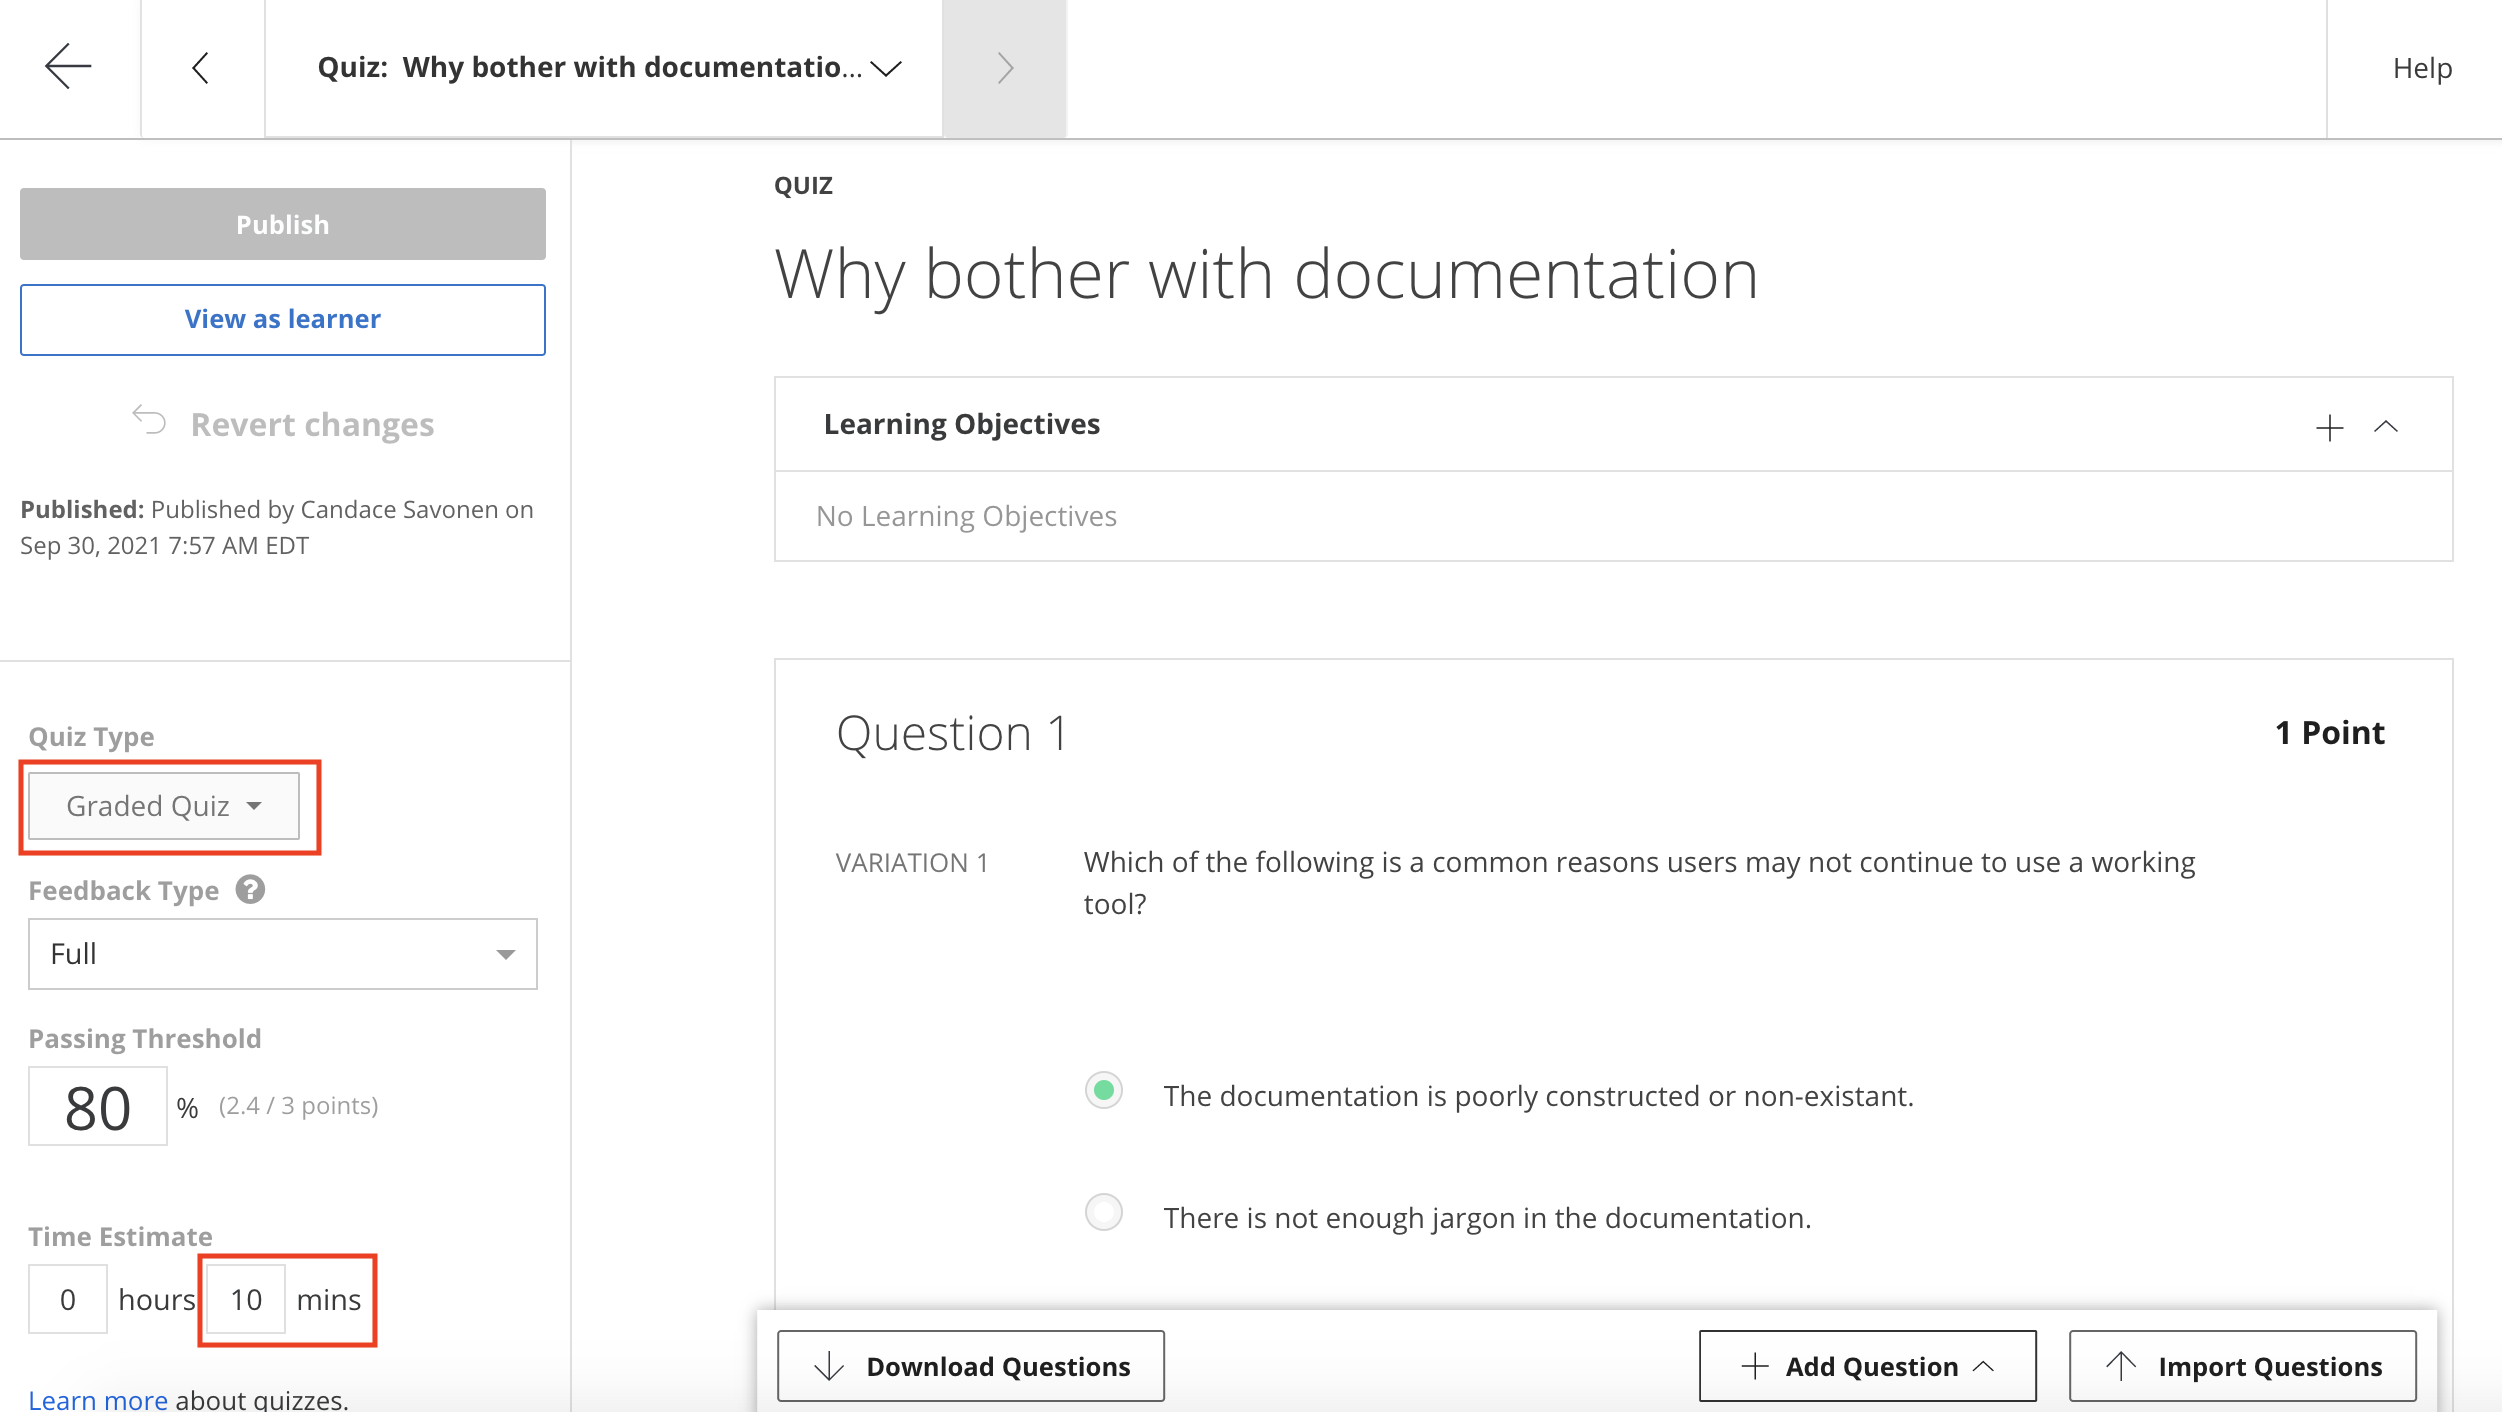
After a successful upload, click Continue. Change the quiz type from Practice Quiz to Graded Quiz as needed using the dropdown on the left. Update the time estimate as well.
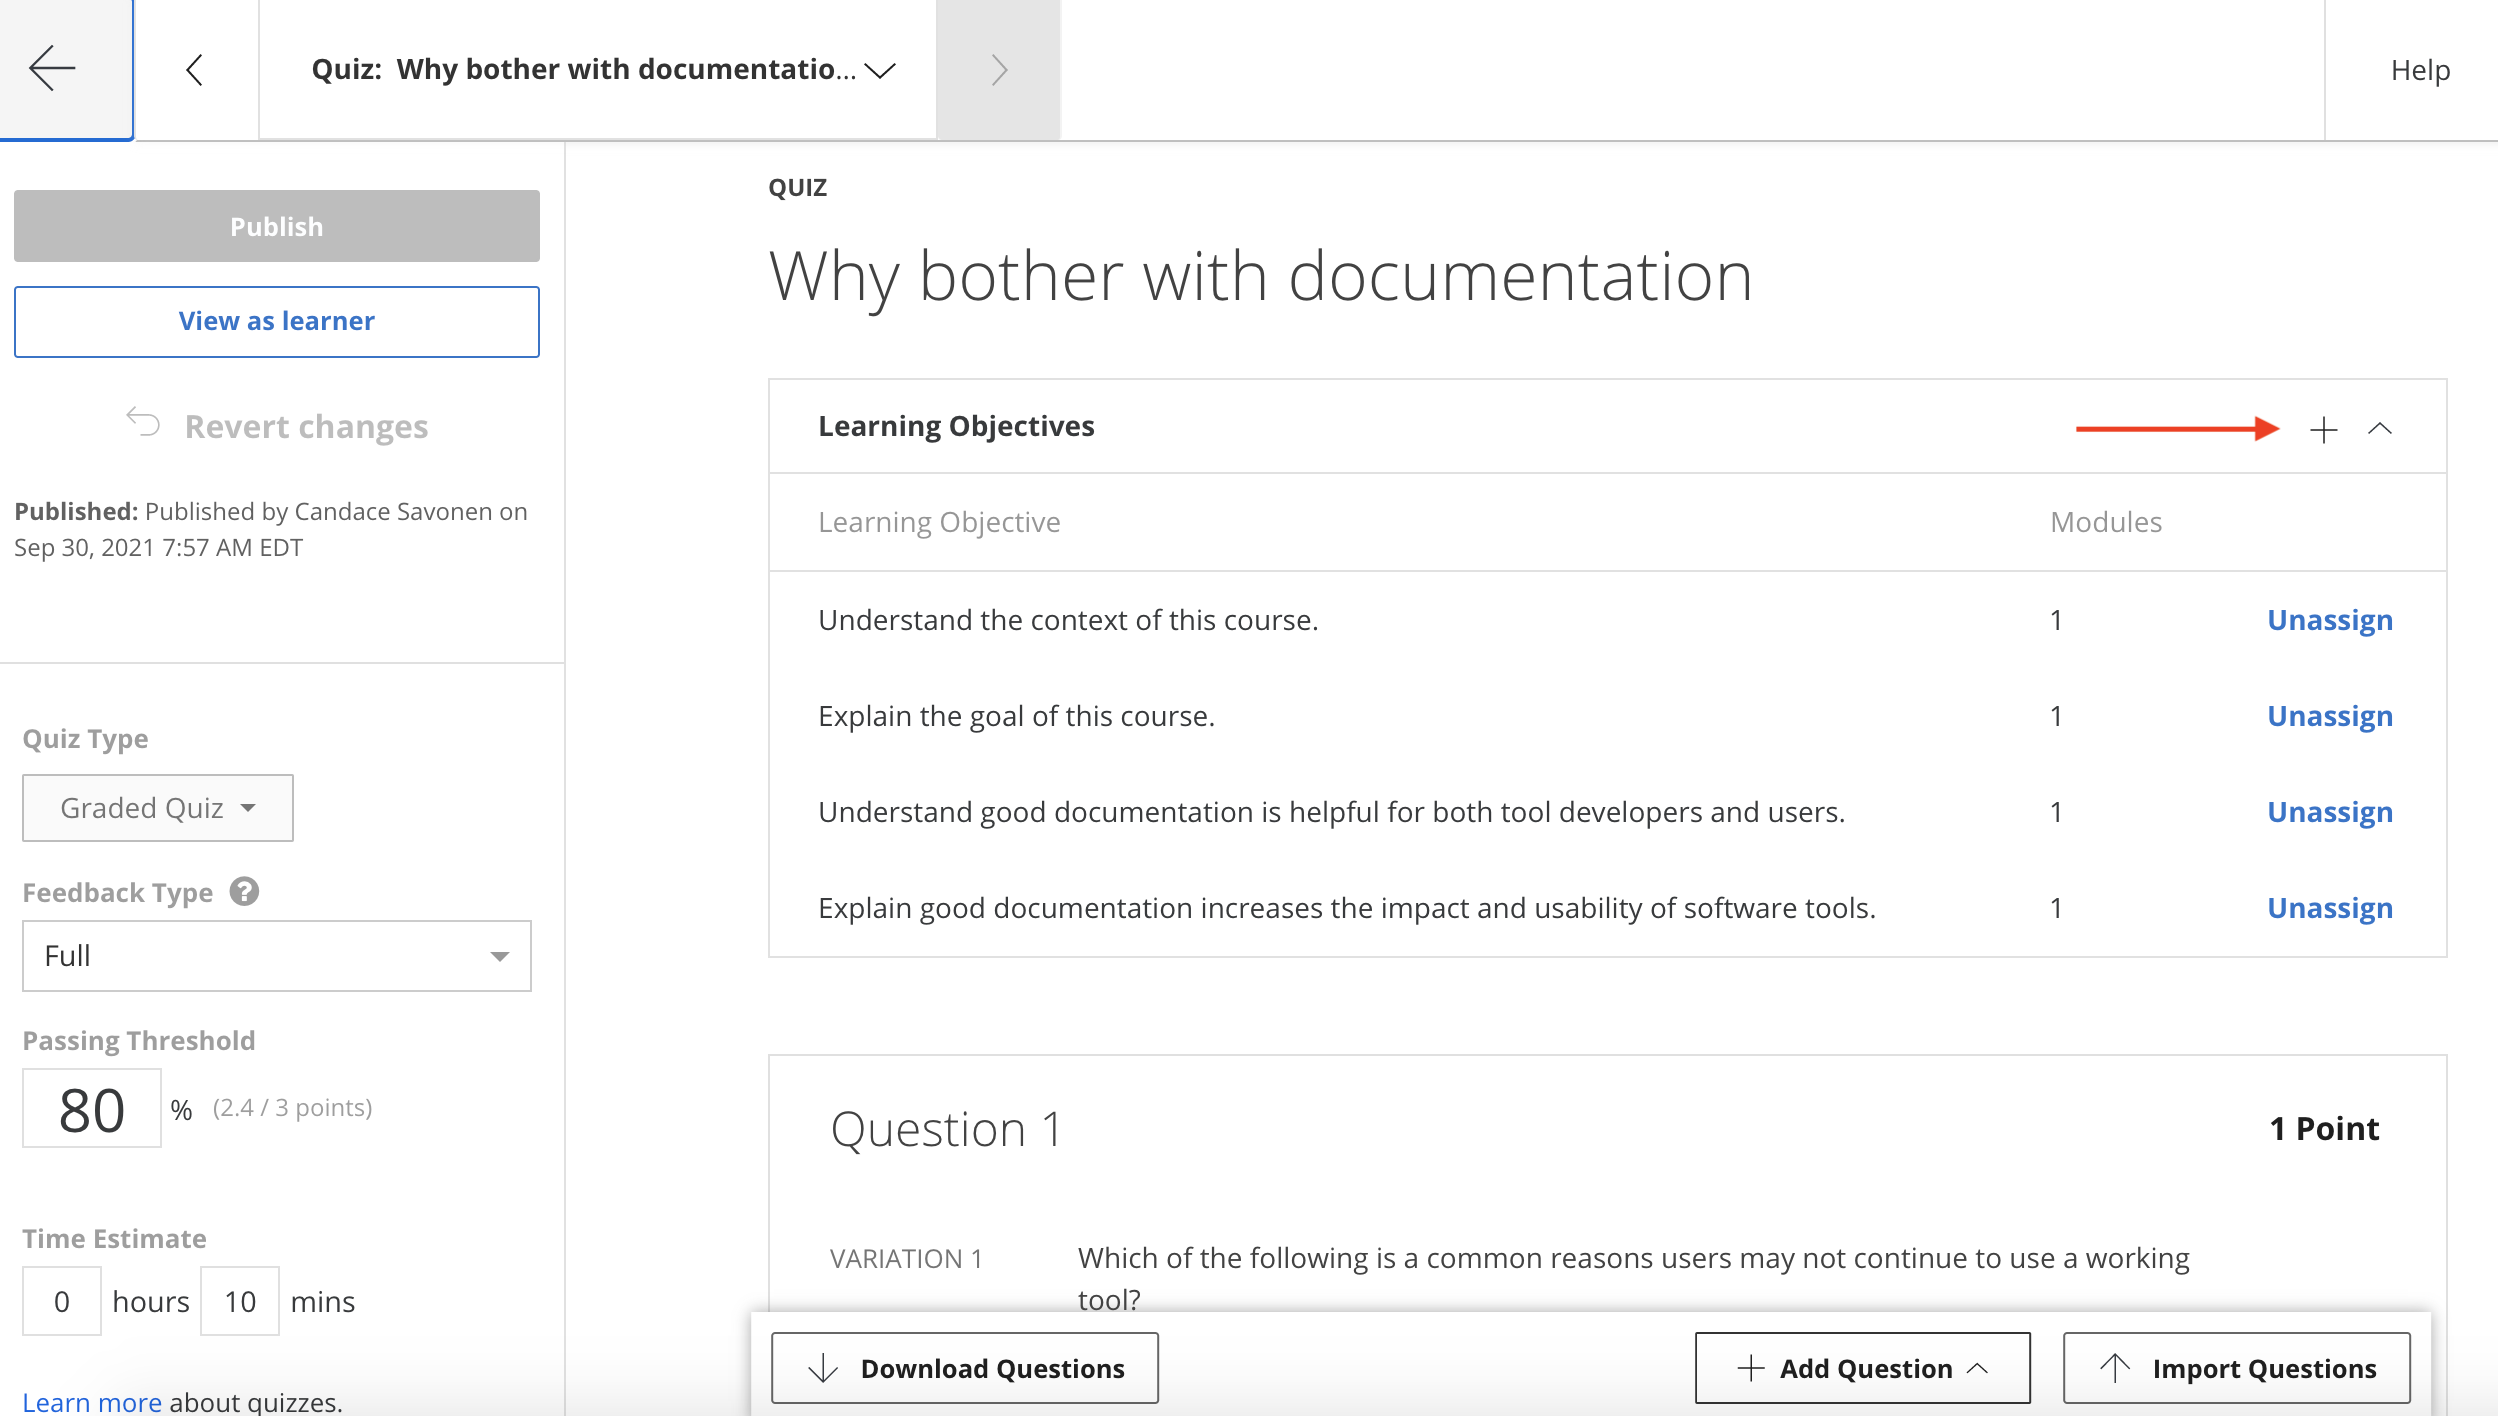
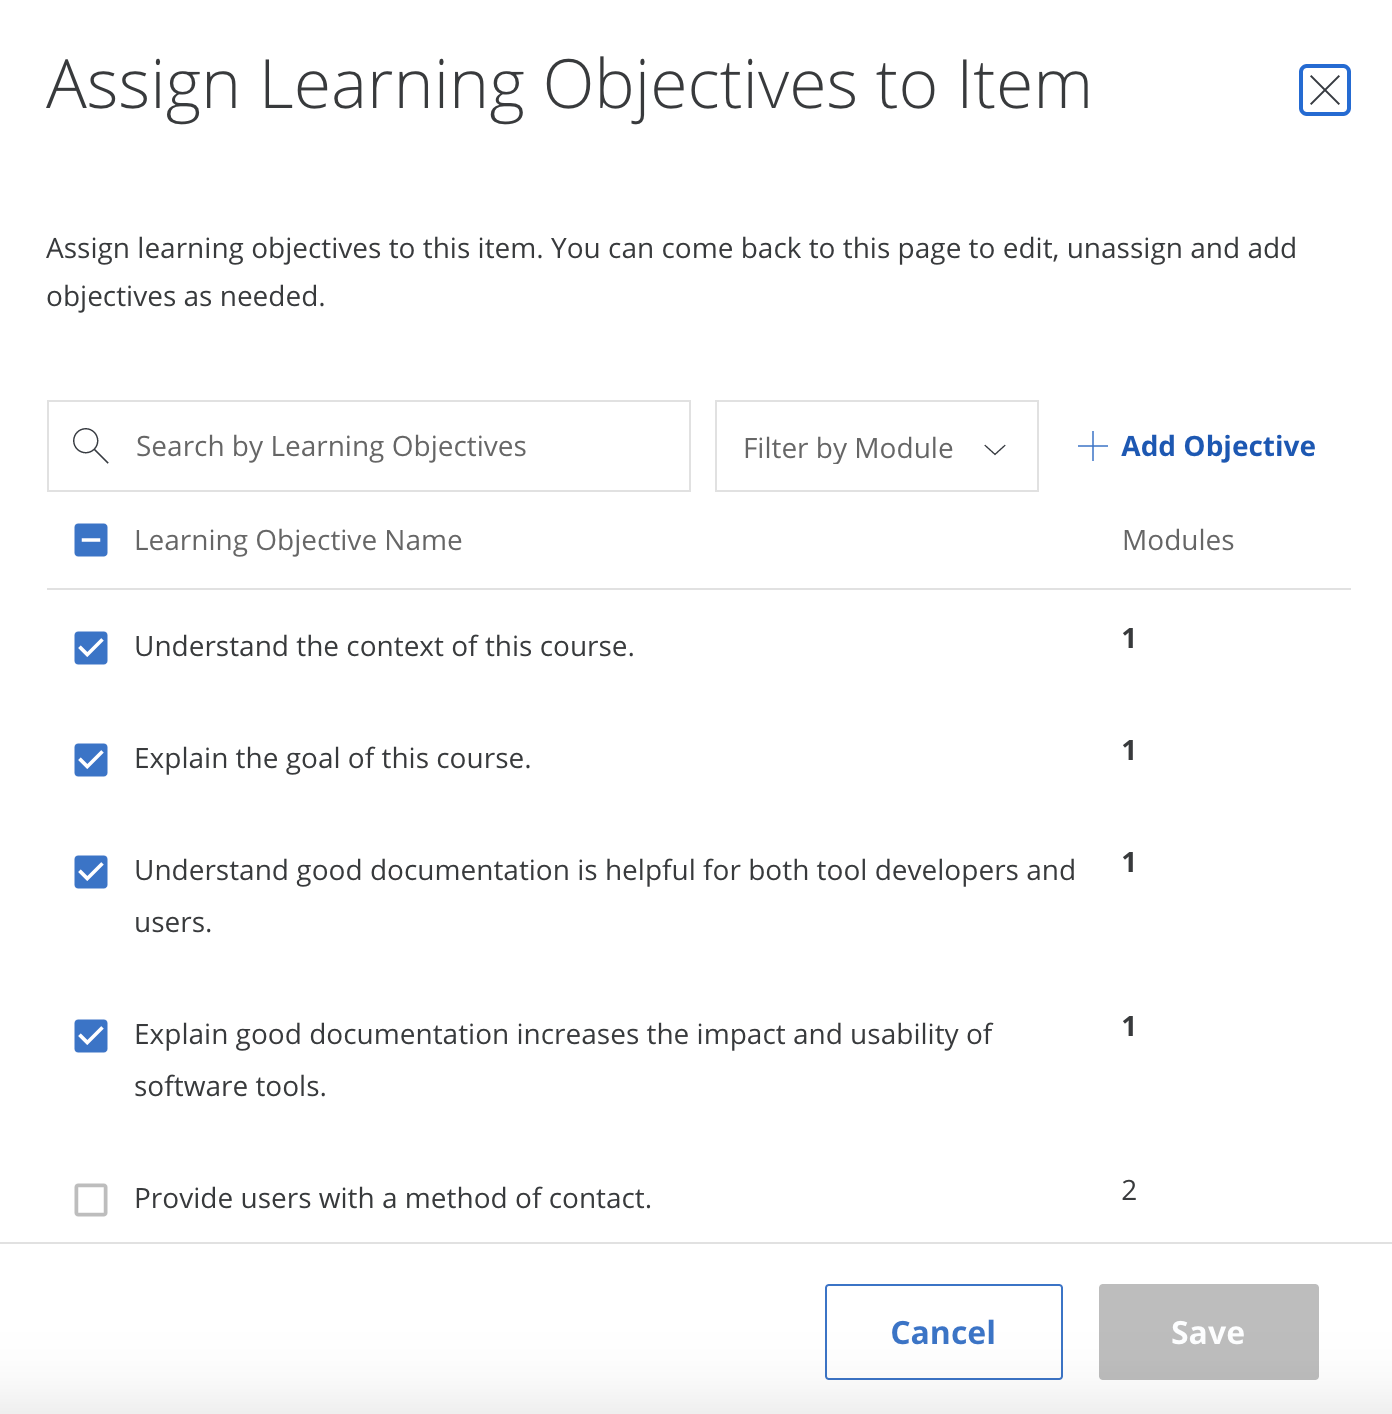
Assign learning objectives by clicking the plus sign under the title, selecting applicable objectives, and clicking Save:
Edit the title if needed, then click Publish to save.
Programmed messages
From Edit Course, navigate to Content > Programmed Messages in the left sidebar. At minimum, add a Welcome and a Completion message. Click Preview then Publish to save each.
Welcome message template:
Welcome to {Course Name}

We hope this course will {What will they learn?}

To get the most out of the course {What do you advise?}

If you ever encounter any problems with the course, have questions or ideas, please let us know using this feedback form.
Completion message template:
Congratulations and thank you for completing {name of course}!

We hope this course has {What do you hope they learned}.

If you have feedback about our course we would greatly appreciate you filling out this form.
Add a link to your feedback form using the link icon in both messages.
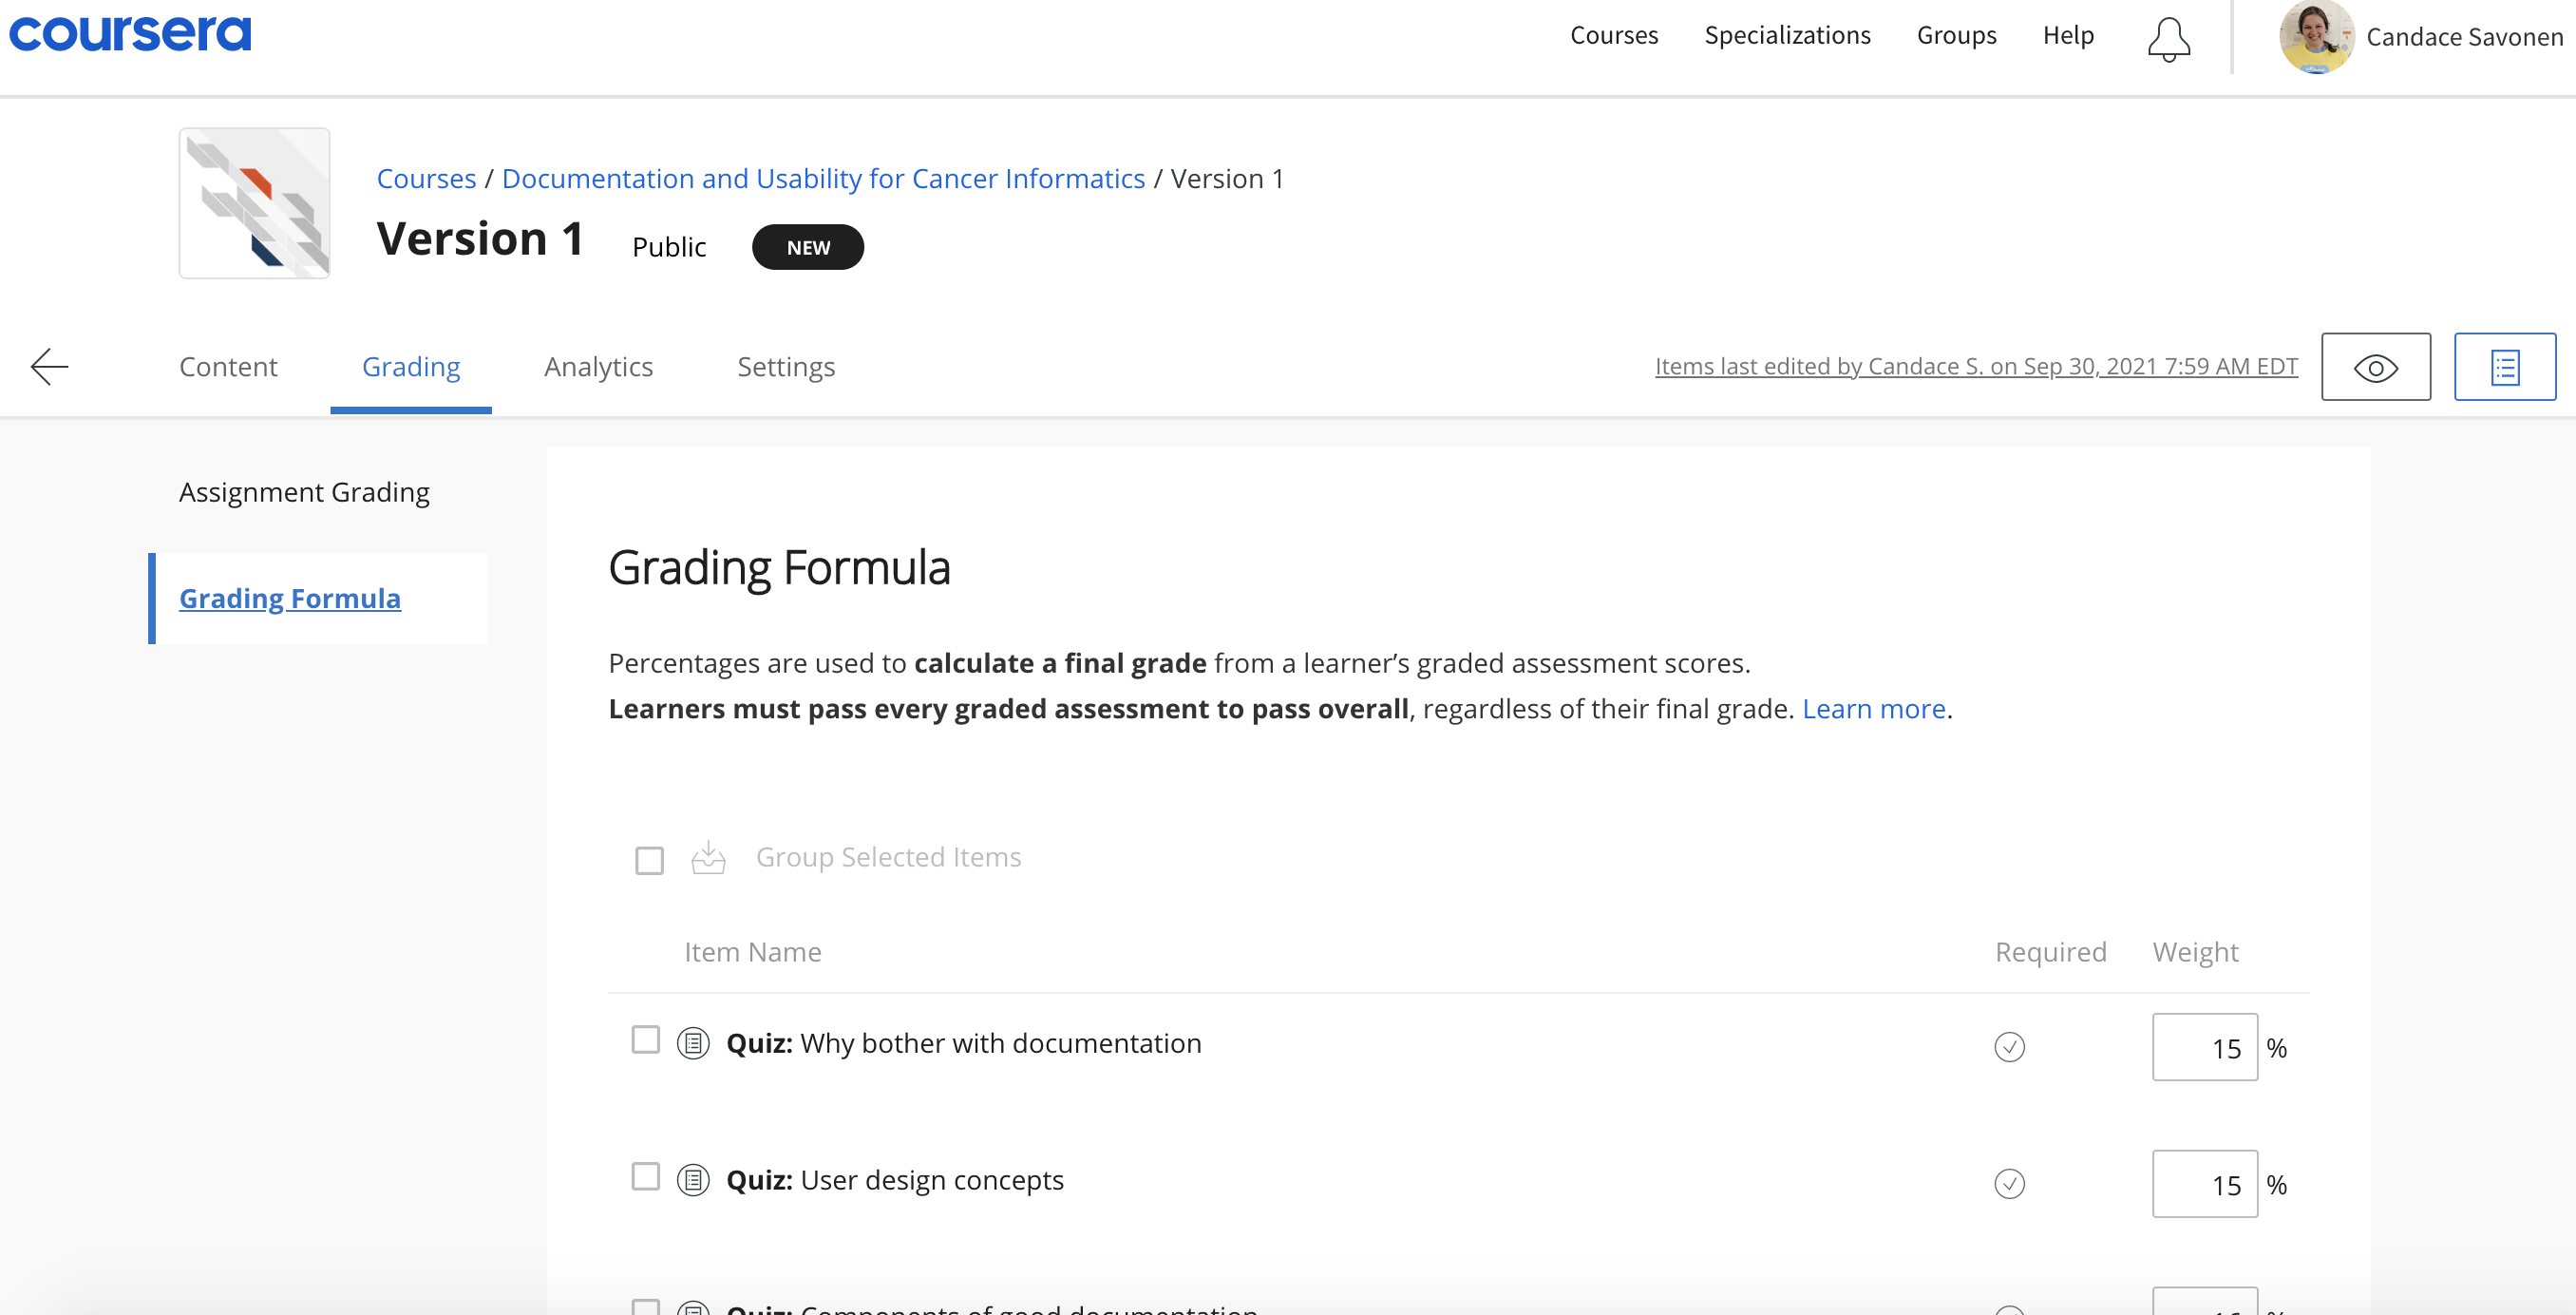
Grading formula
From Edit Course, navigate to your version page. Set the percentage each module’s assignments contribute to the final grade.
Content schedule
Found under the Content tab. Assign modules to weeks of your course here.
Module descriptions
Located just before learning objectives when editing content. Descriptions help learners know what to expect from each module.
Landing page
Add a course image and consider including:
- Estimated workload
- Skills covered
- Recommended background
- What students will learn
Multiple reading formats
Because Coursera uses plug-ins and there are accessibility concerns, add a reading at the very start of your course directing students to alternative formats. Create a reading using the Add Reading button (next to Add Quiz) and move it to the top of the first module by dragging the three-line icon on the left.
Title the reading:
Multiple Lesson FormatsPaste and modify the following:
Like many of our other courses, the content of this course is available in multiple formats.
You can also find the lessons for this course at [insert Bookdown link here]. This format might be most appropriate for you if you rely on screen-reader technology.
Our courses are open source, so you can also find all the source material on GitHub by visiting [insert GitHub link here].
These resources are used throughout this Coursera course in the form of ungraded plug-ins. You are welcome to use those plug-ins here on Coursera or connect to the content in other formats through the links above. Please select the format that most suits your needs.
Note about links in the plug-ins: The plug-ins used throughout the course feature links to other resources. To follow these links, right-click on them and open in a new tab or window.
Regardless of the format you choose for the instructional content, you must take and pass the quizzes here on Coursera if you want to earn a Coursera certificate.