Getting started
There are two main types of OTTR websites:
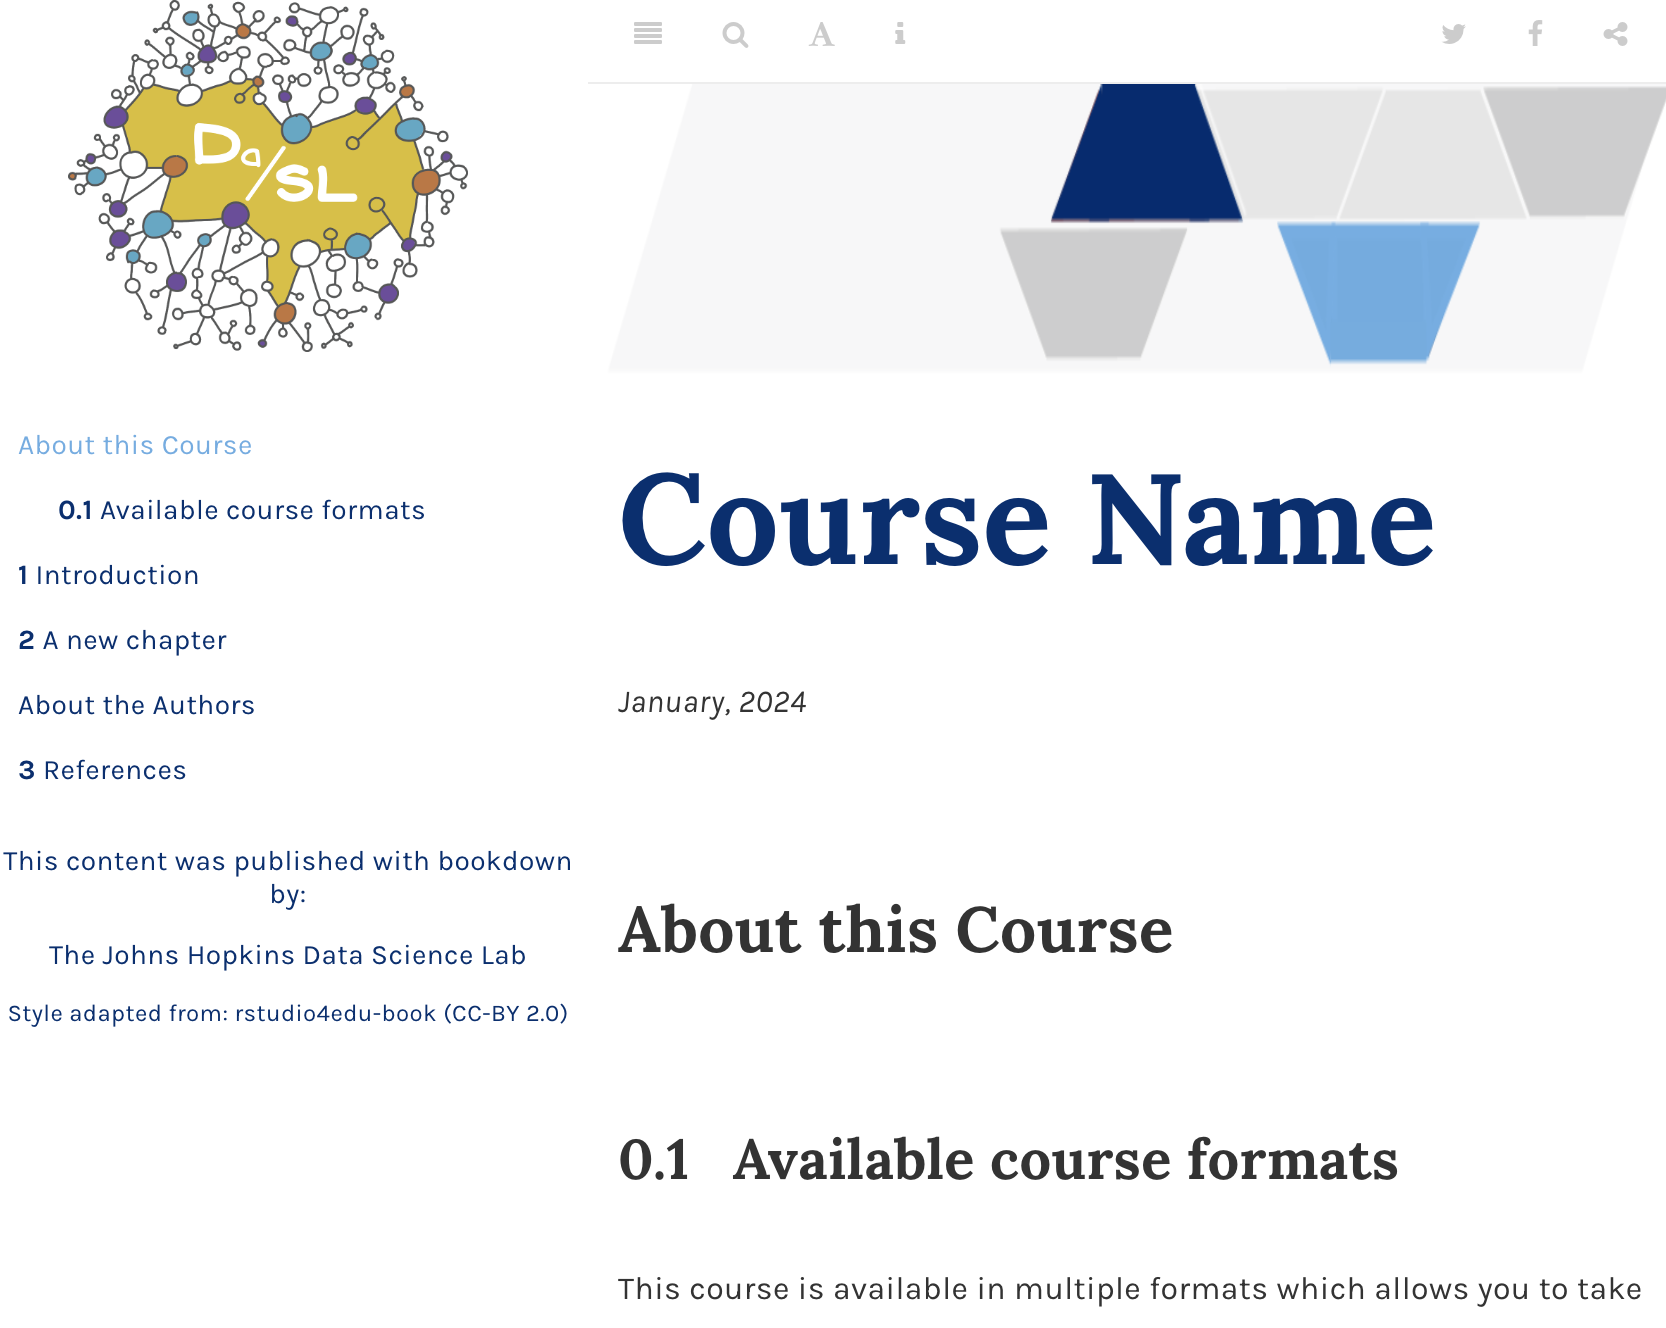
- OTTR Website classic - this is your typical website like the one you are looking at right now, with a nav bar on the top. Keep in mind you can customize everything without too much effort – our guide will hopefully help!
- OTTR Course
Website - this is for books/courses and has a table of contents on
the side.

Prerequisites for using OTTR
OTTR relies on R Markdown and GitHub Actions. You do not need to be an expert in either R Markdown or GitHub to get started as we will guide you through the process! However, we recommend spending a few minutes familiarizing yourself with both to gain a general understanding of their functionality before delving into our guide.
Please check out these resources if you are not familiar with R Markdown. Note that OTTR is also compatible with Quarto and regular markdown websites.
- If you aren’t familiar with Markdown, this site is a nice
introduction.
- If you aren’t familiar with R Markdown (a variation of Markdown used here), you can find RStudio’s lessons here.
If you are not familiar with Git and GitHub, we recommend going through these chapters from our Reproducibility courses:
We offer two suggested approaches for creating content, based on your comfort and interest level in using Git and GitHub:
- OTTR Entry Level: If you are not interested in delving into GitHub, you can use this version, which is entirely conducted through the GitHub web browser.
- OTTR Advanced: If you are already familiar with Git and GitHub or have an interest in starting to use them, we suggest this method. It will involve some additional learning, but acquiring skills in Git and GitHub will be highly beneficial not only for OTTR but also for version control in various other contexts.
If you choose to use our OTTR Advanced guidance, you will need a method for working with Git.
If you do not have a method of working with Git already, we recommend using a Git client to facilitate easier branch management. Install GitKraken for a convenient way to handle your course locally.
Starting a new OTTR website/course
1. Create a repository from this template
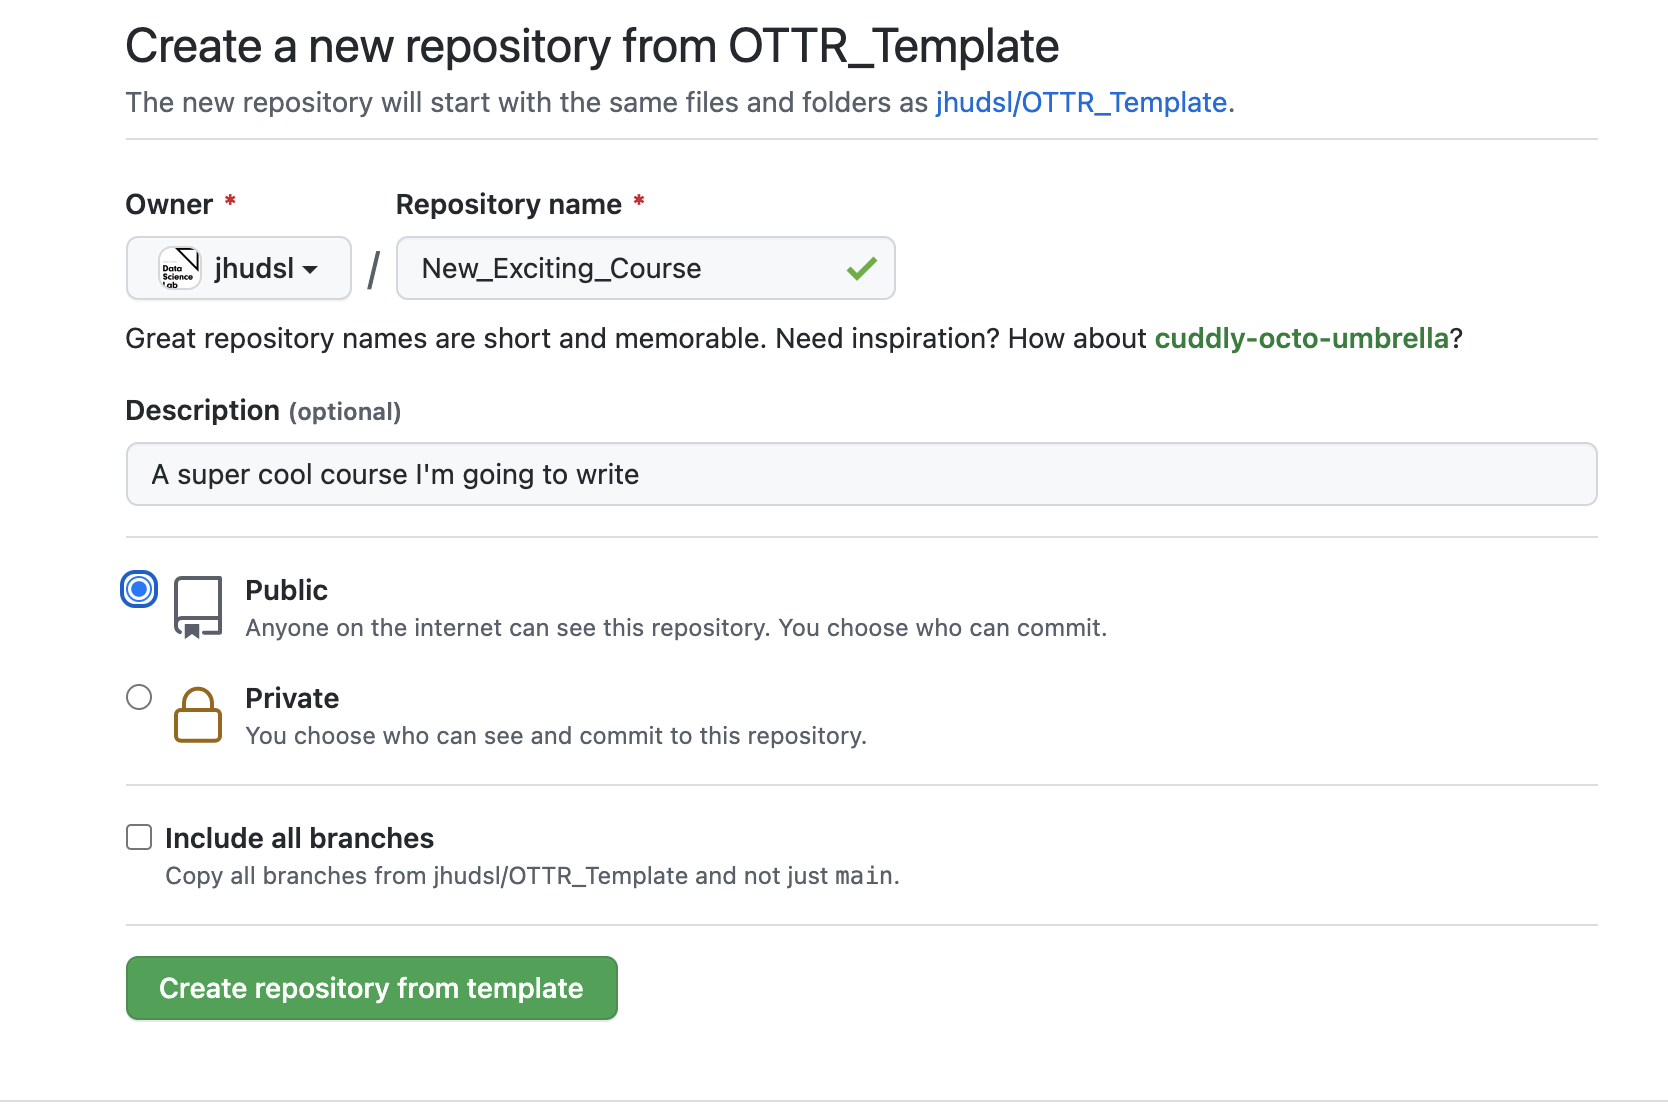
On the landing page of the OTTR Website repository or the OTTR Course repository locate the green “Use this template” in the upper right corner. Click on it and then “Create a new repository” to follow the provided instructions to configure your course’s GitHub repository.

2. Name your repository and fill in a short description
Enter a name for your repository in the “Repository name” field and provide a brief description for it in the “Description” box.

3. Ensure your course is set to public for all GitHub
Actions to work
When creating your repository, make sure to set it to a public repository.
In particular, the rendered preview on pull requests won’t work, but you can alternatively preview the content by re-rendering locally if you want to keep your course private. We will cover this later.
5. Check your repository GitHub Action settings
In case you have a personal repository or an organization that hasn’t utilized GitHub Actions previously, it is important to verify if workflow actions have been enabled.
Go to Settings and then Actions. Make sure
that you have: 1. Given Read and write permissions 2.
Checked
Allow GitHub Actions to create and approve pull requests.
Then click Save.

6. Set up your GitHub personal access token
The OTTR robots require certain permissions to execute certain actions.
To give them permission for all the Actions, you need to set a GitHub
Secret we will call GH_PAT. Go to Settings
> Secrets and variables on the left side menu >
Actions. On this page, scroll down to
Repository secrets. Read
more about GitHub Secrets here if you have general questions.
If you have organization admin privileges and plan on making multiple
courses with OTTR, you can set GH_PAT as an organization
secret so you don’t have to do this again. You only need to do this once
as an organization (if this course is under jhudsl you
don’t need to do this step).
- Click
New repository secret/New organization secretbutton. - Under
Name, you must useGH_PAT. - For
Secret: Create a personal access token following these instructions to create a “Classic” token (not a “Fine-grained token”). UnderneathSelect scopes, check bothrepoandworkflow. Copy the Personal Access Token and save as a Secret in the repository that you made from our template.
All of your GitHub Actions should now be capable of running without any issues. If you encounter any problems, please report your issue to the main OTTR repository here.
7. Set up GitHub Pages
You’ll need to set this up so that your website or course will be published to a URL!
In your repository, go to Settings >
Pages.
- Under
Source, pickDeploy fom a branch - Under
Branch, pickmainand choose/docs. - Then click
Save.
- Lastly, check the box that says
Enforce HTTPSat the bottom of this page.

The URL for your material will be your
main github pages url + / +
your OTTR repository name and it will be displayed
underneath your Settings > Pages.
By default, Github Pages is sent to a URL that looks like
username.github.io where username is either
your individual user name or your organization’s name. However, you can
customize your GitHub Pages URL (like we have in this example here -
jhudatascience.org). So it is likely your pages URL is
something like
username.github.io/your_ottr_repository_name.
For more information about GitHub Pages we recommend you refer to the GitHub documentation here.
Warning: If you go to your URL right now (before you’ve pushed any file changes) you might see a 404 error because nothing has been triggered to be rendered. You can check the URL after you file your first pull request (which we will guide you through in the next section.
8. Enroll your repository for OTTR updates (Not required but highly encouraged)
These OTTR templates (https://github.com/ottrproject/OTTR_Template_Website or https://github.com/ottrproject/OTTR_Template) are always a work in progress. We are working on adding more features and smoothing out bugs as we go. This is also why your feedback is greatly appreciated.
When updates are made to files that aren’t specific to the course content but instead run checks and other processes in the original repository, pull requests are filed automatically to any downstream repositories made from this template.
9. To get sync updates, add jhudsl-robot as a collaborator
*You can skip this step if your course is in the jhudsl
organization. To enable the full functionality of GitHub
Actions in this repository, it is necessary to grant appropriate
permissions. To achieve this, you should add jhudsl-robot
as a collaborator to your repository with write permissions. In your
repository, go to your Settings >
Collaborators & Teams and click on
Add people. In the pop up window, search for and add
jhudsl-robot.
 If shown the option, choose the
 write option then click
Add jhudsl-robot to this repository. Otherwise, just click
add.
To enroll in these automatic update pull requests, the new course’s repository name will need to be added to the relevant OTTR template sync file. See Which file should you edit section for links to the file you want
If you’re a member of the jhudsl GitHub organization, you can make edits to the sync file in a new branch and open a pull request.
If you’re not a member of the jhudsl GitHub organization, you can use one of these alternatives:
- Submit a response in our OTTR Feedback Google Form
by providing the information for your new repo (organization or username
as well as the new repo name) in the “Do you have any overall
suggestions for OTTR?” question and we can make edits to the
sync.ymlfile for you. - Open an issue in the relevant repo (links
in table below) providing us the information about your repo
(organization or username as well as the new repo name) and we can make
edits to the
sync.ymlfile for you. - Edit the sync file by creating a fork and opening a pull request from that fork. We provide instructions for that below in the section Making edits to these files if you are not part of the jhudsl Github organization.
Which sync file should you edit?
- Go to the respective file:
.github/sync.ymlof the OTTR template repository you created your repository from:
Making edits to this file if you are not part of the jhudsl GitHub organization
If you’re not part of the jhudsl GitHub organization, to edit the
sync.yml file you’ll need to - fork the repo - make the
changes (described below) to sync.yml, committing them to a
branch - create a PR in the original OTTR repo using your branch
Detailed instructions for these steps are provided below:
- Click the pencil in the upper right for “Fork this repository and edit the file”
- Click the green button that says “Fork this repository”
- Make the edits to the file, adding your repository’s name where it
says
#NEW REPO HERE#. Be careful to indent the same amount as the other repositories listed.
- Click the green “Commit changes…” button. As the banner on the top of the page says, this will write your changes to a new branch in your fork so you can open a pull request.
- Add a commit message or extended description beyond what’s there if you want to provide more info and click the green Propose Changes button.
- This will automatically open a new page comparing the changes from your branch to the original repo. Click the green “Create pull request” button to create a PR with your edits to the sync.yml file to the OTTR repo.
- Edit the title or provide an extended description beyond what’s there if you want (if you already did that when you created your commit, GitHub will copy that over). Click the green “Create pull request” button. This will create a PR in the OTTR repo.
- To make sure that we see the PR, you’ll want to add a comment with
@kweavto alert us there’s a PR that needs to be merged. Scroll down to “Add a comment”, type the@kweav, and click the green “Comment” button.
Some alternative information on these steps are available here from GitHub or from James Priest’s Gist on the Fork and PR Workflow (note: you don’t need to clone the forked repo locally, instead making edits online and committing to a new branch).
Links to open an Issue in an OTTR Template repository
| Repository | Issues Links |
|---|---|
| OTTR_Template | Open
a general issue here Open an issue to add a new repo to sync.yml for OTTR
updatesOpen an issue to update your repo name/location in sync.yml for
OTTR updates |
| OTTR_Quizzes | Open an issue here |
| OTTR_Template_Website | Open
an issue here Open an issue to add a new repo to sync.yml for OTTR
updates |
Making edits to this file if you are part of the jhudsl GitHub organization
- Add your repository’s name where it says
#NEW REPO HERE#. Be careful to indent the same amount as the other repositories listed.
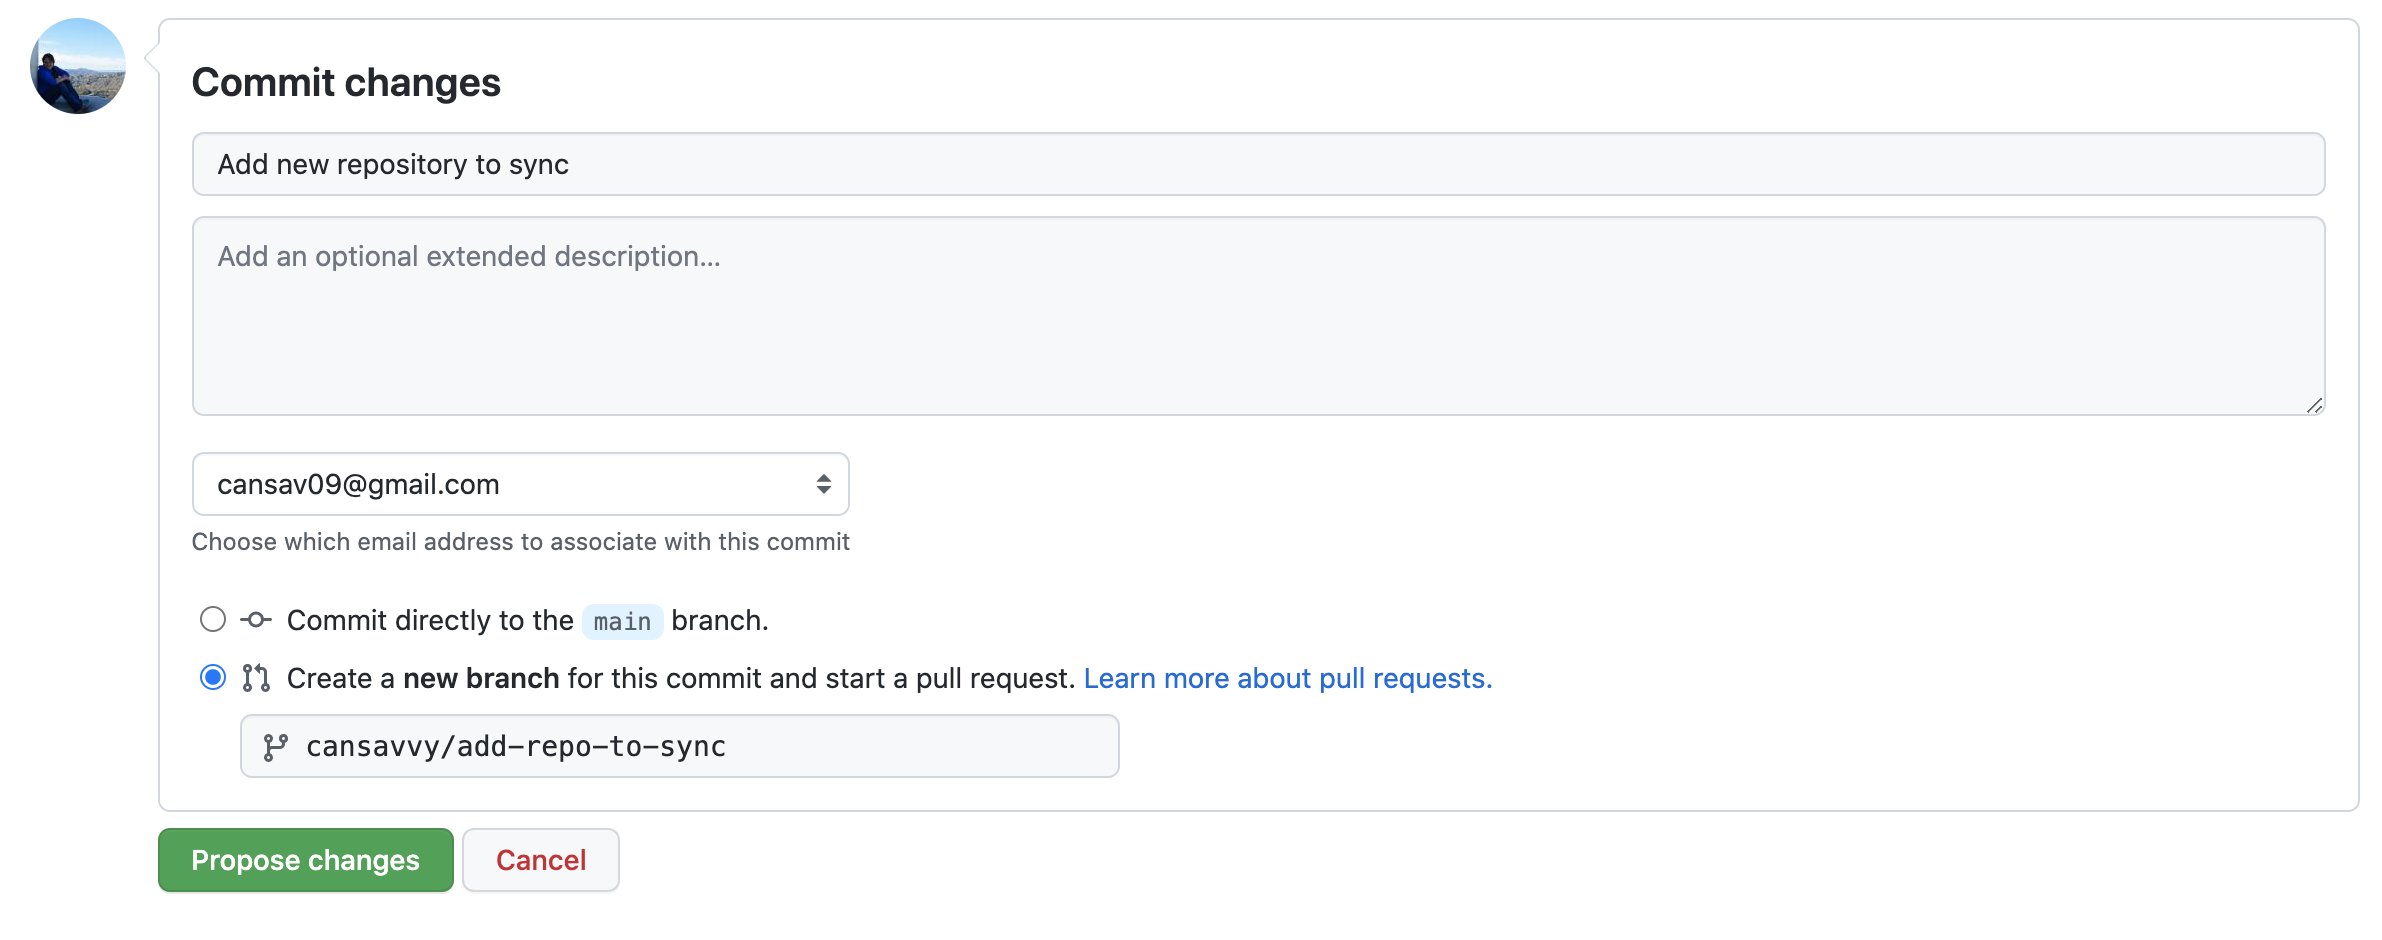
- Click on
Commit changes... - Type
Add new repository to synctoCommit message. - Choose
Create a new branch for this commit and start a pull request.Name the branch what you like.
- Click
Propose changes. - Write a short pull request description describing that you are
adding a new repository to the
sync.ymlfile. - Click
Create Pull Request - Request
@kweavas a reviewer.
If your new course doesn’t need some of the functionality of these files or you find the automatic updates bothersome, you can feel free to use this guide to tailor which files you want updates for.
If you have any questions about the implications of any of these
updates or files, please tag @kweav or
@carriewright11.
Create your website or course
Now you need to decide whether you want to build a course or a website and follow those instructions!
If you wish to contribute to OTTR, please take a look at our Code of Conduct.

Your feedback is greatly appreciated! You can fill out this form
or file a GitHub issue.
Otter images by Jimin Hwang.
