
Examples of OTTR courses
Below are some examples of courses created using the OTTR Template and published on three platforms: Bookdown, Leanpub and Coursera.
Introduction to Reproducibility in Cancer Informatics:
Computing for Cancer Informatics:
Publishing with Bookdown
To publish your content using Bookdown, you can utilize Github Pages by following the repository setup instructions provided here. It’s important to note that Bookdown serves as a fundamental component for utilizing other publishing platforms such as Coursera or Leanpub. Therefore, if you intend to use Coursera or Leanpub, you will need to publish your content using Bookdown.
As you modify the names of the chapters of your course and add more
chapters (using the .Rmd files), you need to update the
_bookdown.yml file accordingly.
For example let’s say that we added another chapter and named the
file 03-new_chapter_of_course.Rmd. We would update our
_bookdown.yml to look like this:
book_filename: "Course_Name"
chapter_name: "Chapter "
repo: https://github.com/ottrproject/OTTR_Template/ ##Make sure you update this to your GitHub Repo!!
rmd_files: ["index.Rmd",
            "01-intro.Rmd",
            "02-chapter_of_course.Rmd",
            "03-new_chapter_of_course.Rmd",  ## This is the only new line!
            "about.Rmd"]
new_session: yes
delete_merged_file: true
language:
  ui:
    chapter_name: "Chapter "
output_dir: "docs"
Notice how only a single line is different - the line mentioning
03-chapter_of_course.Rmd", Be careful with quotation marks
("") and commas (,)!
Once this change is made, we can preview the book by typing
bookdown::serve_book() in the RStudio Console. Note that
when you run bookdown it will generate an .rds
file; you can generally ignore this file. You will then see a live
version of your book in your RStudio Viewer.
Keep in mind that when a pull request is merged to main, GitHub Actions will re-run
bookdown::render_book() and the results will be added to
main.
Publishing with Leanpub
OTTR contains all the files you need to publish your course to Leanpub. The ottrpal
package takes care of handling and automatically converting the
content into a rendered version that is prepared for Leanpub.
These converted files are stored in the manuscript
folder. As a general rule, don’t edit files in the
manuscript folder. This folder should be auto generated by
the ottrpal package and should not be edited.
Note that if you wish to keep your quizzes and their answers hidden, there is some additional setup involved with this process and you will need to create a separate private OTTR_Quizzes repository to store these quizzes. Start with these instructions first if you want your quizzes and answers to be hidden.
Leanpub Rendering
The ottrpal package can handle most of the formatting
tasks for links and other elements for you, as long as you have followed
the formatting
instructions provided in the Set up images section.
Github Actions in this repository will attempt to convert Bookdown to
Leanpub for you by running ottrpal::bookdown_to_leanpub()
function at the top of the repository.
Hosting your course on Leanpub
Finalizing your course on Leanpub can be tricky. We have created a course, Using Leanpub, to help guide you.
To host your course on Leanpub, follow these steps:
If you do not have an existing account, create a Leanpub account by visiting this link: https://leanpub.com/.
Start a course:
- Click on the three-line button positioned at the far right of the top bar.
- Click the “Author” tab on the far left
- Click “Courses” (if you haven’t already, verify your email address)
- Click the text that says
create a new course - Click “A Course” and provide the “Title” of your course and your “Course URL” will be automatically filled for you.
- Select “Using Git and GitHub” (if you work with us at JHU there is a different protocol and additional settings you need to set which you should follow - see this document )
- Press the
add to planbutton
TODO: Which plan?
- Preview a new version
- Click on the 3 line menu button
- Click the author tab on the far left
- Click Courses
- Click on your course name/icon
- Click “Preview New Version”
- Click
Create Previewbutton
If you have errors in your course (typically from a quiz formatting issue) the render will fail and you will need to fix your quizzes. Also note that occasionally the preview might fail and you should just try again, as it will work the second time. This might be due to a lag in GitHub and Leanpub communicating.
Setting up quizzes
Quizzes need to be stored in the quizzes/ directory.
Edit and add quizzes to this directory. See and copy this template
quiz to get started. All quizzes need to be written in the Markua
format. Refer to their documentation
(note that it is sometimes vague or outdated). The example question
types in the template are ones that are verified to work.
After you add each new quiz to the quizzes/ directory,
its filename needs to be added in the corresponding spot in the
Book.txt file (do not edit the one in
manuscript but the one at the top of the repository); this
ensures Leanpub incorporates the quiz into the book in the correct
order.
If you wanted two quizzes (one called quiz_1.md and one
called quiz_2.md) you could duplicate and modify
quiz_1.md for your needs and then you could make the
Book.txt file look like this (assuming you created a
chapter called "03-chapter_of_course.Rmd" and you wanted
quiz_1 to be after 02-chapter-of_course and quiz_2 to be
after 03_chapter_of_course:
01-intro.md
02-chapter_of_course.md
quiz_1.md
03-chapter_of_course.md
quiz_2.md
about.md
Note that any .md files with an # in front
of the name in the Book.txt file will be ignored by
Leanpub. We have included an example of this in the
Book.txt file.
See an example
quiz here Note that you cannot have two quizzes with the same
quiz_id.
Leanpub Quizzes
Leanpub has specific formatting requirements for quizzes, and it will
not generate a preview if any question or quiz does not adhere to these
rules. Our GitHub
Action for checking quizzes (located in file
.github/workflows/pull-request.yml underneath
check-quizzes section) will print out a list of errors
which you can retrieve from a pull request comment that is automatically
printed. This check is only run when changes are made to the
quizzes/. At this time, two types of questions are
supported. (Short answers are not yet supported by our checks but will
be added in the future).
Standard multiple choice:
The answer choices are not randomized and look like:
? A question is here
a) A wrong answer
B) A correct answer has a capital letter
c) A wrong answer
d) A wrong answer
Choose answers
You can use choose-answers option which will randomize
the multiple choices or you can use a standard quiz question that
doesn’t randomize. The notation for the answer choices are:
C) for correct answers m) for mandatory
incorrect answers and o) for optional incorrect
answers.
Note that the number given for the number of answers has to be at least equal to the number of correct and mandatory incorrect answers listed.
Here’s an example:
{choose-answers: 4}
? A question is here
C) The correct answer is signified with a capital C
m) A mandatory incorrect answer
m) A mandatory incorrect answer
o) An optional incorrect answer
o) An optional incorrect answer
Upon merging to the main branch, a GitHub Action will
automatically run check-quizzes.yml, which uses the
ottrpal package to check that your quiz conforms to these
rules. If there are any problems, it will report the quiz formatting
errors on your pull request.
Leanpub Quiz Format Rules
- Quizzes start and end with the {quiz} and {} tags.
- Don’t have exclamation points or colons in answers.
- Make sure there’s at least one right answer.
- Check that the question and quiz attributes used are attributes recognized by Leanpub. -
- Make sure all quizzes are listed in Book.txt
- The number of choose answers is at least as big as the number of mandatory and correct answers listed.
- For choose-answers questions, use
C)for correct answersm)for mandatory incorrect answers ando)for optional incorrect answers. - Check that the question and quiz attributes used are attributes recognized by Leanpub.
Converting Quizzes from Leanpub to Coursera format
See more instructions on how to port a course made from these templates to Coursera.
You can convert your quizzes to a nicely upload-able yaml file in this repository by running this command in the docker image
ottrpal::convert_quizzes()Note that currently images and links are not supported and if your quizzes contain those, you will have to manually add them at this time.
You can run this same command locally if you wish to test something. This render the chapters without the table of Contents. If you do not wish to publish to Coursera and prefer this do not run, you may delete this section (but it shouldn’t hurt anything to keep as is – unless for some reason it causes you some troubles).
Additionally, the ottrpal
package has a ottrpal::convert_quizzes() function if you
choose to create quizzes and publish on both Leanpub and Coursera.
Setting up the _Quizzes repository checklist:
Your Leanpub course as been created on Leanpub
- Writing mode in this course is set to
GitHuband your main OTTR_Template repository is linked.
- Writing mode in this course is set to
Repository is created and set to
private.mainbranch has been set up:Require pull request reviews before mergingbox is checked.Require status checks to pass before mergingbox is checked.- Underneath that
Require branches to be up to date before mergingbox is checked.
- Underneath that
This repo has been enrolled in automatic updates from the original template.
Your Book.txt file is up to date.
Publishing with Coursera
Once your content has been extensively developed, you might consider adding your course to Coursera.
This guide was prepared specifically for those developing courses for the ITN project at Johns Hopkins University or other Coursera partner institutions. It reflects the needs and goals of ITN course developers. Coursera’s Educator Resource Center is the authoritative source of documentation for using the Coursera platform.
Setting up your Coursera course
If you are from Johns Hopkins: You will need to follow this document and send information to Ira Gooding (iragooding@jhu.edu) who will create a course shell for you.
If you are not from Johns Hopkins: You will need to set up your own educator profile and course shell through your institution.
Converting your files for Coursera
The Github Actions (set up in render-all.yml) renders
your course material in a format suitable for linking to Coursera. This
Coursera version is identical except that the table of contents bar on
the left side has been dropped so as to not confuse Coursera users about
navigating the course. These files can be previewed in the
docs/no_toc folder and a link to the Coursera version is
printed out in a GitHub comment in your pull request by
render-preview.yml.
If you have written your quizzes in Leanpub format first, the
pull-request.yml Github Action will convert those quizzes
so they are ready to be uploaded to Coursera.
Alternatively, if you do not wish to have a Leanpub version of your course, you can write your quizzes directly on Coursera’s website. You can download the quiz you write on their website as a yaml and store it on your repository as well.
Navigating to your course on Coursera
After your course shell
has been added to your account you can navigate to it by going to
My Courses:
And you should see it listed:
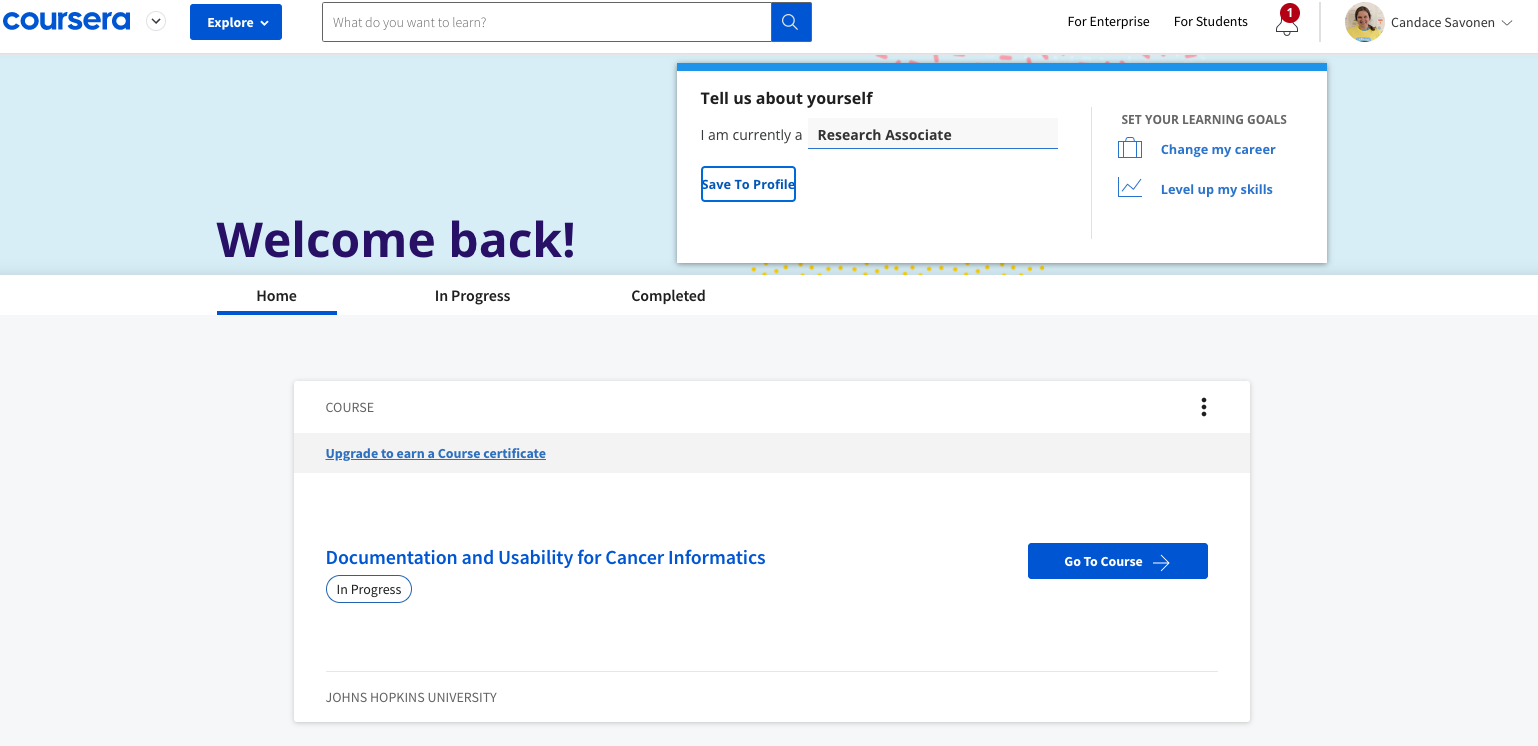
Click on Go to Course and on your main course page,
click Edit Course in the right corner.
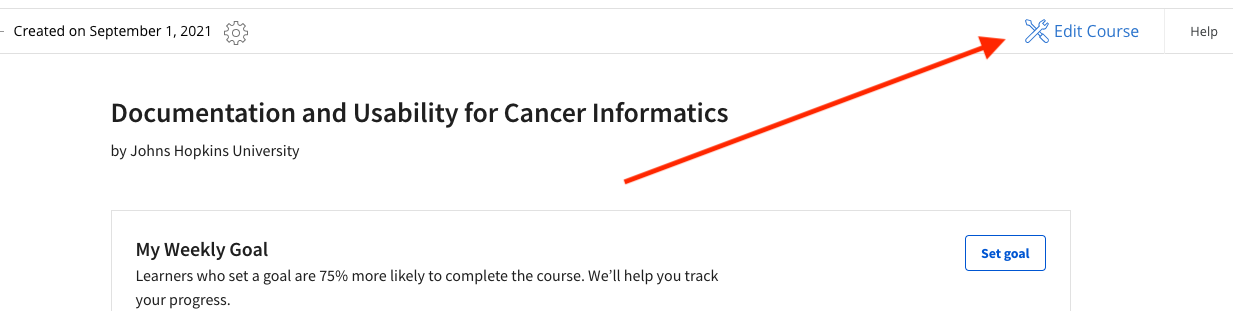
This will bring you to your version page (at this point you should only have a Version 1, so go to that one).
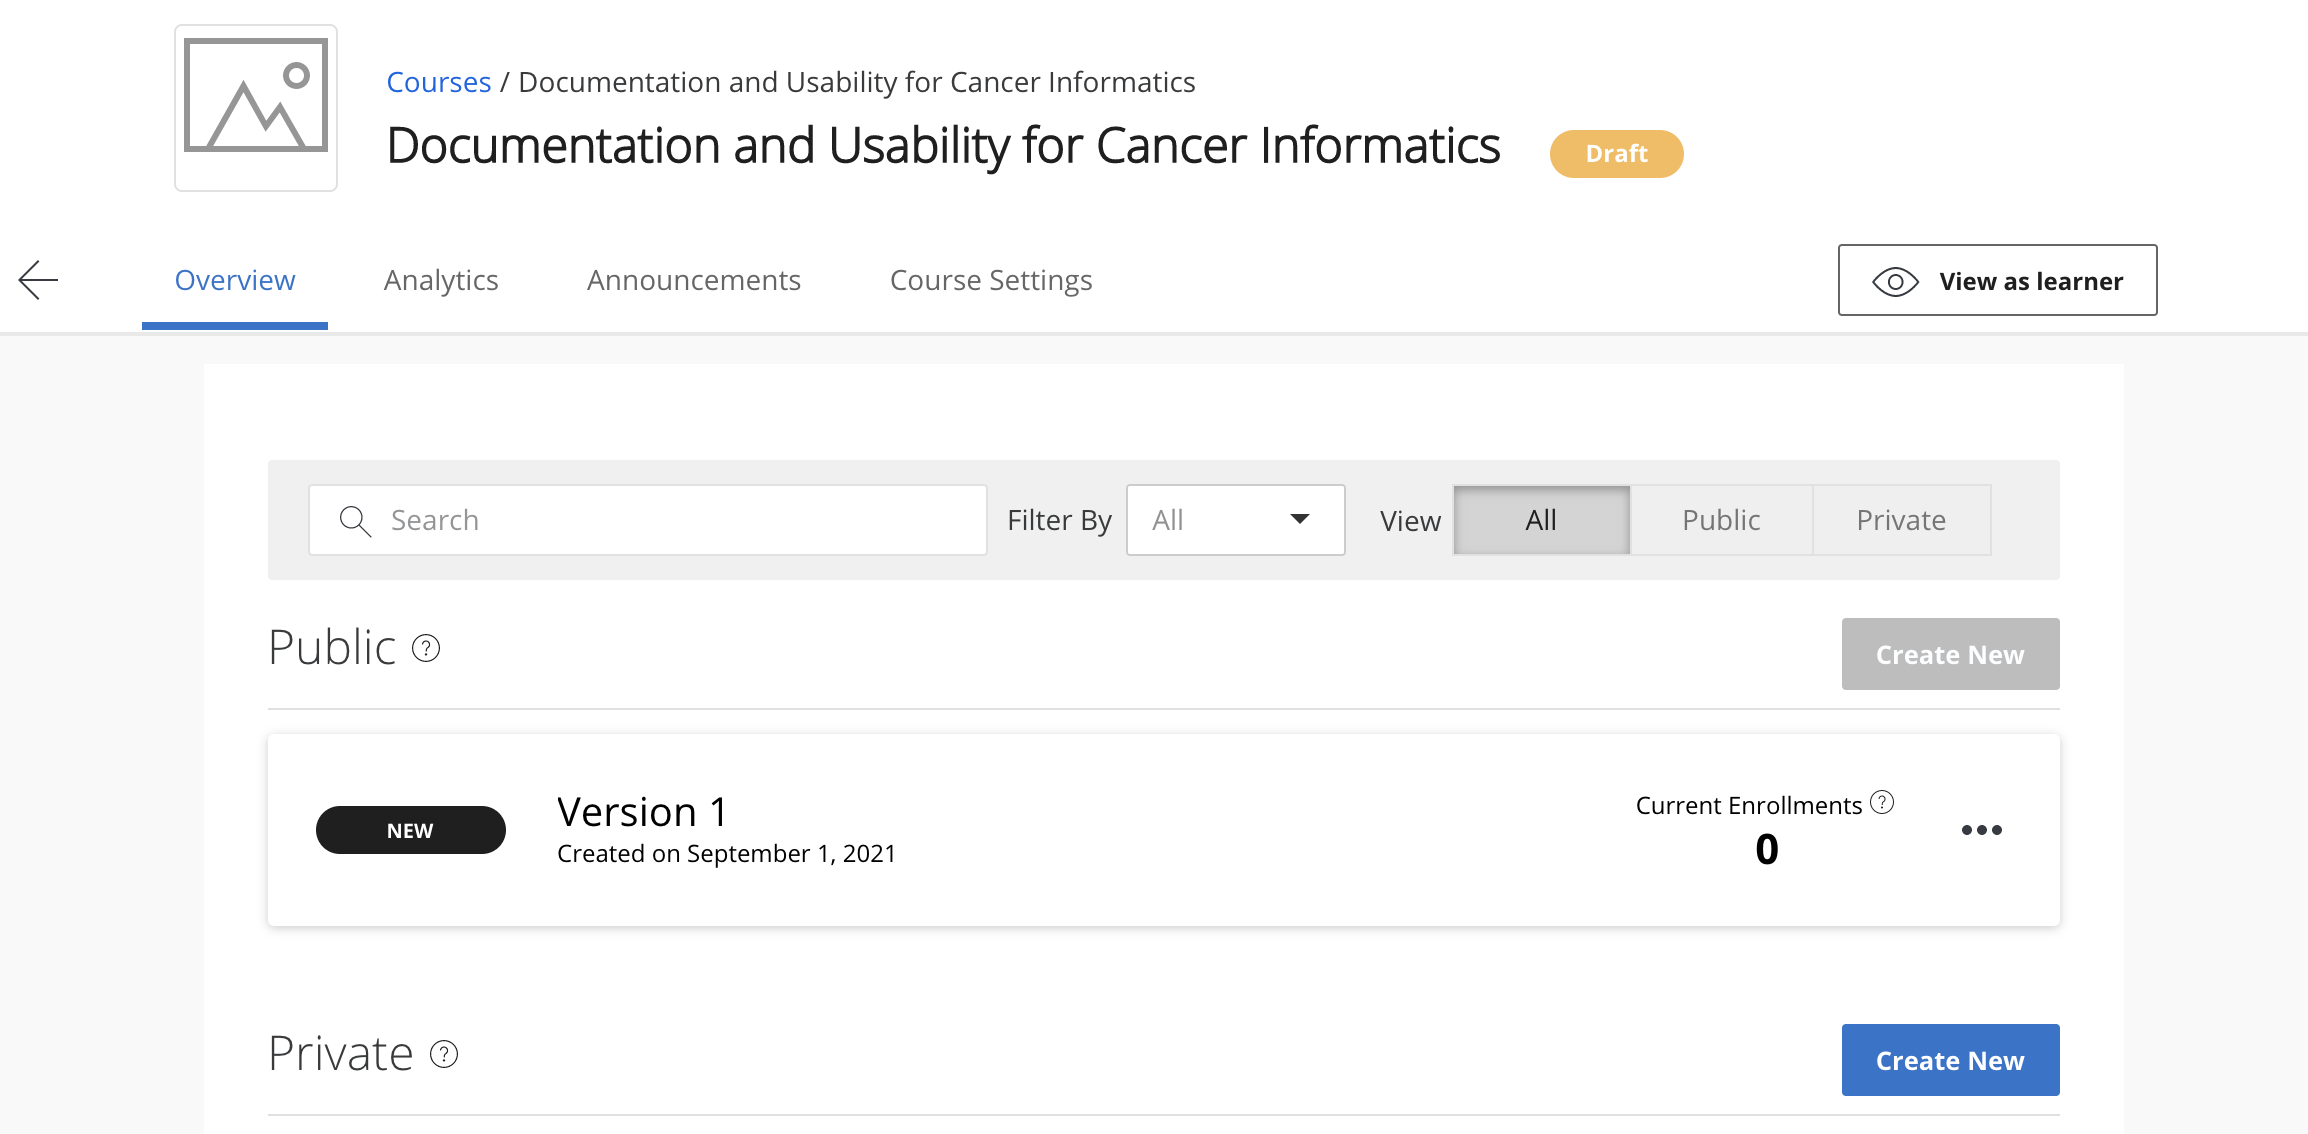
Now you are on the Edit content page and ready to add lessons, modules and quizzes!
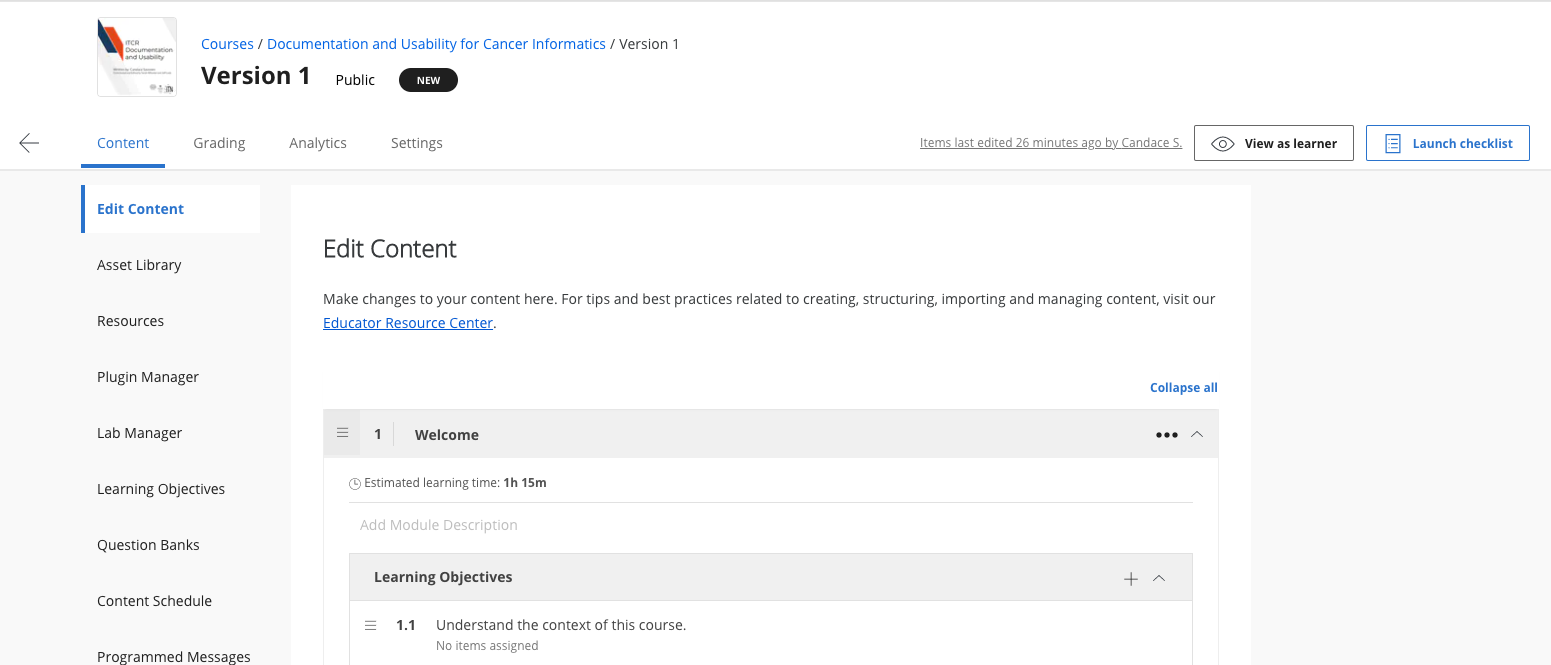
In general, you will want each lesson to contain at least a chapter and a quiz.
Each module is supposed to take a learner one week, so depending on the length of your chapters and quizzes you may want one or two lessons/chapters/quizzes a module.
To add a new lesson, click the + Add Lesson button:
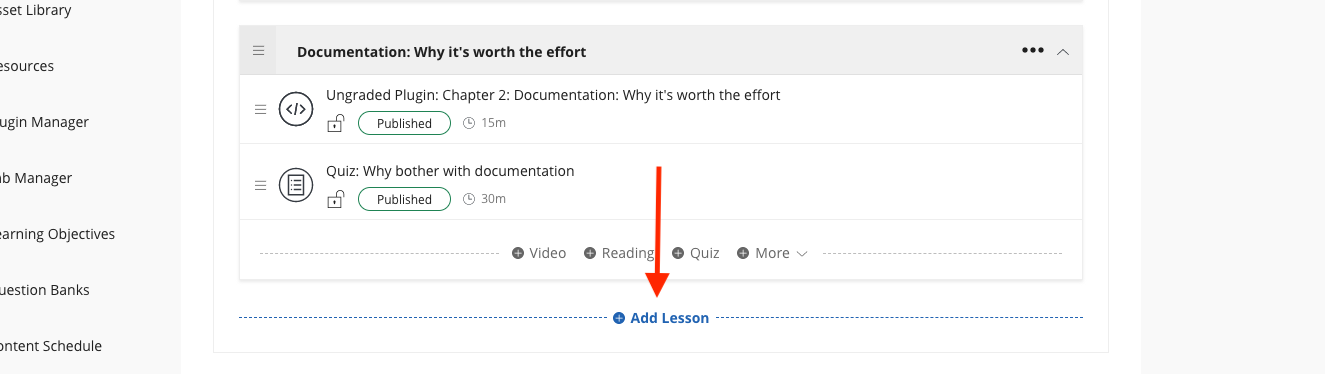
Now you are ready to add a chapter!
Adding new chapters to Coursera
You’ll need to link out each chapters in Coursera by providing a URL built from your Github Pages for your course.
You can see a preview of these chapters you will link to in Coursera
by going to the Github Pages for
your course, but adding /no_toc at the end of your URL
before the chapter file name.
So the URLs for each of your chapters which you will supply to Coursera in the next steps will look like this:
<main-github-pages-url>/no_toc/<html_filename>If you are unsure what the main URL for your Github pages is, in your
github repository, go to Settings > Pages
and you’ll see Your site is published at:
So for example, the introduction chapter of this template would be linked by using this URL:
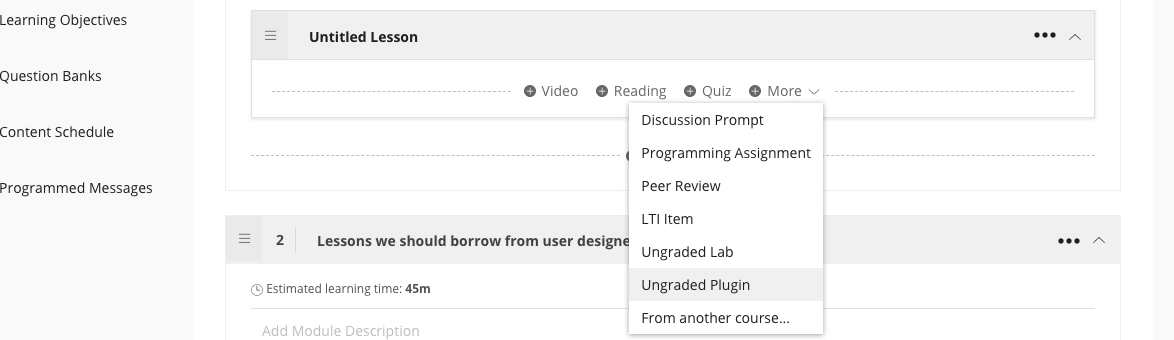
https://ottrproject.org/OTTR_Template/no_toc/introduction.htmlTo add this URL to Coursera, add a new lesson, click
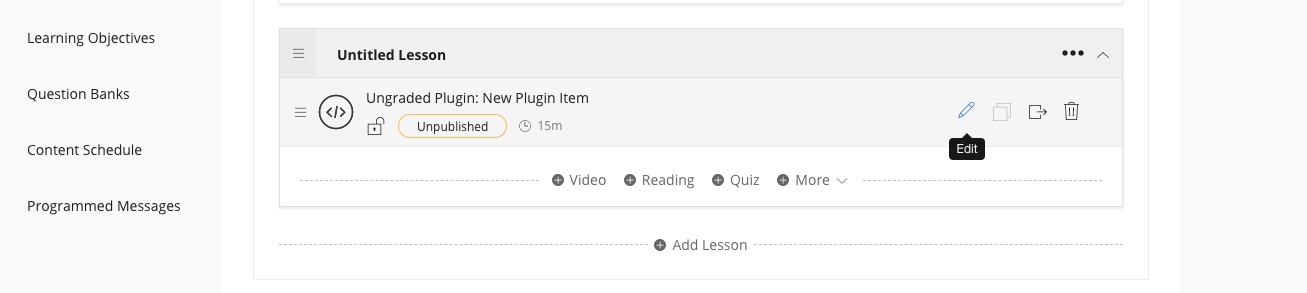
+ More and choose Ungraded Plugin.
This will add an unpublished ungraded plugin to your lesson: 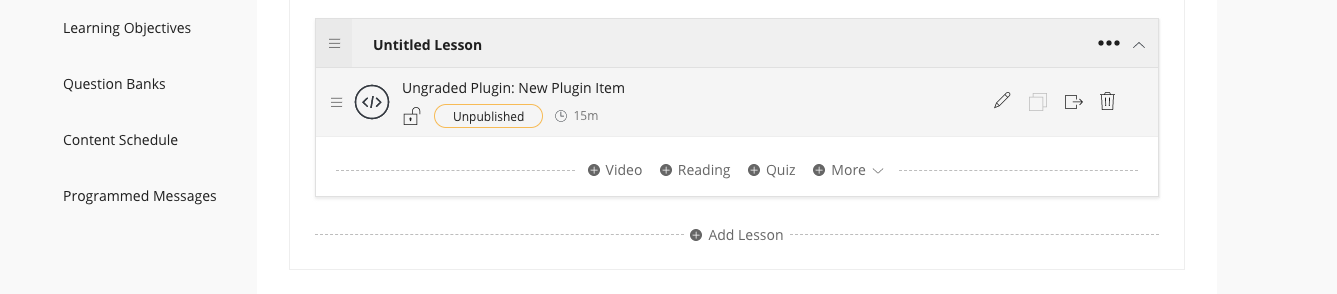
Now click the edit button on the new
Ungraded Plugin.
This will bring you to the standard example plug in page. 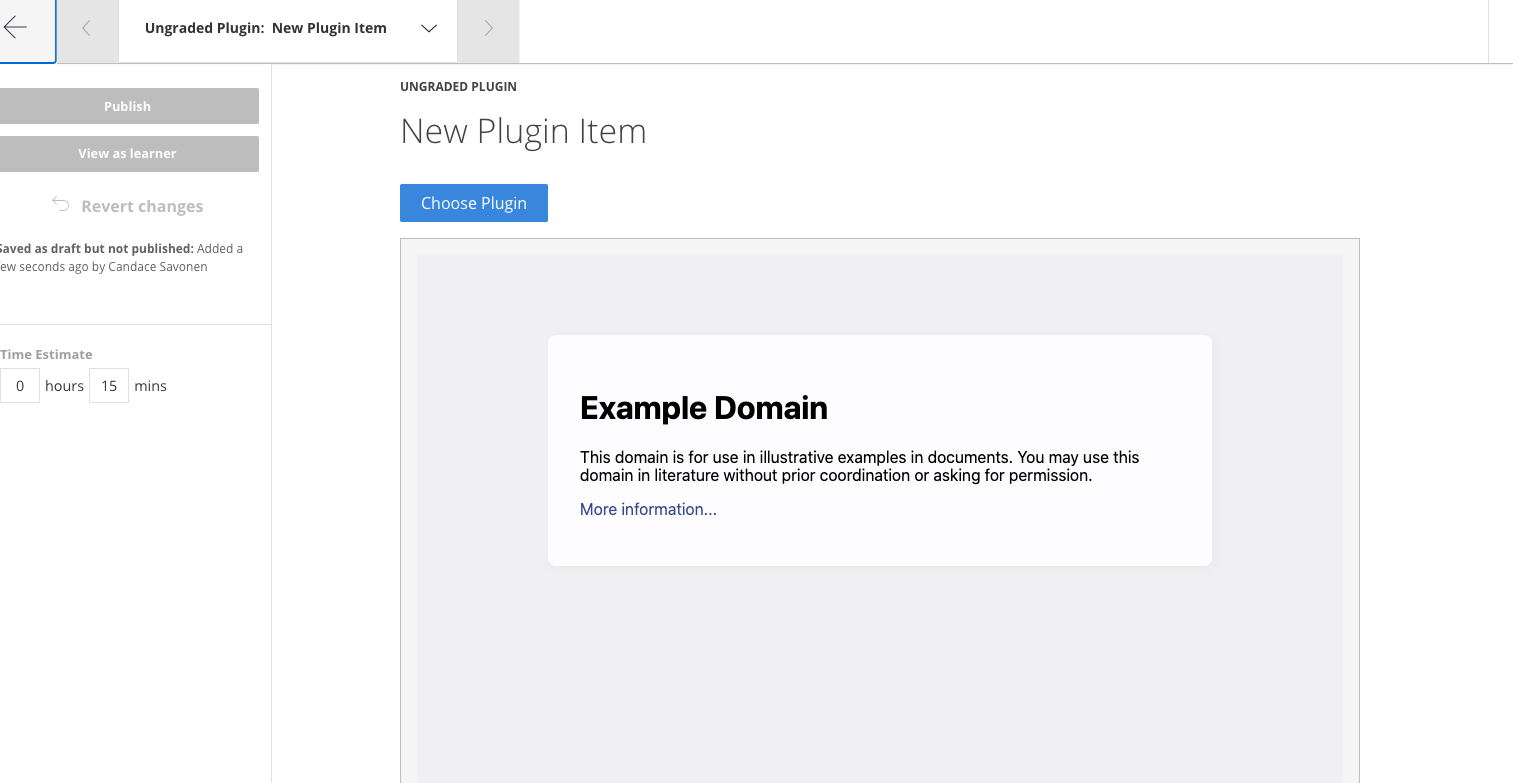
Scroll down and click Edit Configuration:
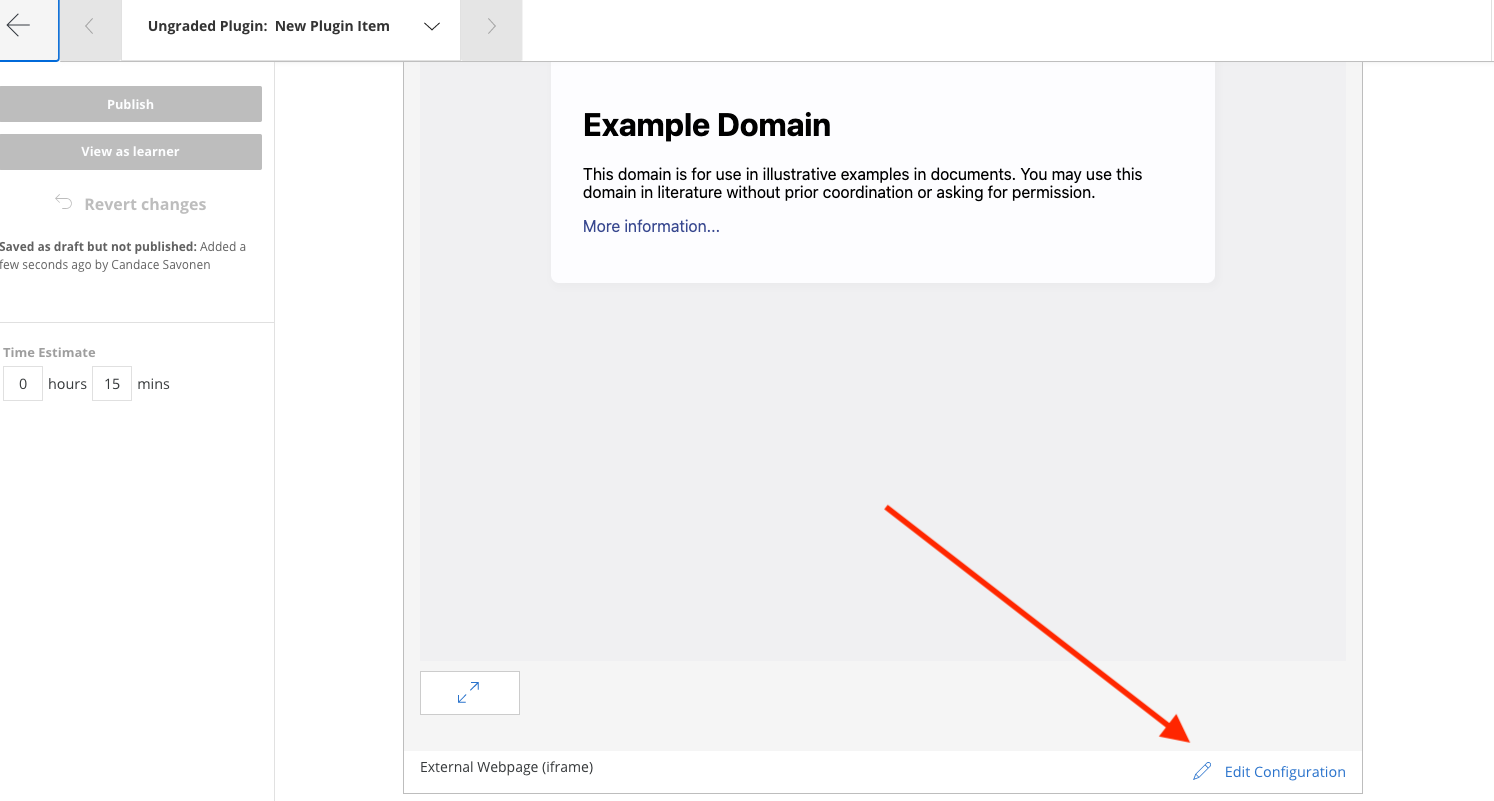
Replace the example URL with the URL of your individual chapter we discussed above.
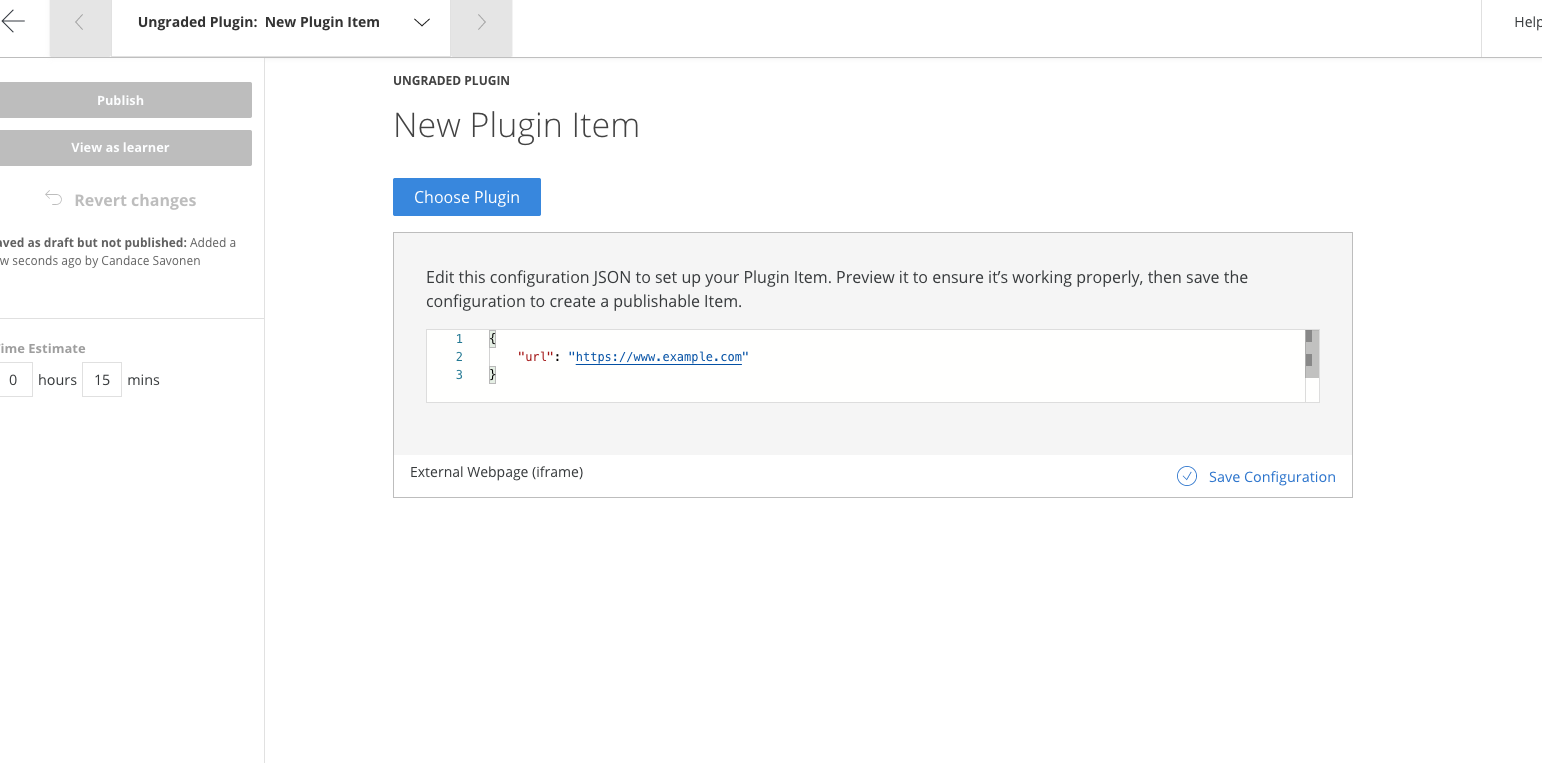
Then click on Save Configuration:
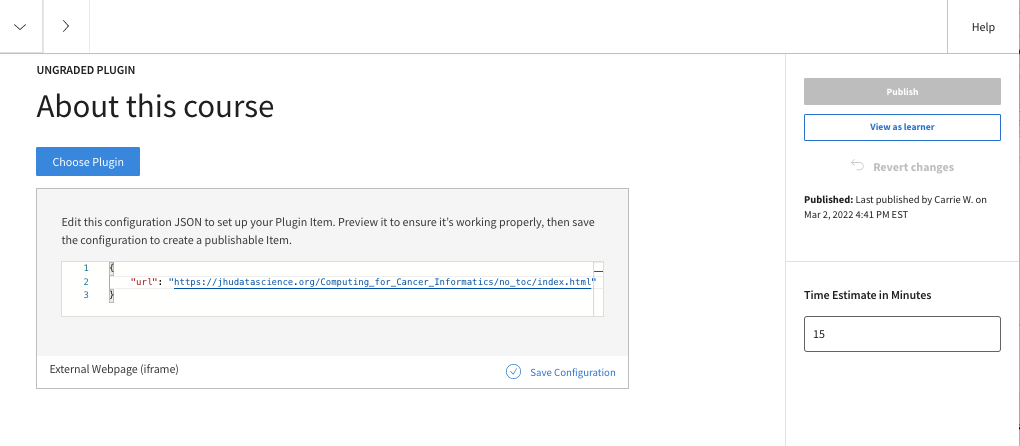
Also be sure to modify the time estimate to be something that you think is appropriate for your content - err on the side of giving students extra time.
If the URL you provided was correct, you should see a preview of your chapter:
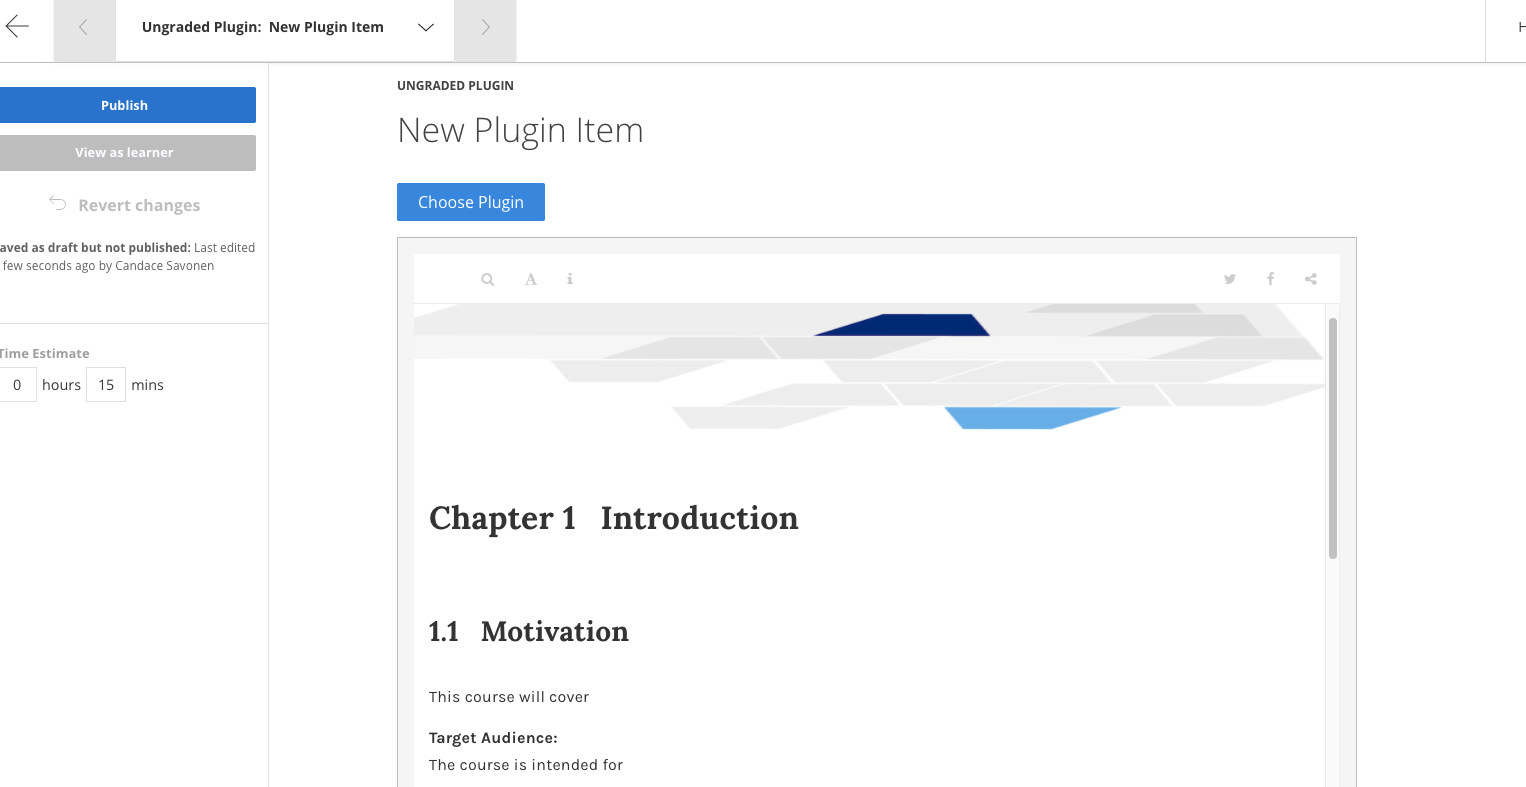
You may want to edit the title at the top of this page to indicate the material being linked.
Now click Publish in the left upper corner (don’t worry
it’s not actually publishing publicly, it is just saving your changes).
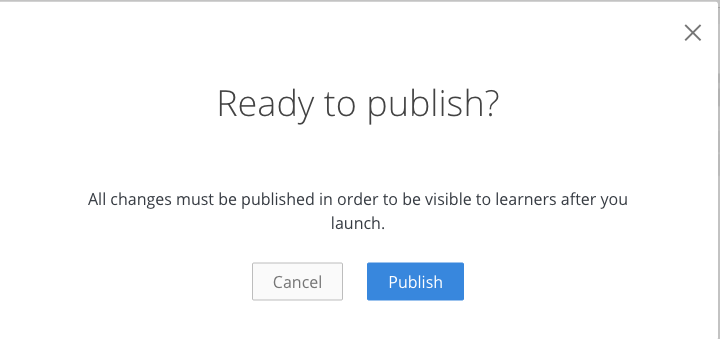
And it will ask you again to really scare you, but yes, click
Publish.
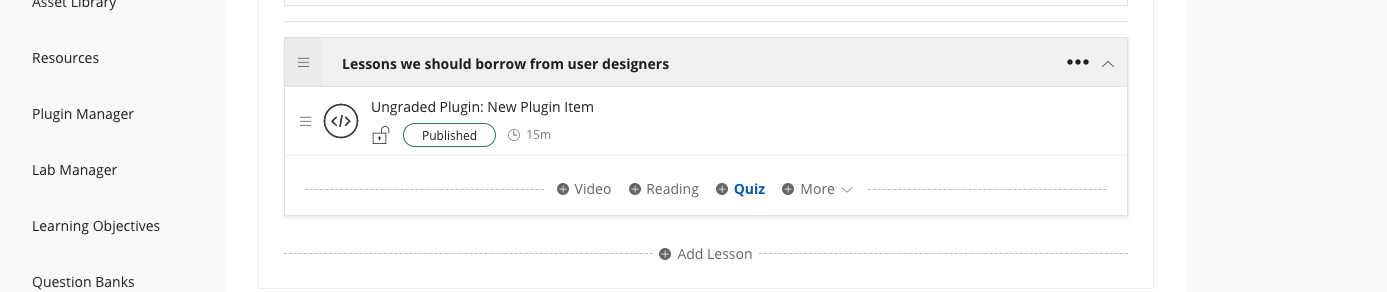
Congrats you added a chapter to your course! Now do the same thing for all your chapters!
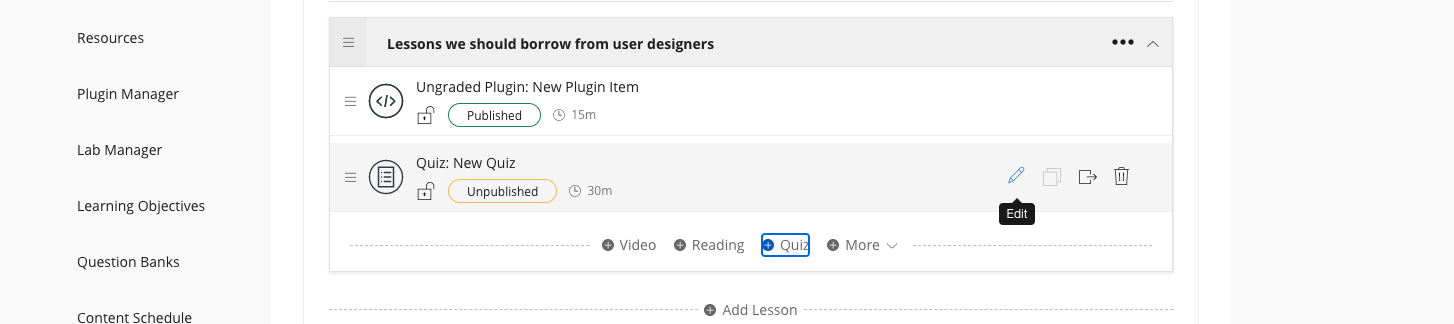
Adding new quizzes to Coursera
To add a new quiz start from your Edit content page and
on whatever lesson you would like to add the quiz to and click the
+ Quiz button.
Now go to Edit on the new quiz.
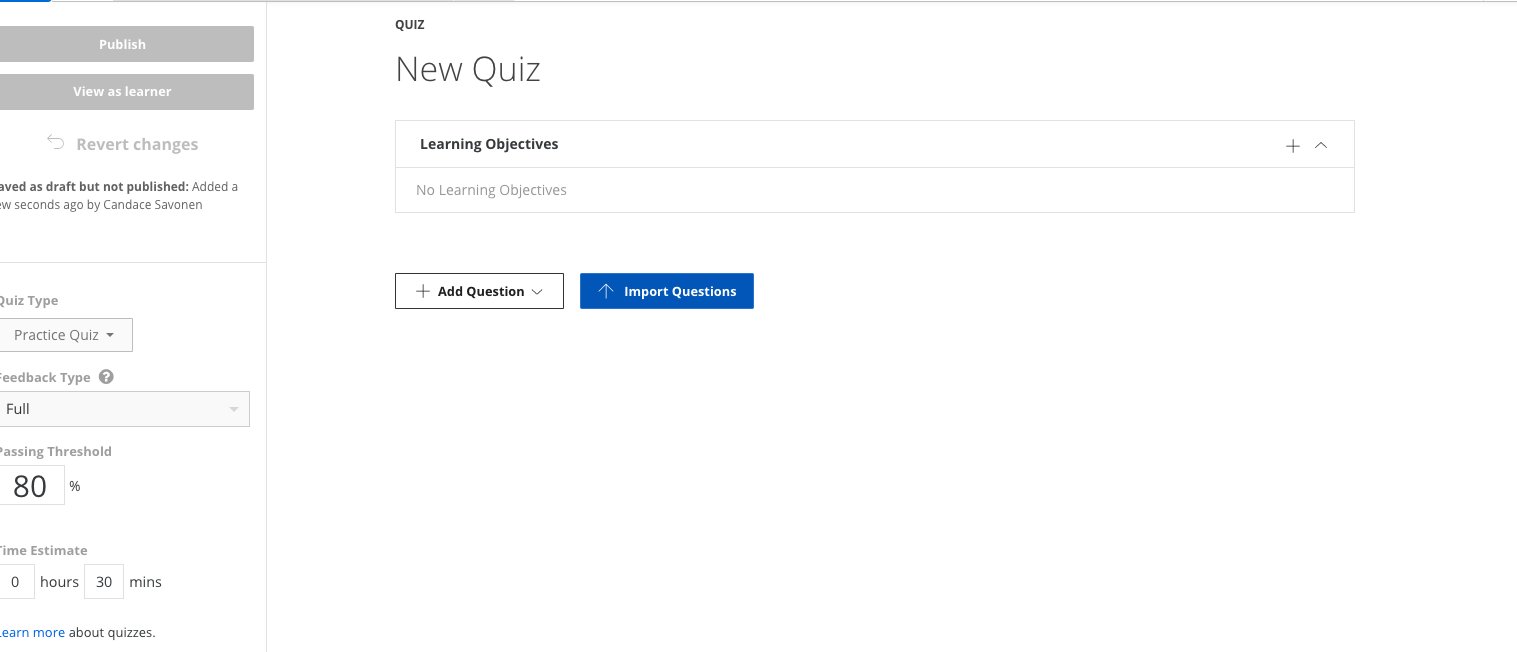
If you are choosing to manually enter your quizzes, you can continue to add each question from this page.
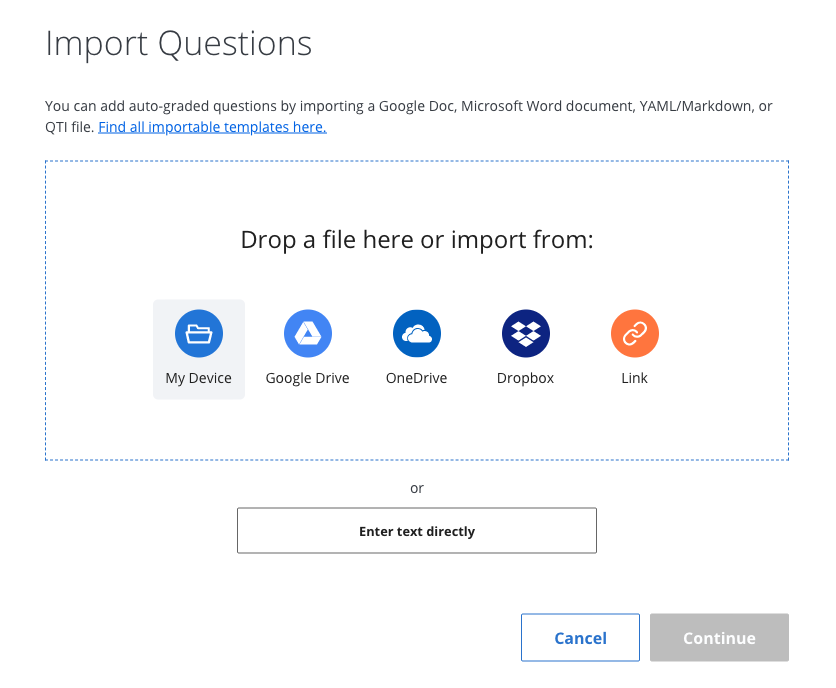
If you are importing a Leanpub converted quiz click the
Import Questions button and choose your converted yml
files. (If you’ve not yet converted your leanpub quizzes, then refer to that
section.)
Upload your Coursera quiz yml file from your device:
After you’ve selected the file click Upload:
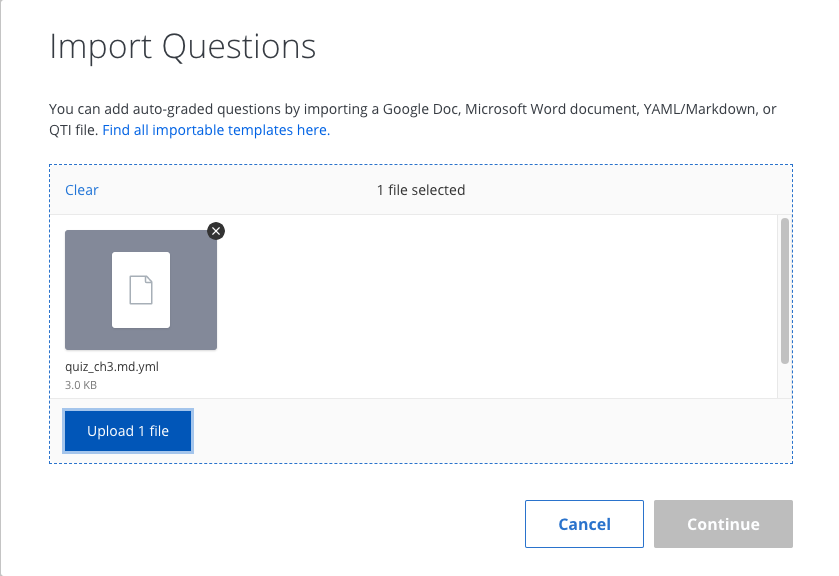
It will let you know if there are any problems uploading the quiz. If
the coursera_quiz_conversion.R script failed to render
something properly, please file an issue
here describing how it failed and including a file that shows the
instance it failed to convert.
Note that images and links are not currently supported in that
conversion script. You also cannot have : in your prompts
or answers.
But if the quiz uploads without issue, then click
Continue.
By default quizzes are set to Practice Quiz but you will
need at least some of your quizzes to be used for Grading. On the left
side of quiz editing page, there’s a drop down menu to select
Graded Quiz. Also in this location you can edit the
estimated time it should take to complete the quiz (by default it is set
to a certain number of minutes).
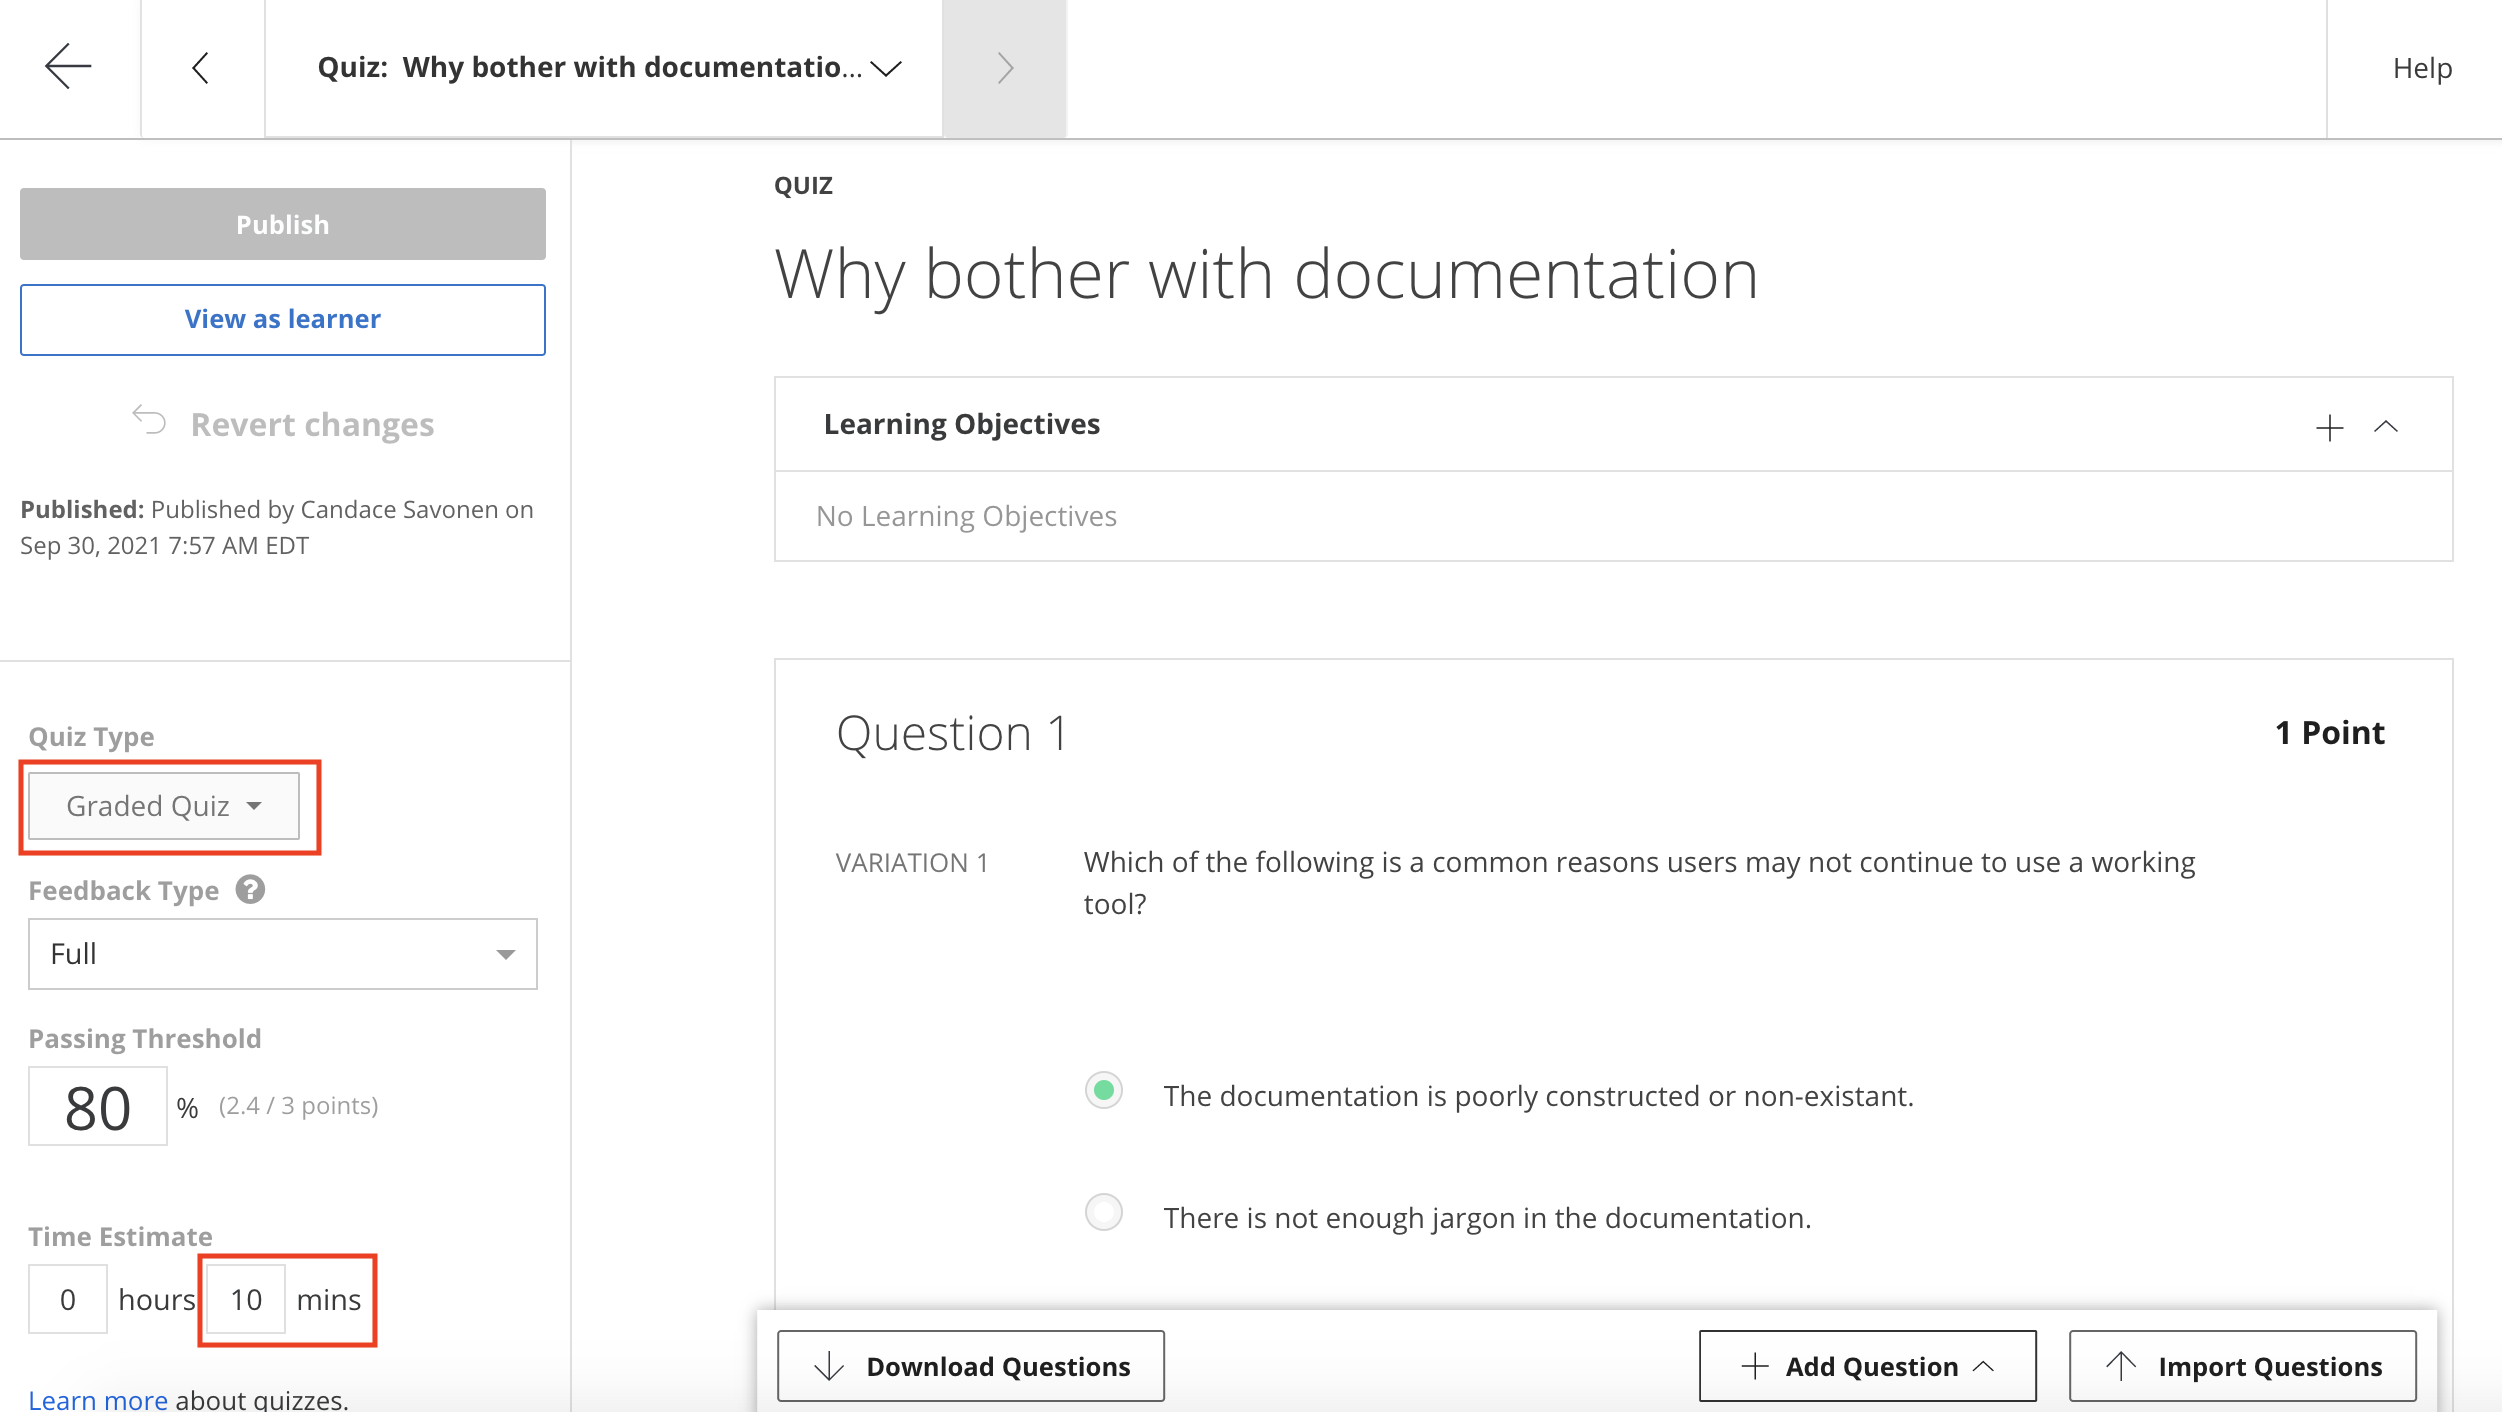
You also will want to assign the learning objectives that apply to this quiz. You can do this by clicking on the plus sign underneath the title.
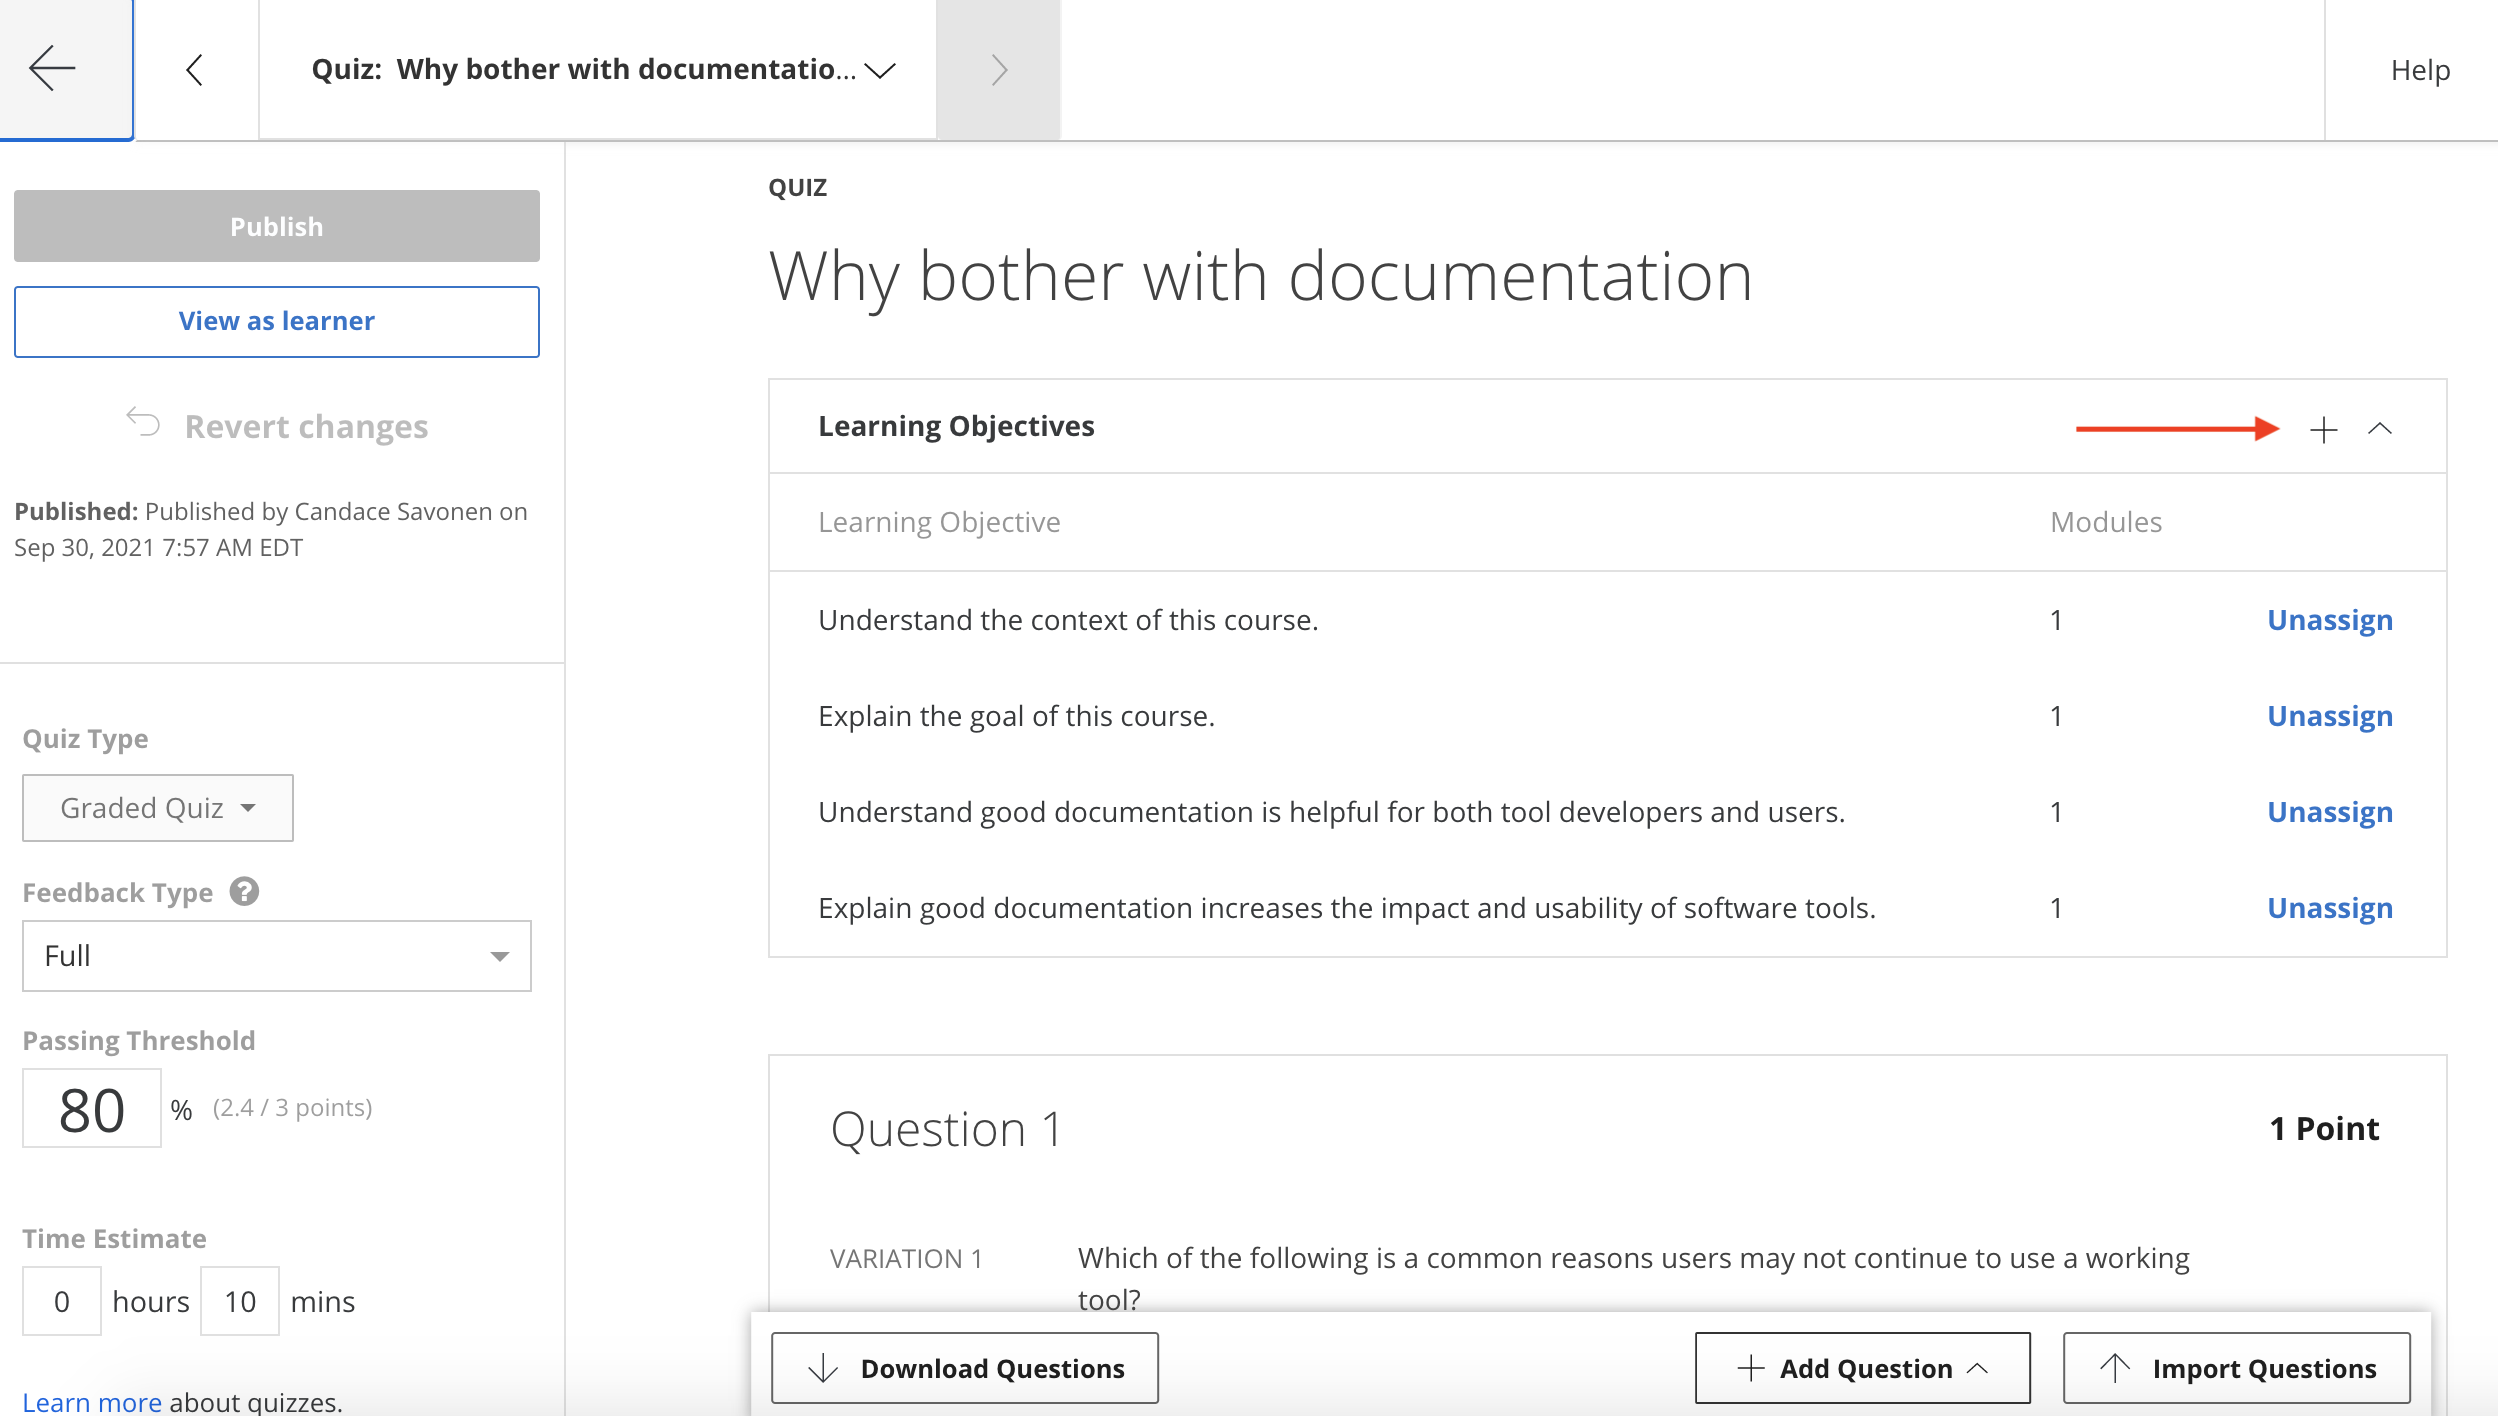
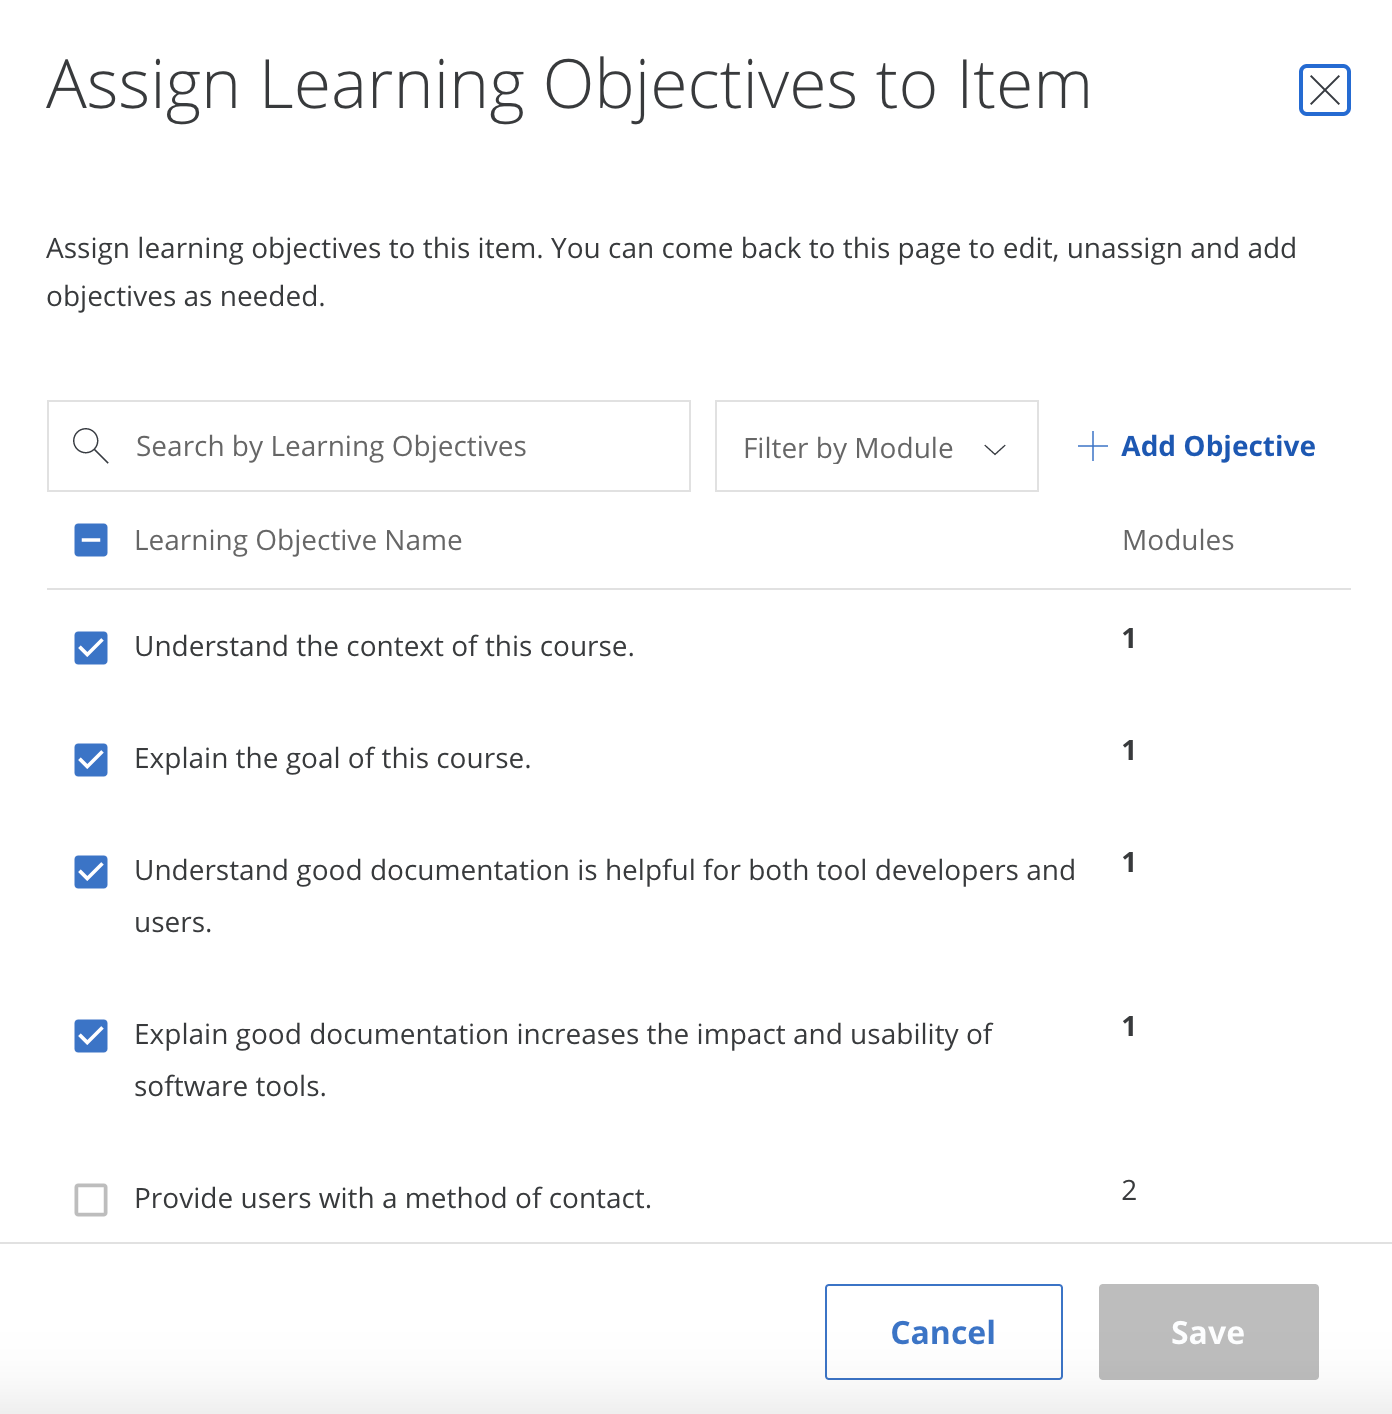
From here it will suggest the module’s learning objectives. Click all
that apply and then Save.
You can edit the title of your quiz and then click
Publish (don’t worry it’s not actually publishing publicly,
its just saving your changes). And it will ask you again to really scare
you, but yes, click Publish.
Congrats you added a quiz to your course!
Add programmed messages
You can click on Go to Course. And on your main course
page click Edit Course in the right corner.
This will bring you to your version page.
Underneath Content, on the left side bar, at the bottom,
there is the Programmed Messages.
At the very least you should add a Welcome to the course
and a Completion programmed message. Click on each of these
to edit them. Click Preview and then Publish
to save your edits.
Here are some templated messages to get you started:
Welcome template message:
Welcome to {Course Name}

We hope this course will {What will they learn?}

To get the most out of the course {What do you advise?}

If you ever encounter any problems with the course, have questions or ideas, please let us know using this feedback form.
Add a link to your feedback form by clicking the link icon. Click
Preview and then Publish to save your
edits.
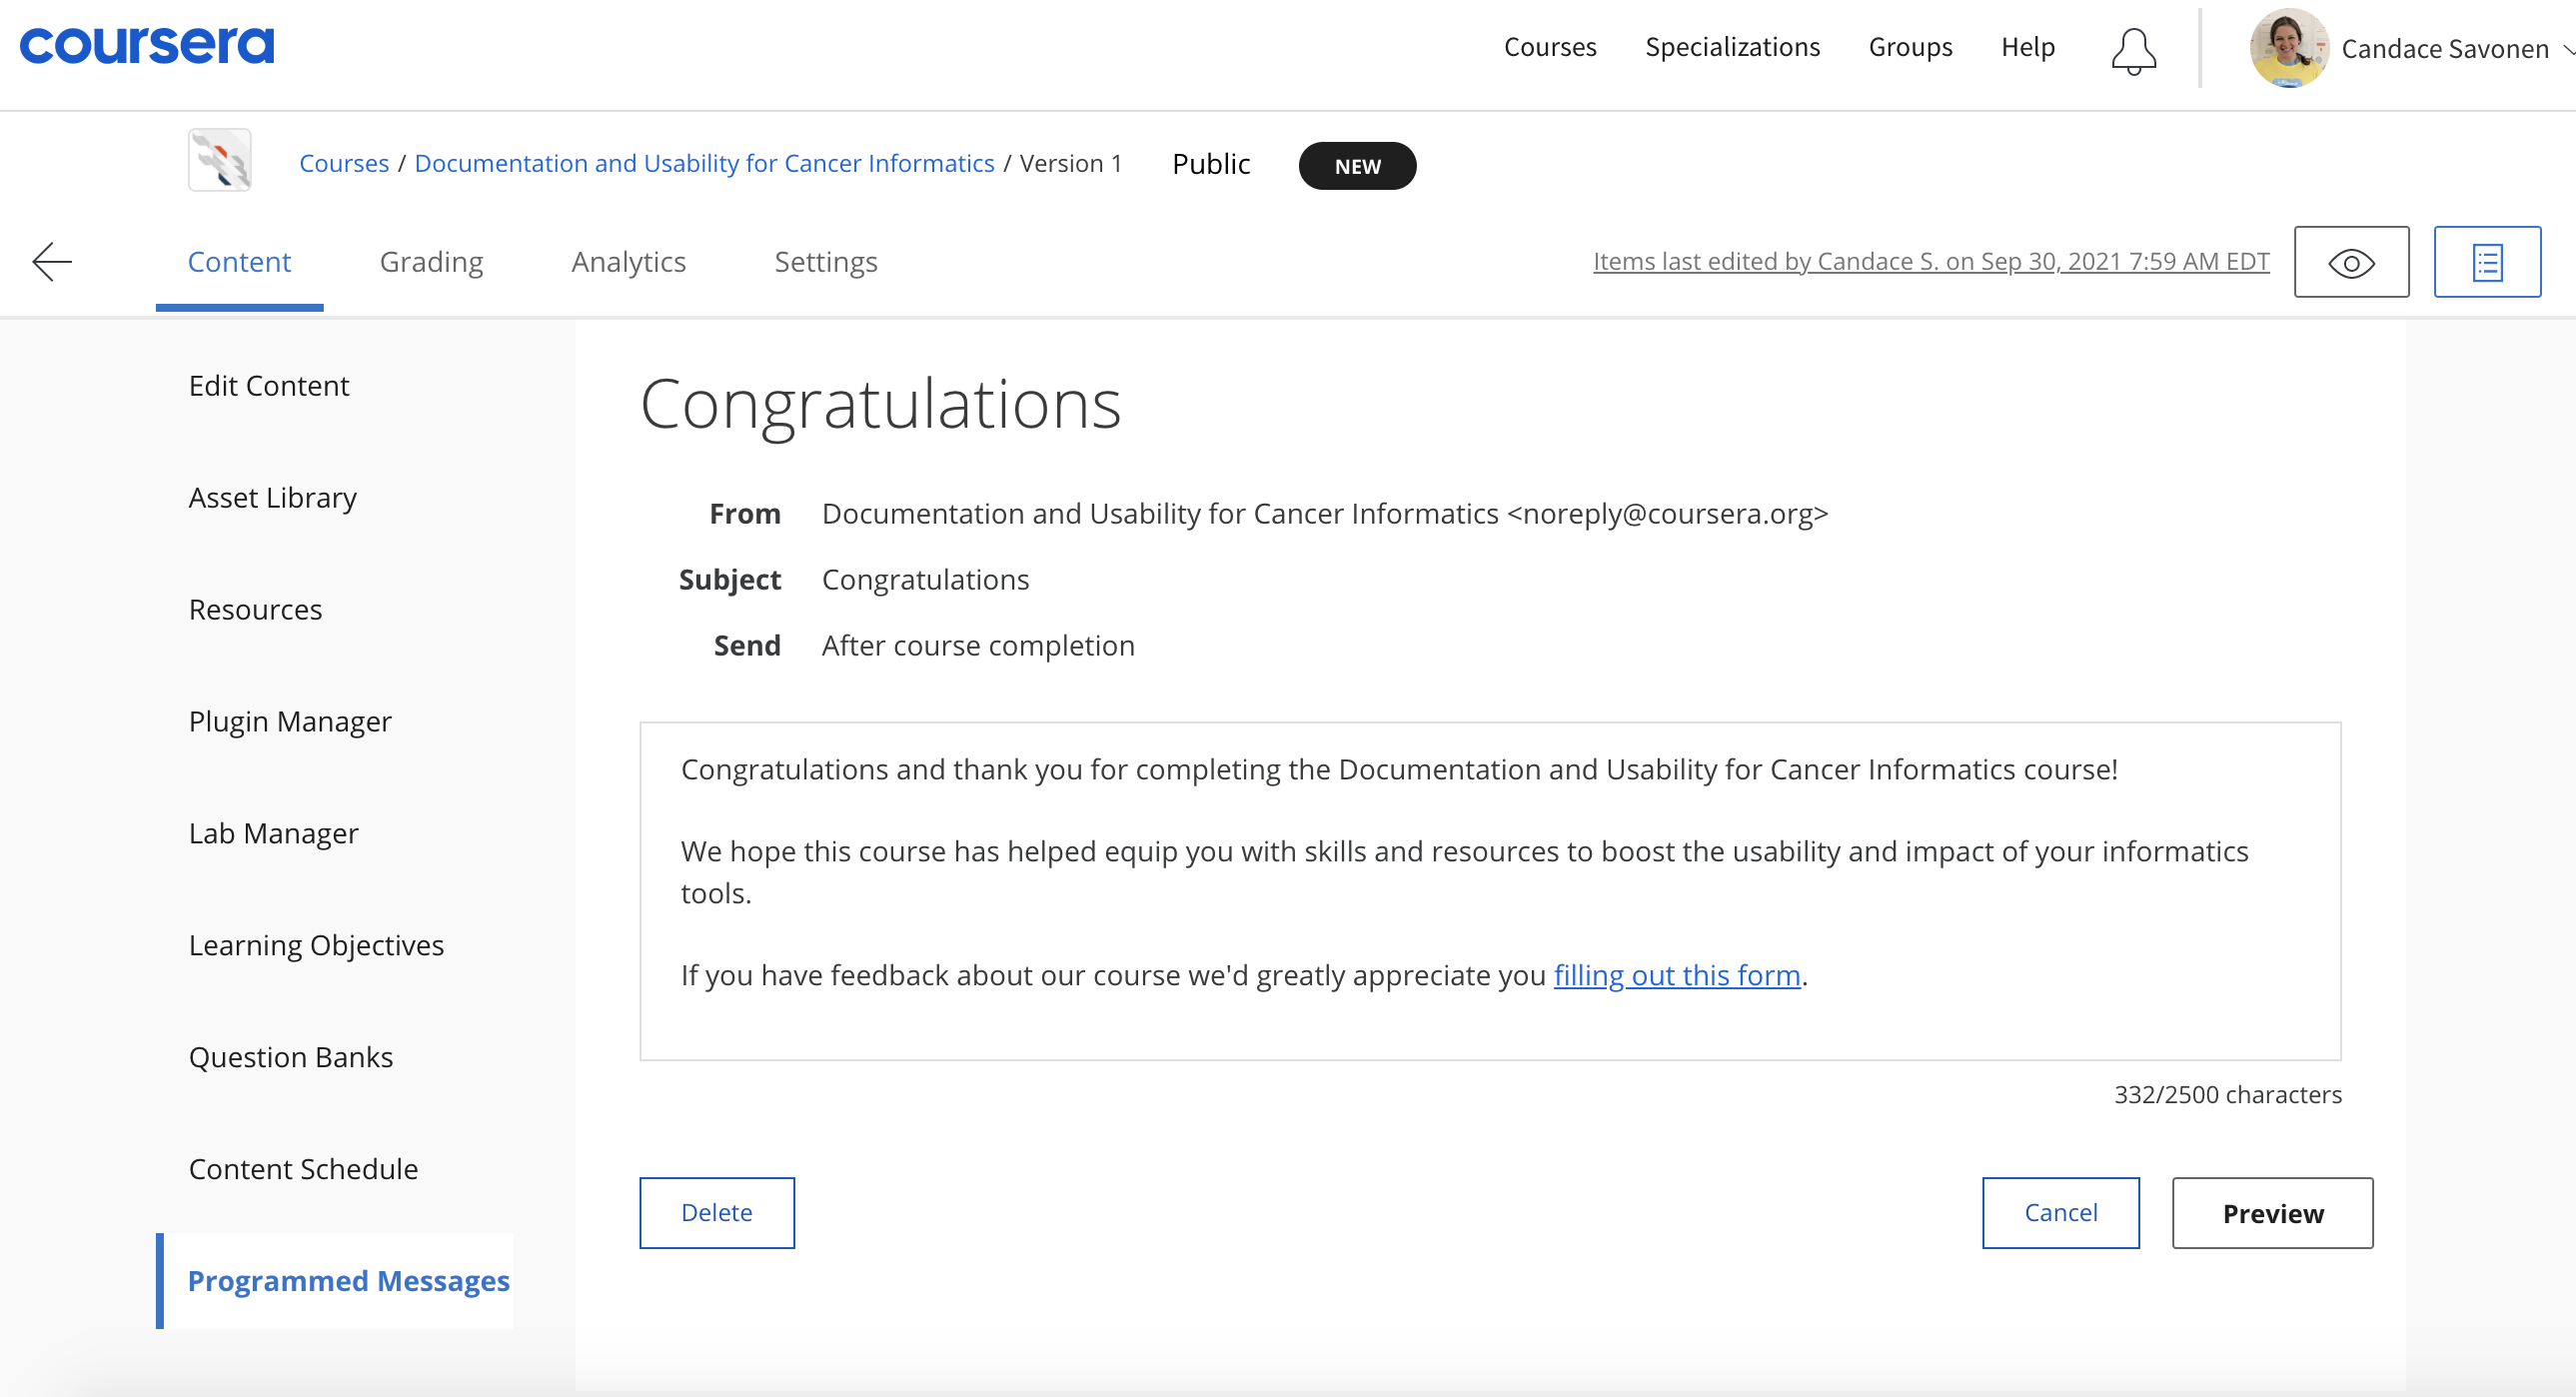
Completion template message:
Congratulations and thank you for completing {name of course}!

We hope this course has {What do you hope they learned}.

If you have feedback about our course we'd greatly appreciate you filling out this form.
Add a link to your feedback form by clicking the link icon. Click
Preview and then Publish to save your
edits.
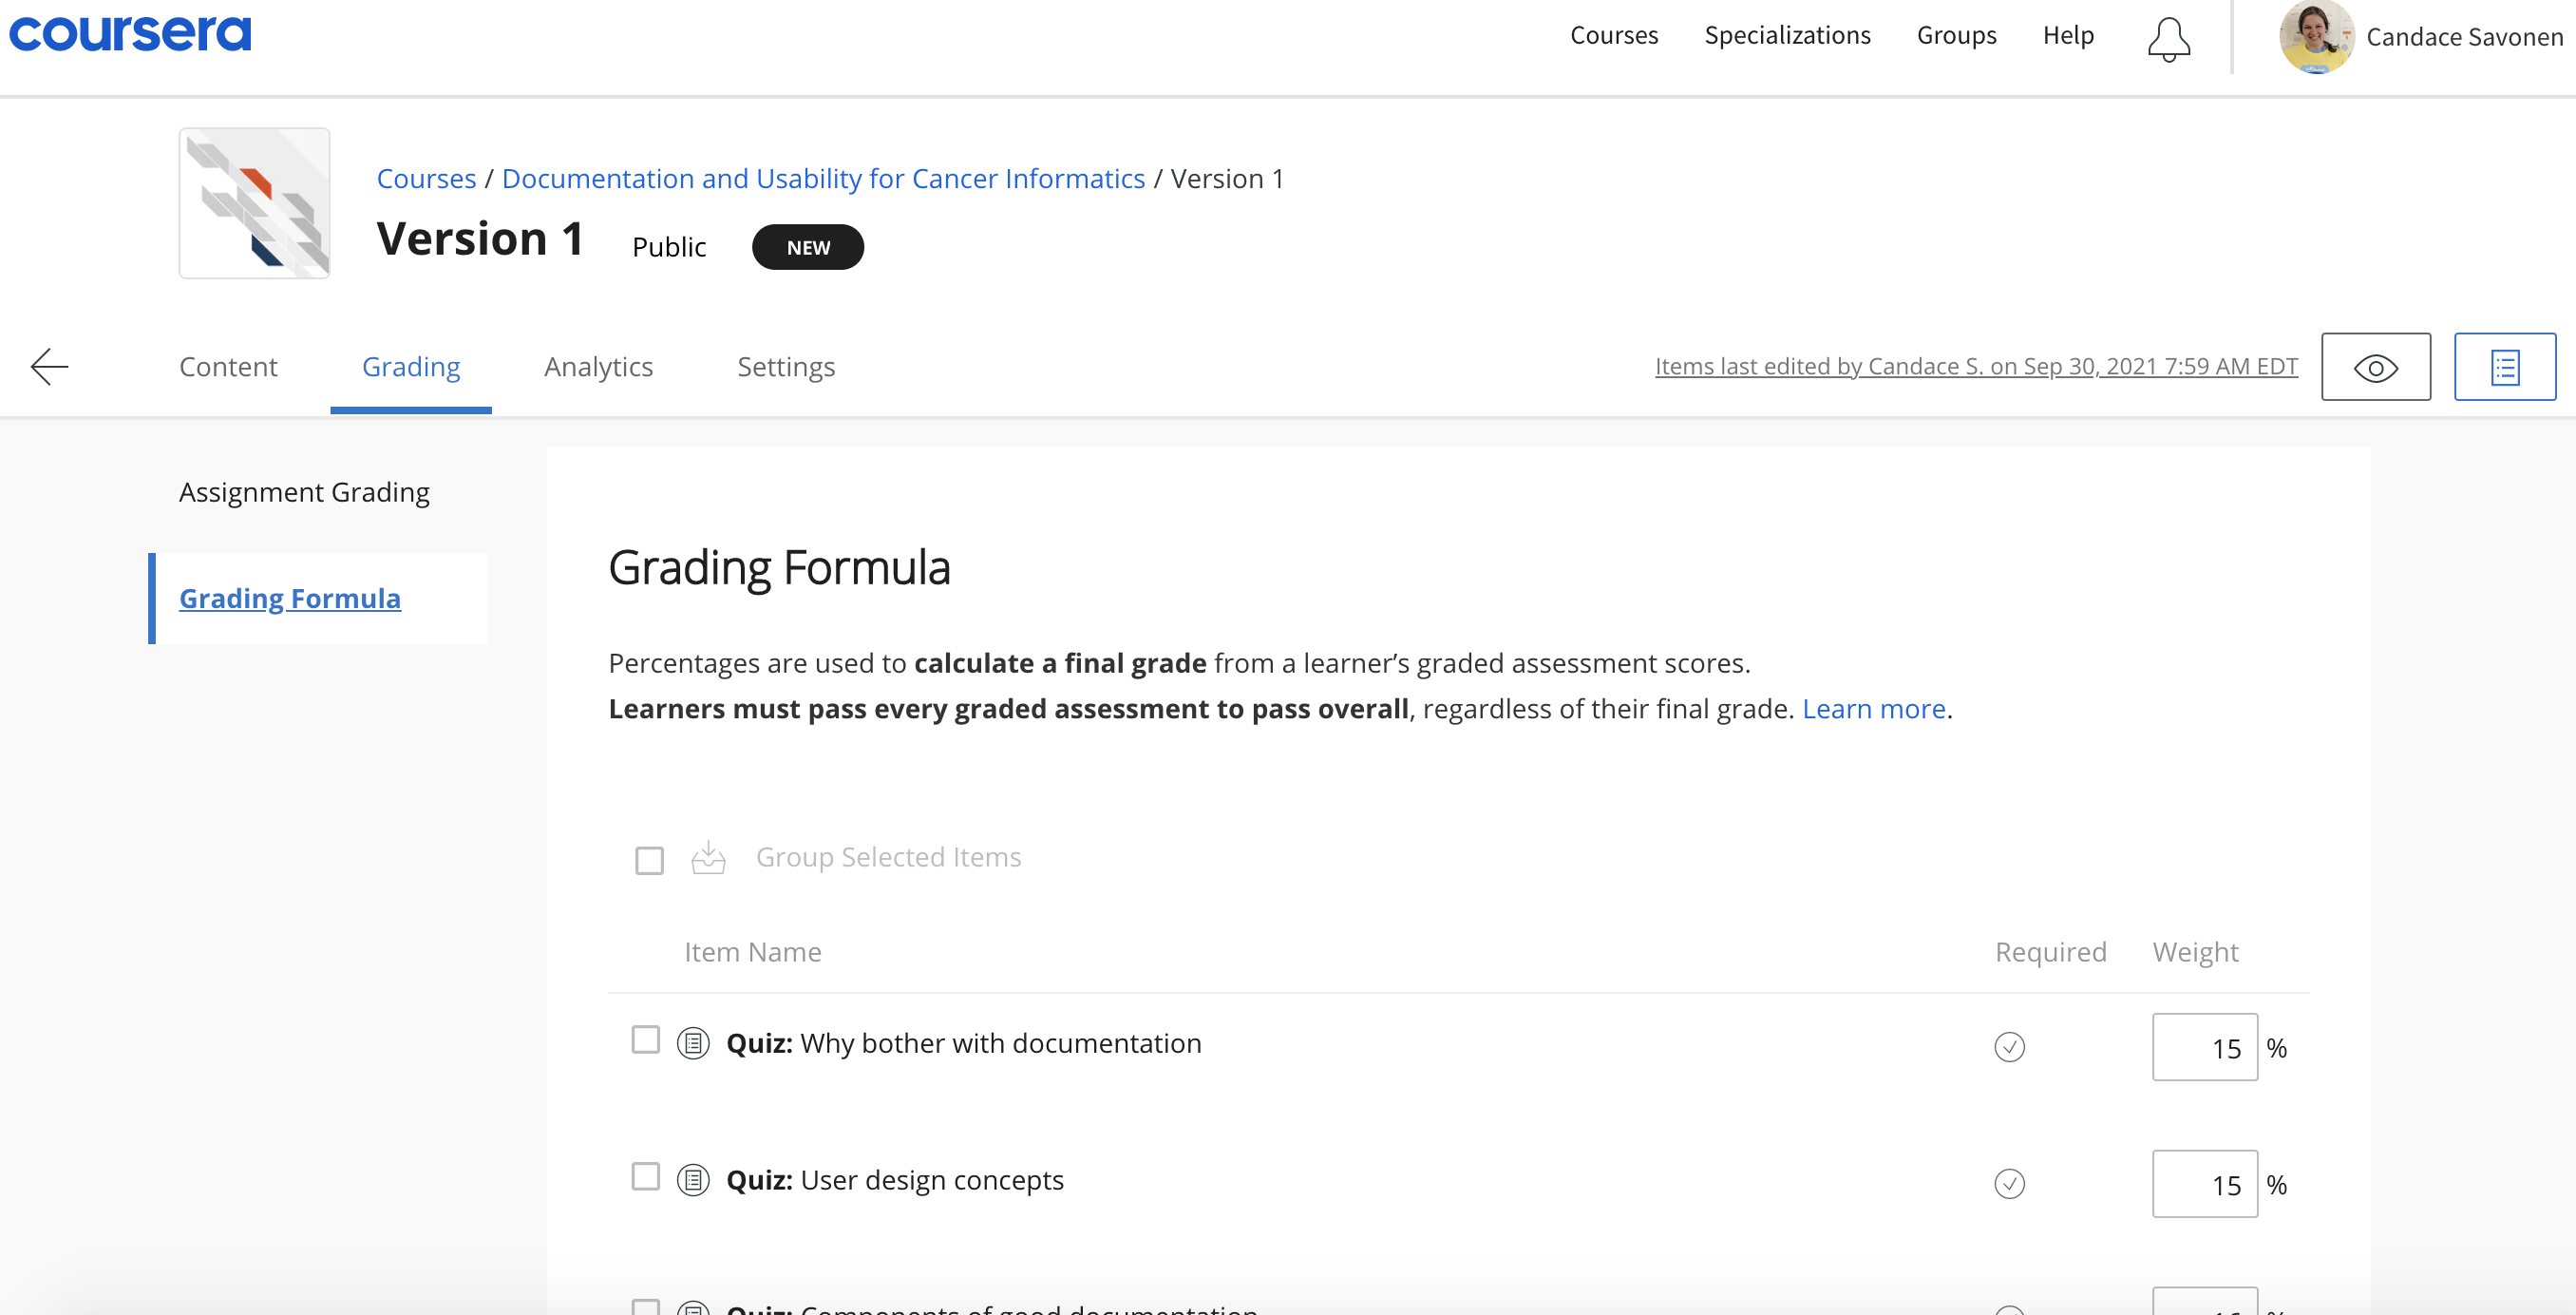
Grading Formula
For final grades in the course, you will need to set the Grading
Formula. To get to this page, you can click on
Go to Course. And on your main course page click
Edit Course in the right corner.
This will bring you to your version page.
Now you can set the percentage that each module’s assignments are worth in the course.
Content Schedule
You can find the settings for this under the Content
tab. Here you can modify how each of your modules should be assigned to
each week of your course.
Module Descriptions
Module descriptions can be found right before learning objectives when you are editing content. Adding these helps learners know a bit more about what to expect.
Landing Page
Add an image for your course and consider adding the following to polish your course: * Estimated workload * Skills * Recommended background * Items students will learn
Reading about multiple reading formats
Since we are publishing on Coursera using plug-ins and because there are concerns about accessibility with plug-ins, we encourage you to point out that the course material is available elsewhere in a reading at the very beginning of your course so that students can find it right away. To create a reading, you can click the add reading button which is located to the add quiz button. If you need to, you can rearrange elements of the first module and move this reading to the top of the course by clicking and dragging the three horizontal line icon on the far left of the reading section.
Title the reading as:
Multiple Lesson FormatsModify the following based on your course and publishing plans and paste into the reading:
Like many of our other courses, the content of this course is available in multiple formats.
You can also find the lessons for this course at [insert Bookdown link here]. This format might be most appropriate for you if you rely on screen-reader technology.
Our courses are open source, so you can also find all the source material on GitHub  by visiting [insert GitHub link here].
These resources are used throughout this Coursera course in the form of ungraded plug-ins. You are welcome to use those plug-ins here on Coursera or connect to the content in other formats through the links above. Please select the format that most suits your needs.
Note about links in the plug-ins: The plug-ins used throughout the course feature links to other resources. To follow these links, right-click on them and open in a new tab or window.
Regardless of the format you choose for the instructional content, you must take and pass the quizzes here on Coursera if you want to earn a Coursera certificate.
Your feedback is greatly appreciated! You can fill out this form
or file a GitHub issue.
Otter images by Jimin Hwang.